www.climecon.fi
© Climecon
C
A
A
A
A
C
C
C
D
C
A
A
B
B
B
B
A
A
C
C
C
D
AR
E
E
6
Lämmittäjänkatu 4 A, FI-00880 HELSINKI, Finland · Telephone +358 20 198 6600, Fax +358 020 198 6609
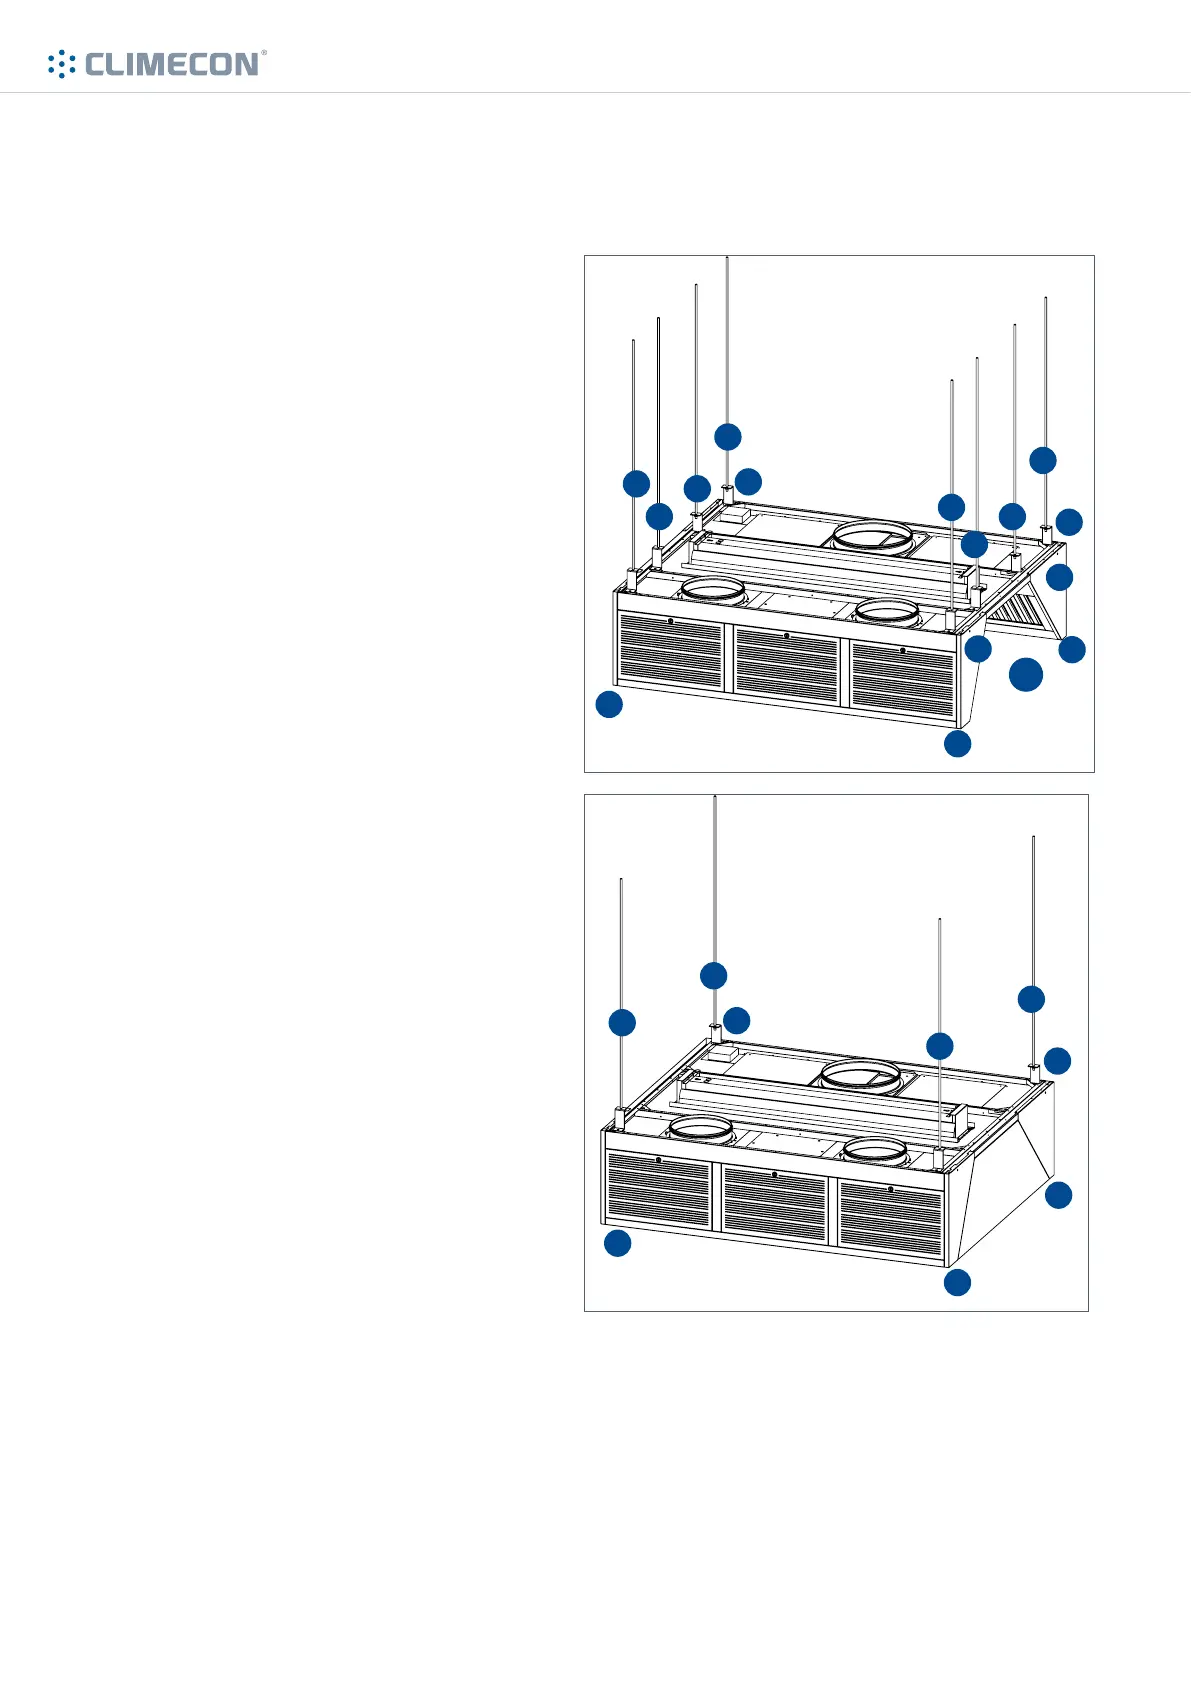
3.1 Installation of the hood
1. Mount the thread bars (A) to the cor-
rect positions in the ceiling. NOTE!
Thread bars are not included in delivery!
If the hood features an open side (AR),
the hood should also be supported from
the middle of the open side (B).
2. Lift the hood up from the corners (C),
keeping it steady
3. Install adaptor brackets (D) to the
thread bars and the hood
4. Check that the hood is horizontally
5. Remove any possible transportation
supports
6. Fix adjacent hoods to one another
through the holes (E) in the upper edge
of each hood, using M6 bolts and nuts.
3. INSTRUCTIONS FOR INSTALLATION OF
CLEANMASTER® HOODS