www.climecon.fi
© Climecon
13
Lämmittäjänkatu 4 A, FI-00880 HELSINKI, Finland · Telephone +358 20 198 6600, Fax +358 020 198 6609
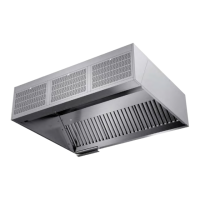
4. INSTRUCTIONS FOR ADJUSTMENT OF
CLEANMASTER® HOODS
Adjusting the exhaust air flow
• Carefully remove the grease filter cartridge
(1) by pushing its bottom edge inwards while
lifting the upper edge up and away from the
mounting groove
• Open the locking screw (3) of the adjusting
damper (4)
• Increase or decrease the suction opening by
moving the damper in its sliding rails
• Install properly the filter cartridge(s)
• Measure the pressure drop at the measuring
connection (2) of the chamber
• Repeat the above procedure, if necessary
• Finally lock the damper with a locking screw
and check that the filter cartridges are properly
in position
Adjusting the supply air flow
• First measure the pressure drop at the
measuring connection (5) of the supply air
chamber
• Remove supply air modules (6), using a
screwdriver
• Adjust the supply air by turning the adjusting
damper (7) inside the supply air chamber
• Lock the adjusting damper with a locking
screw
• Re-install the supply air modules (6) to their
places
• Measure the pressure drop at the measuring
connection (5) of the supply air chamber
• Repeat the above procedure, if necessary
Adjusting the capture air
The thrust length of capture air can
be adjusted. You can adjust the thrust
by first turning the hand screws of
the capture air unit, then moving the
screws sideways and finally locking in
position by tightening the hand screws.
4.1 Adjusting the supply air, exhaust air and capture air flow