7
Edition 2.0 2010/06
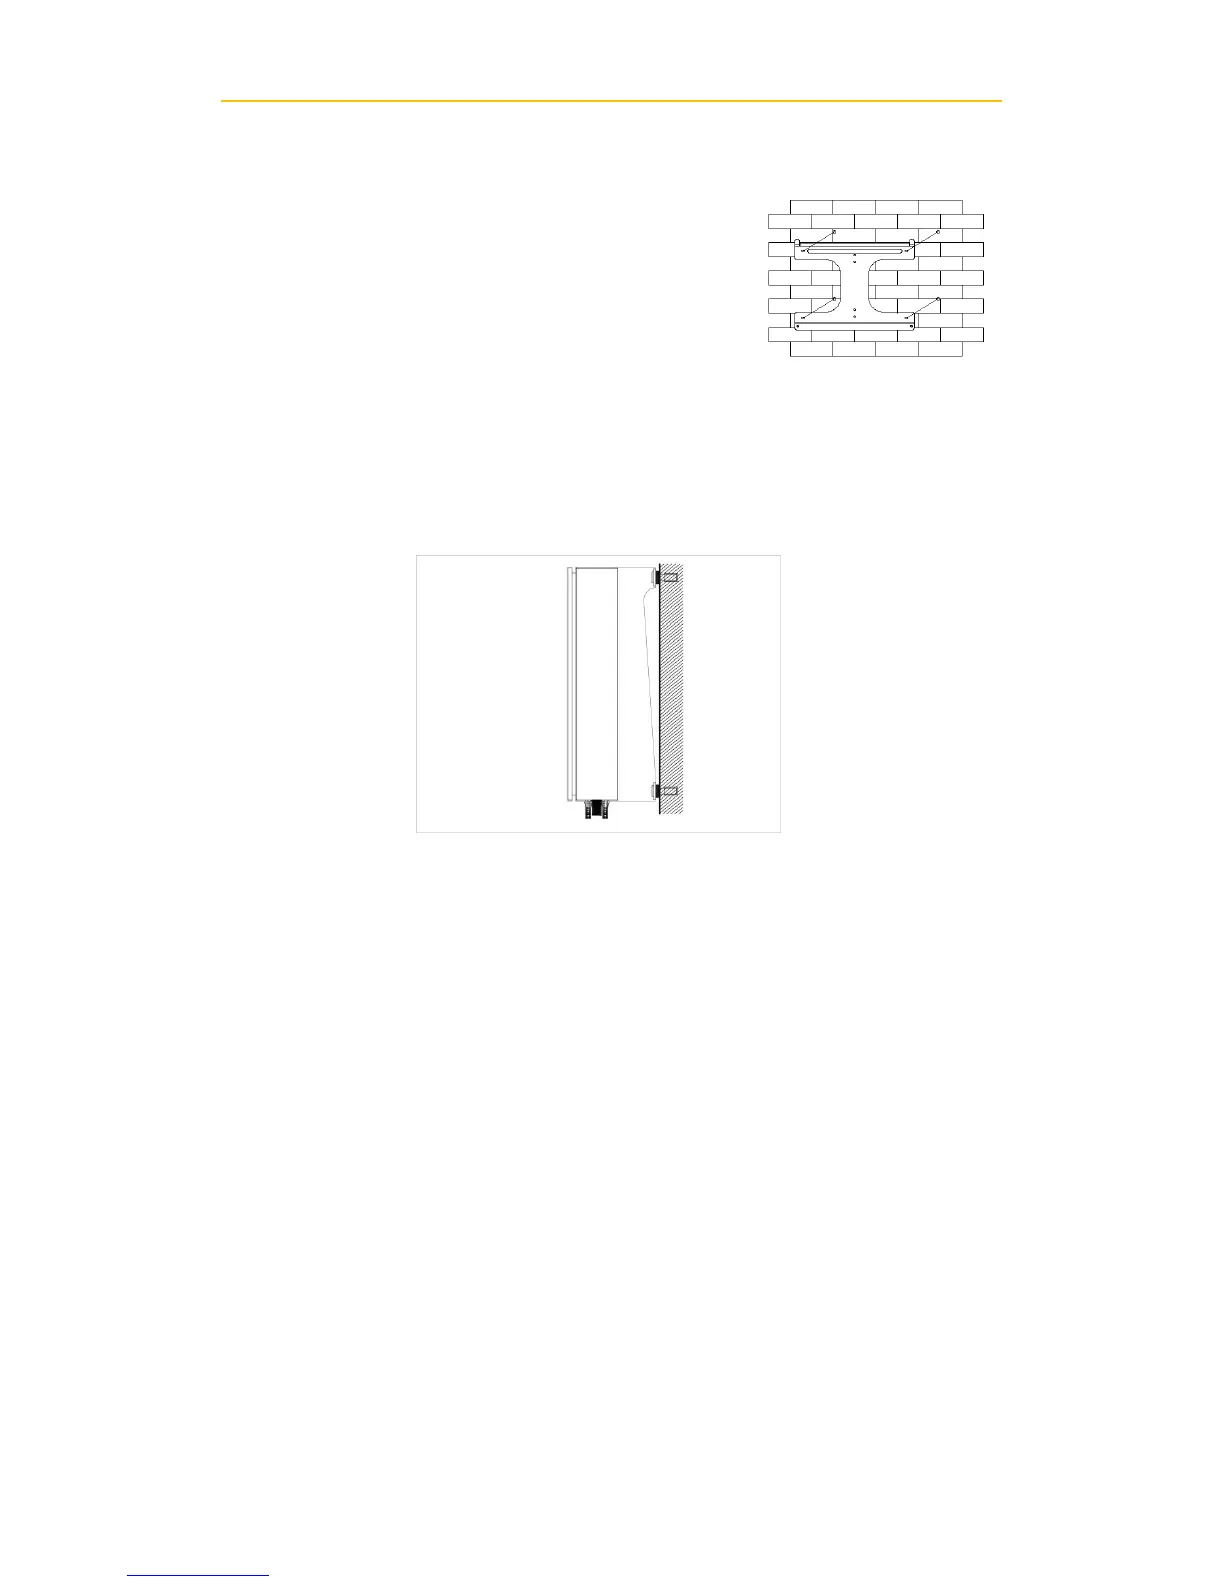
D. Fix the mounting frame as the figure shows. Do not make the screws to be flush
to the wall. Instead, leave 2 to 4mm exposed.
E. Hang the inverter on the mounting frame
F. Check the installation conditions
a) Do not install the PV-Inverter on a slanted surface
b) Check the upper straps of PV-Inverter and ensure it fits on to the bracket
c) Insert safety-lock screws to the bottom leg to secure the inverter.
d) Check the secure mounting of the PV-Inverter by trying to raise it from the bottom.
The PV-Inverter should remain firmly attached.
e) Select the installation location so that the status display can be easily viewed.
f) Choose a strong mounting wall to prevent vibrations while inverter is operating.
3) Connecting to the grid (AC utility)
A. Measure grid (utility) voltage and frequency. It should be 230VAC (or 220VAC) ,
50/60Hz and single phase.
B. Open the breaker or fuse between PV Inverter and utility.
C. For Inverter (CMS 4000 and CMS 5000 ), connect AC wires as follows: