15
Using method:
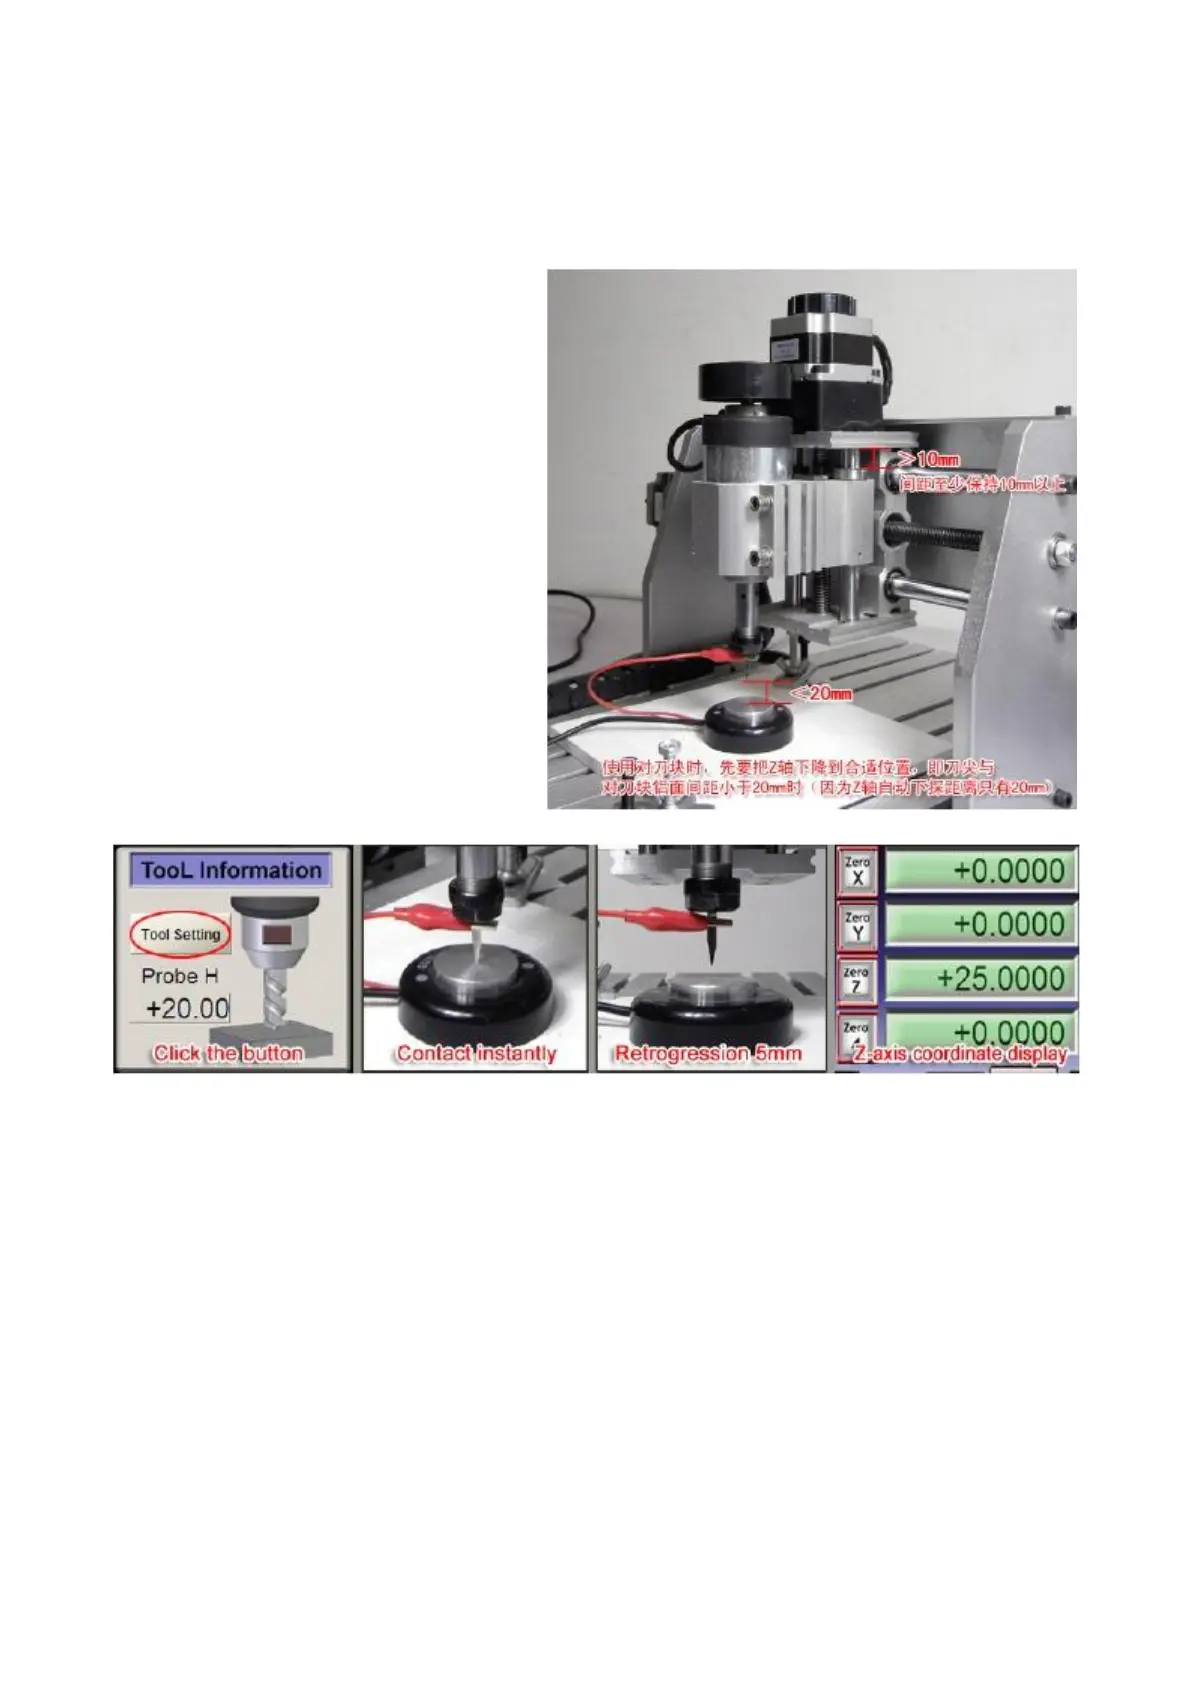
① Just shown in the picture, put the tool setting gauge on the materials to be engraved, and then adjust
Z axis to an appropriate position manually. When the tool setting is triggered, Z axis may arise 5mm
automatically; when it is executing the task of tool setting, the automatic bottom detection distance for Z
axis is only 20mm. Therefore, at the time of
making manual adjustment, the distance
between the tool tip and the surface of the
tool setting gauge should be no more than
20mm. After adjustment, the tool shank
should be clipped by the clams on the red
cable.
② Turning on the POWER switch on the
control box, and clicking the "Tool Setting"
button in the MACH3, Z axis may slowly
decline. When the tool tip touches the
surface of the tool setting gauge, it may
immediately stop, and then automatically
return upward 5mm.
③ Take away the tool setting gauge, and then the tool setting is completed. Attention that the
coordinate data on the Z axis should not be zero at this time.
◆Control the spindle motor through software
This machine supports MACH3 software to control the start, stop, and speed regulation of the principal
axis. Meanwhile, you may also directly add the code to start or close the principal axis in the engraving
code, so as to make the principal axis starts automatically and reach to the preset rotational speed at
the beginning of engraving. When the engraving is finished, the principal axis may be automatically
closed (recover the minimal rotational speed). Now, let's learn the method of controlling the spindle
motor by software.
 Loading...