EasyManua.ls Logo

Cobra 3198 User Manual

Cobra 3198
13 pages
To Next Page IconTo Next Page
Page #1 background imageLoading...
Page #1 background image
Cobra 3198 User Instructions
Dear customer,
Congratulations on purchasing this product which has been designed and manufactured to the highest
automotive standards utilising the latest technology for total reliability.
The manual is divided into 9 parts:
Your dealer will be pleased to clarify any queries you may have with the system or its operation.
The Cobra 3198 alarm system MUST be fitted with a previously installed Category 2 M.I.R.R.C listed
immobiliser to obtain Category 1 status for the vehicles security systems.
If there is no Category 2 Thatcham listed immobiliser fitted along with associated VSIB installation
certificate,Category 1 status cannot be claimed on fitment of alarm
The Cobra 3198 imobiliser system is a Category 2-1 MIRRC Thatcham listed security system. If the
installation of this product is modified or altered from the standard specifications, or non compliant
accessories are fitted, insurance approval will be invalidated.
Page 2 ________ INTRODUCTION
3 ________ ADDITIONAL PROTECTIONS
4 ________ BRIEF INSTRUCTIONS
6 ________ BASIC FUNCTIONS
7 ________ ADVANCED FUNCTIONS
9 ________ ALARM MEMORY
10 ________ EMERGENCY
11 ________ PERSONAL PIN CODE
12 ________ MAINTENANCE AND TROUBLE SHOOTING
Existin
g
Immobiliser Make/Model: Thatcham MIRRC Evaluation No:
Question and Answer IconNeed help?

Do you have a question about the Cobra 3198 and is the answer not in the manual?

Cobra 3198 Specifications

General IconGeneral
Alarm Type2-Way
PagerYes
Remote ControlYes
Starter KillYes
Panic AlarmYes
Shock SensorYes
SirenYes
LCD DisplayYes
InstallationProfessional

Summary

Introduction

Personal PIN Code

Explains the default PIN and suggests changing it for ease of remembrance.

Additional Protections

Level Monitor Module

Detects vehicle jacking or wheel theft when armed.

Hyperfrequency Module

Provides volumetric protection using microwave emission. Stable with soft tops open.

Window Lift Module

Automatically raises car electric windows when arming.

Brief Instructions

Arming the System

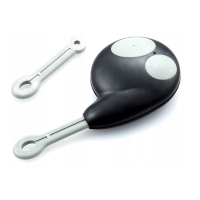
Details the process of arming the system via radio control, indicators, and LED behavior.

System Protection

Describes the system's response to opened doors or volumetric intrusion when armed.

Interrupting and Disarming Alarms

Explains how to deactivate an active alarm and disarm the system.

Alarm Memory

Indicates how alarm history is signaled by buzzer and turn indicators.

Deactivating Volumetric Sensor

How to temporarily disable volumetric sensors for open windows or occupants.

Panic and Garage Functions

Details panic alarm activation and temporary exclusion of functions for service.

Basic Functions

Controlled Windows Lift

Allows windows to close in a controlled mode when arming.

Door/Bonnet/Boot Open Signal

Configures indicator/buzzer signals for opened parts during arming.

Arm/Disarm Blinker

Controls turn indicator signals for arming and disarming.

Automatic Arming Functions

System auto-arms, immobilises engine, and can trigger immobiliser alarm.

Buzzer Function

Controls buzzer synchronization with turn indicators for arming/disarming.

Advanced Functions

Immobilizer Auto Re-arm

Immobiliser automatically rearms if ignition isn't switched on after disarming.

Alarm Auto Re-arm

System auto-rearms, with optional automatic door locking.

Automatic Door Locking

Doors lock at a set speed or time delay when ignition is ON.

Automatic Anti-Hi-Jack

Anti hi-jack function requires PIN entry on ignition ON to operate vehicle.

Voluntary Anti-Hi-Jack

Driver can activate anti hi-jack by pressing button 'B' with ignition ON.

Speed Sensor Anti-Hi-Jack

Vehicle immobilises immediately when stopped if anti hi-jack is activated.

Alarm Memory

Alarm Memory LED Signals

Displays alarm history via LED signals when system is disarmed.

Emergency Override

Emergency Override Procedure

How to deactivate the system using the emergency panel and PIN code.

Personal PIN Code

Personal PIN Code Programming

Steps to program a new four-digit PIN code for system access.

Maintenance and Troubleshooting

Radio Control Issues

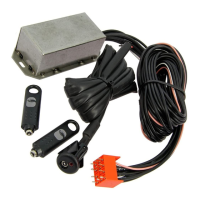
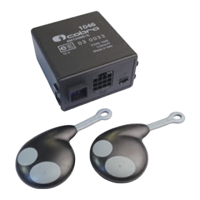
Procedures for re-synchronization, battery replacement, and loss of radio controls.

PIN Code Loss

Steps to replace the PIN code if it is lost or forgotten.

General Troubleshooting

Solutions for common issues like radio control failure or false alarms.
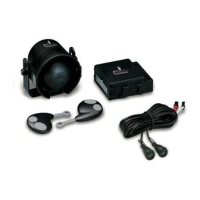
Related product manuals