Setup & Installation
2.1 Installing the Remote Control Batteries
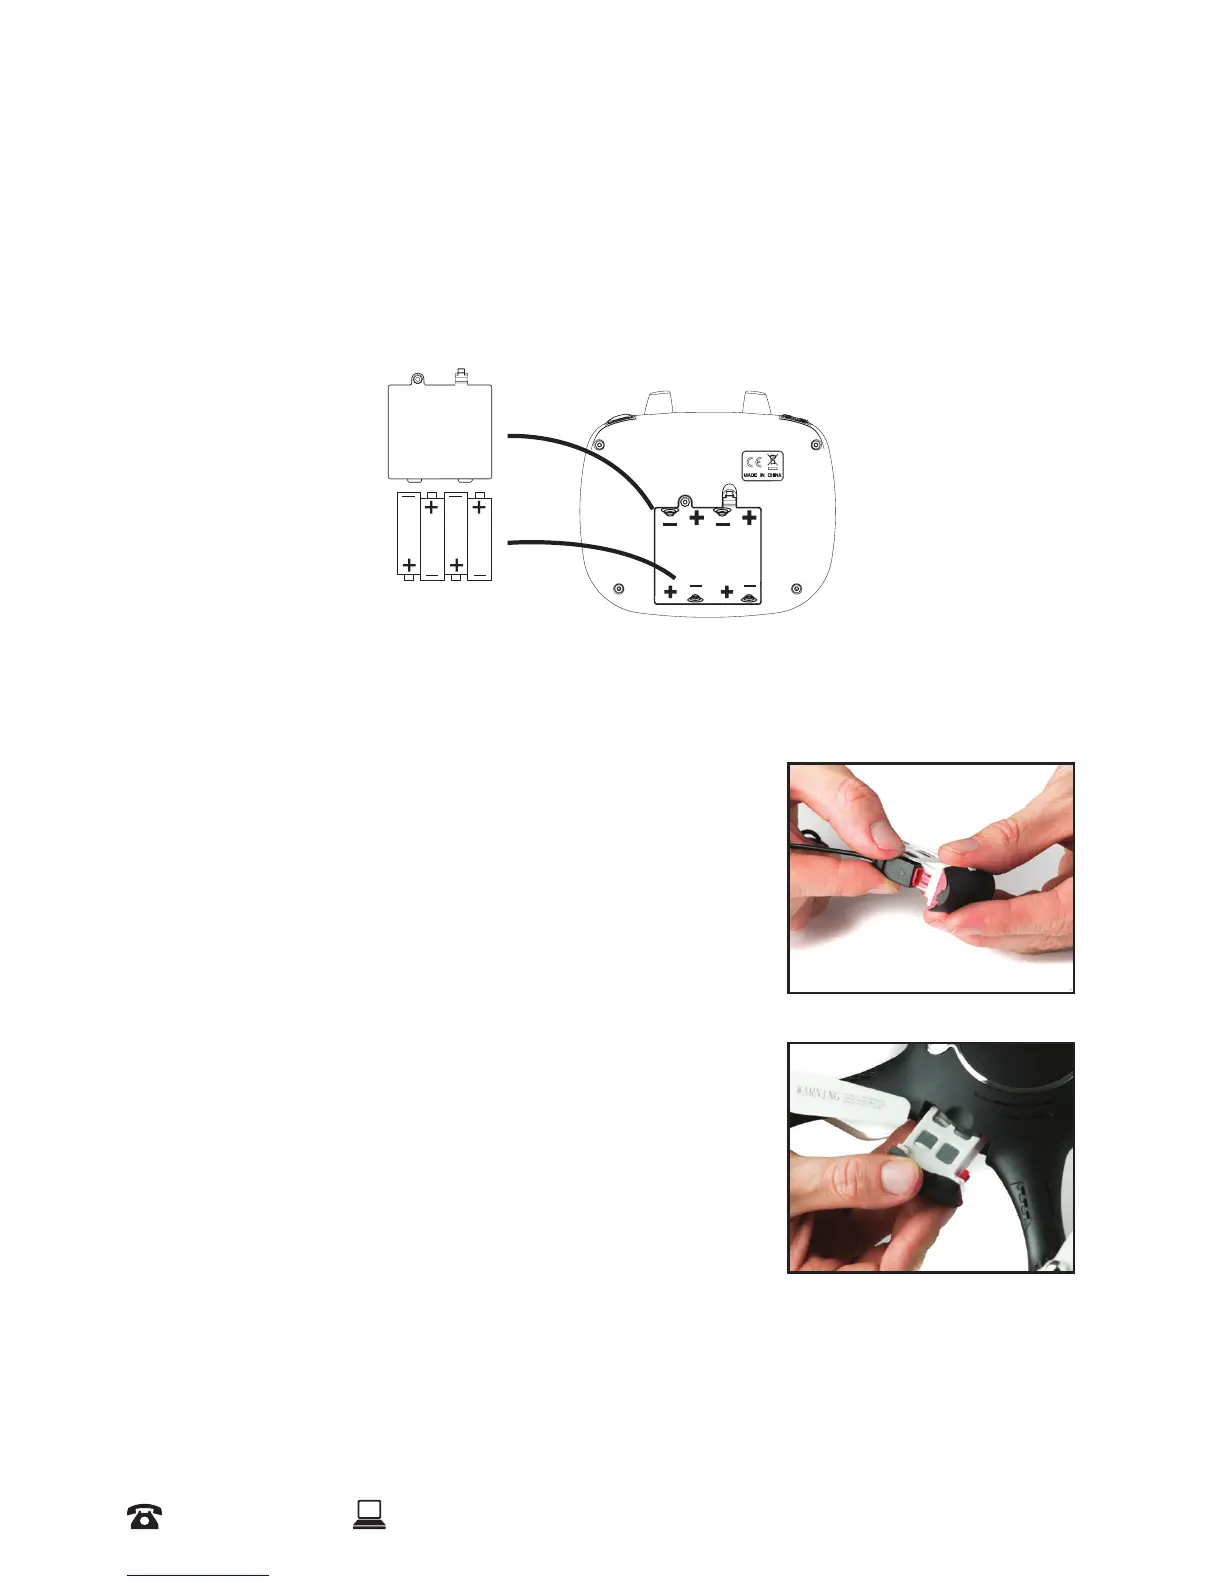
a. Use a screw driver to remove the screw on the back of the remote control, then open the
battery cover
b. Install the 4 x AA supplied batteries into the back of the remote control. Please note the
polarity positions indicated
c. Replace the cover and reinstall the screw
NOTE: For best performance, do not mix dierent types of batteries.
2.2 Charging & installing the Cocoon FPV HD Camera Drone Battery
a. Fully charge the drone’s battery before use
b. Insert the battery power port into the small end of the
supplied USB charging cable
c. Insert the other end of the USB charging cable into a USB port
(charger not included). The charging indicator light will be
RED
d. Once the charging indicator has turned OFF and no longer
red, the battery is fully charged
e. Disconnect the USB cable from the USB port
f. Disconnect the battery power port from the small end of the
USB charging cable
g. Insert the battery into Cocoon FPV HD Camera Drone
ensuring a tight t
NOTE: See page 6 for further information about battery care