Page 5 of 16
Strap Kit Option:
Important!
Mounting brackets are specic to the vehicle model. Please make sure the brackets are suitable for the vehicle before
installation.
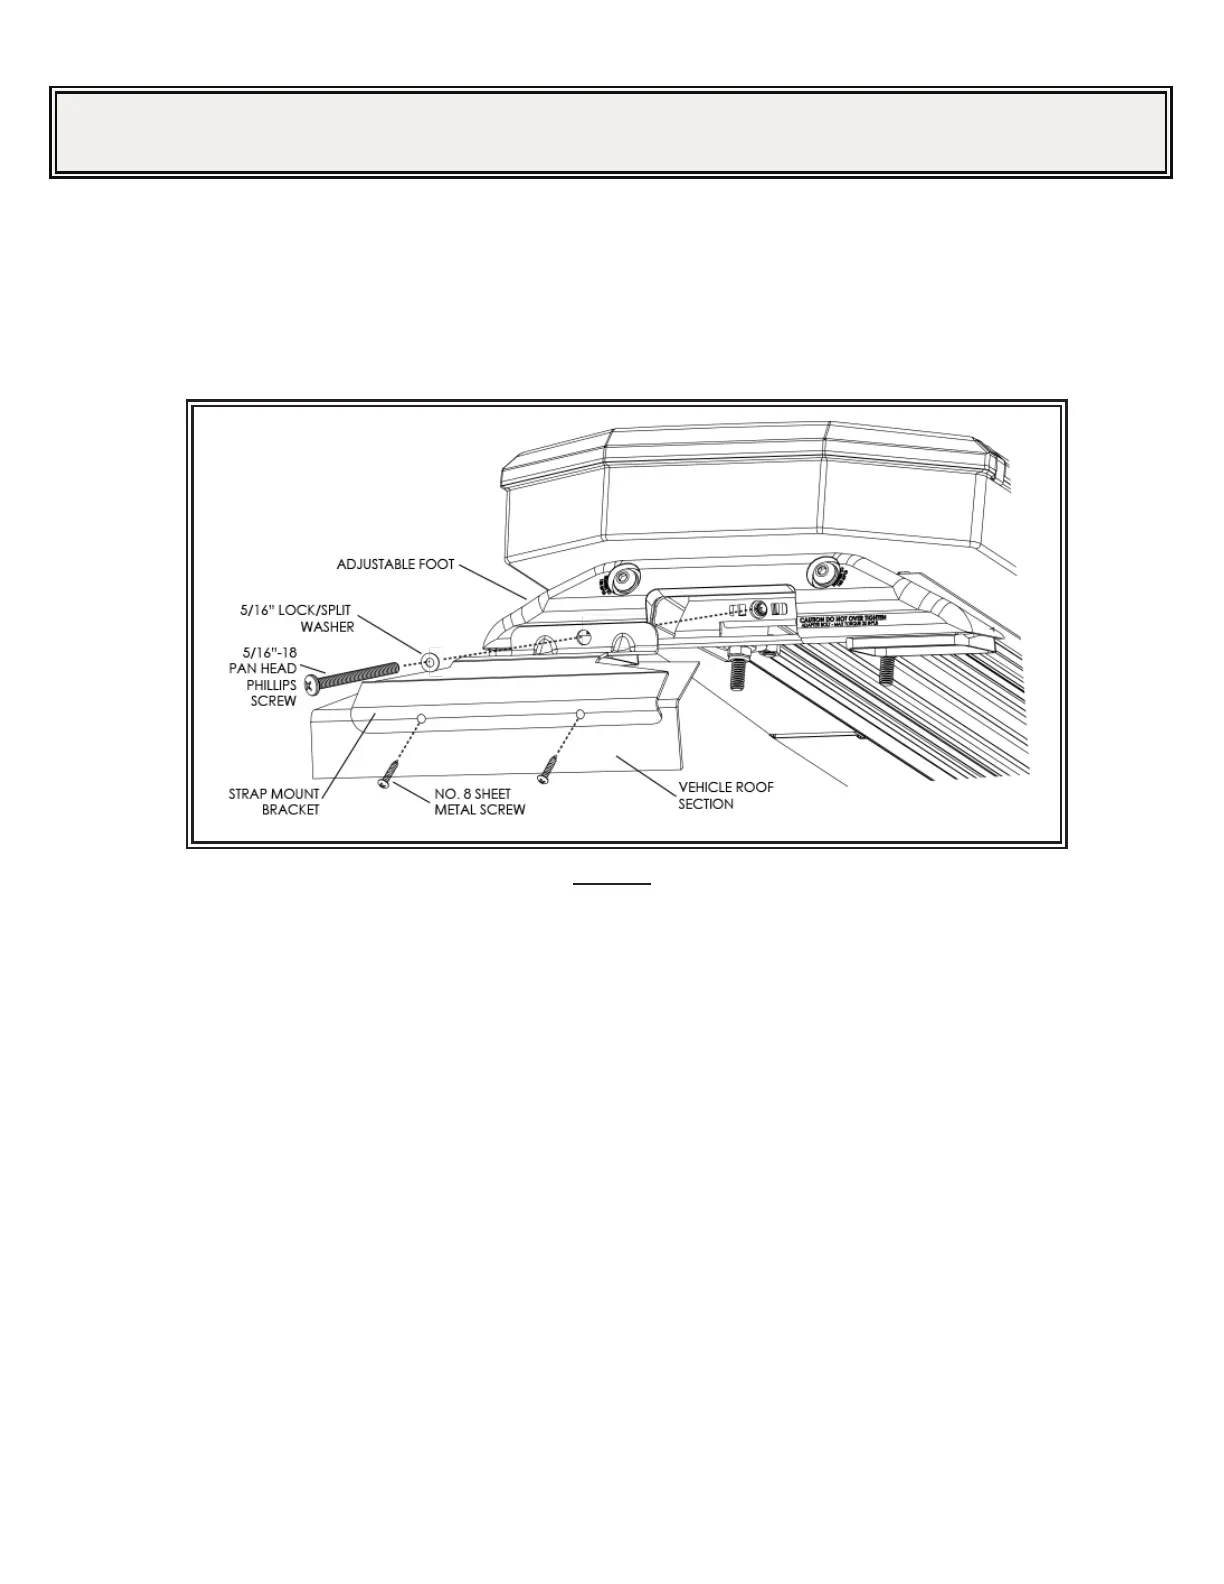
1. Loosen the 5/16” nuts to allow the mounting feet to slide along the base of the lightbar. Loosely attach the mounting strap to each foot
using the supplied pan head phillips screws and lock washers.
2. Center the lightbar across the vehicle and align the strap mount brackets to hook into the gutter of the vehicles door frame as shown in
FIGURE 4.
3. Secure the feet to the lightbar in location by tightening the four (4) nuts on each foot.
4. Slowly tighten the pan head screws to secure the strap mount brackets to the lightbar feet and around the door gutters, keeping the
lightbar centered and level. Ensure the doors close completely and secure each strap mount bracket to the door frame. Mounting
geometry and parts will vary for dierent vehicles. See the Wiring section of this manual for further wiring instructions.
Figure 4
*For a full list of vehicle specic brackets, please reference a Code 3 catalog or contact a Code 3 representative.