EasyManua.ls Logo

Coleman SUNDOME 9260F907 User Manual

Coleman SUNDOME 9260F907
2 pages
To Next Page IconTo Next Page
Page #1 background imageLoading...
Page #1 background image
Connect Frame to Tent
–Insert one end of main tent pole end
onto pin of pin & ring system, at tent
corner. (illus. 4)
–Go to opposite end of pole and
gradually apply pressure to the pole
forming an arch until you are able to
insert the pin into the pole.
–Repeat for second pole.
SUNDOME
9’x7’
1
Layout & Positioning
of Tent, Pole Assembly
–Layout and position tent with door
facing desired direction. (illus. 1)
–Unzip door.
–Stake down tent corners only, using the
rings at the end of the stake loops.
Keep the floor taut. (illus. 2)
–Assemble frame poles by
interlocking shock-corded poles.
This will make two long poles.
–Insert the poles diagonally into pole
sleeves.The center of the poles should
cross forming an “X” in the middle of
tent. (illus. 1)
–Fasten frame tie on top of tent over
both poles. (illus. 1), (illus. 3)
2
When You Are Ready To Set Up
Your Tent
–Select a level campsite clear of rocks,
branches and other hard or sharp objects.
–Do not set up your tent under trees.
–For best results in windy conditions, do not
position the door of tent into the wind.
See owners manual for more tips.
Rainfly
Pole
Rainfly Part No. 9262F905
Main Tent
Poles
POLE ASSEMBLY PARTS
Assembled
poles
inserted
through
pole
sleeves
Frame tie
Instructions apply to Part Number 9260F907
illus. 1
Tent frame
set-up
illus. 3
Frame tie
Part No. 9262F901
Part No. 9260F403
illus. 2 Tent stake
through ring
illus.4
Insert pole end onto
pin & ring
Question and Answer IconNeed help?

Do you have a question about the Coleman SUNDOME 9260F907 and is the answer not in the manual?

Coleman SUNDOME 9260F907 Specifications

General IconGeneral
BrandColeman
ModelSUNDOME 9260F907
CategoryTent
LanguageEnglish

Summary

Tent Pole Assembly Parts

Main Tent Poles

Main tent poles for assembly with part number 9262F901.

Rainfly Pole

Rainfly pole for assembly with part number 9260F403.

Tent Setup: Layout and Positioning

Positioning and Initial Staking

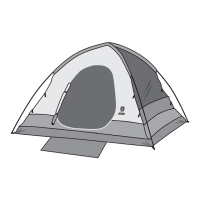
Layout tent with door facing desired direction, unzip, and stake corners taut.

Frame Pole Assembly

Assemble frame poles by interlocking shock-corded poles and inserting diagonally.

Tent Setup: Frame Connection

Connecting Main Poles to Frame

Insert one end of main tent pole onto pin, apply pressure to form arch, and insert other end.

Tent Setup: Attaching Frame Clips

Securing Tent to Frame Poles

Attach frame clips along tent edges to frame poles and adjust stakes.

Tent Setup: Attaching Rainfly

Rainfly Pole Assembly and Attachment

Assemble rainfly pole and insert into pockets, then attach rainfly to frame.

Securing Rainfly

Connect elastic loops with S-hooks and secure rainfly with underside attachments.

Guylines

Stake out tent with side guylines for stability.

Important Tent Usage Information

Condensation Management

Condensation forms due to breath/perspiration; minimize by ventilation.

Tent Storage and Care

Dry tent thoroughly before storage; do not store poles telescoped.

Stake Removal

Pull stakes by the stake itself, not the tent fabric.

Sun Exposure

Avoid prolonged setup to prevent sun damage to material.

Flame and Heat Sources

Keep flame/heat sources away; fabric meets flammability requirements.

Related product manuals