MK!II!Hardware!Installation!Manual:!Rev!1!
©2018!Comb!Communications!
8. Replace the nut and washers on the screw
so that you don’t misplace it (See Figure 15.)
Figure 15: Replace the Nut and
Washers
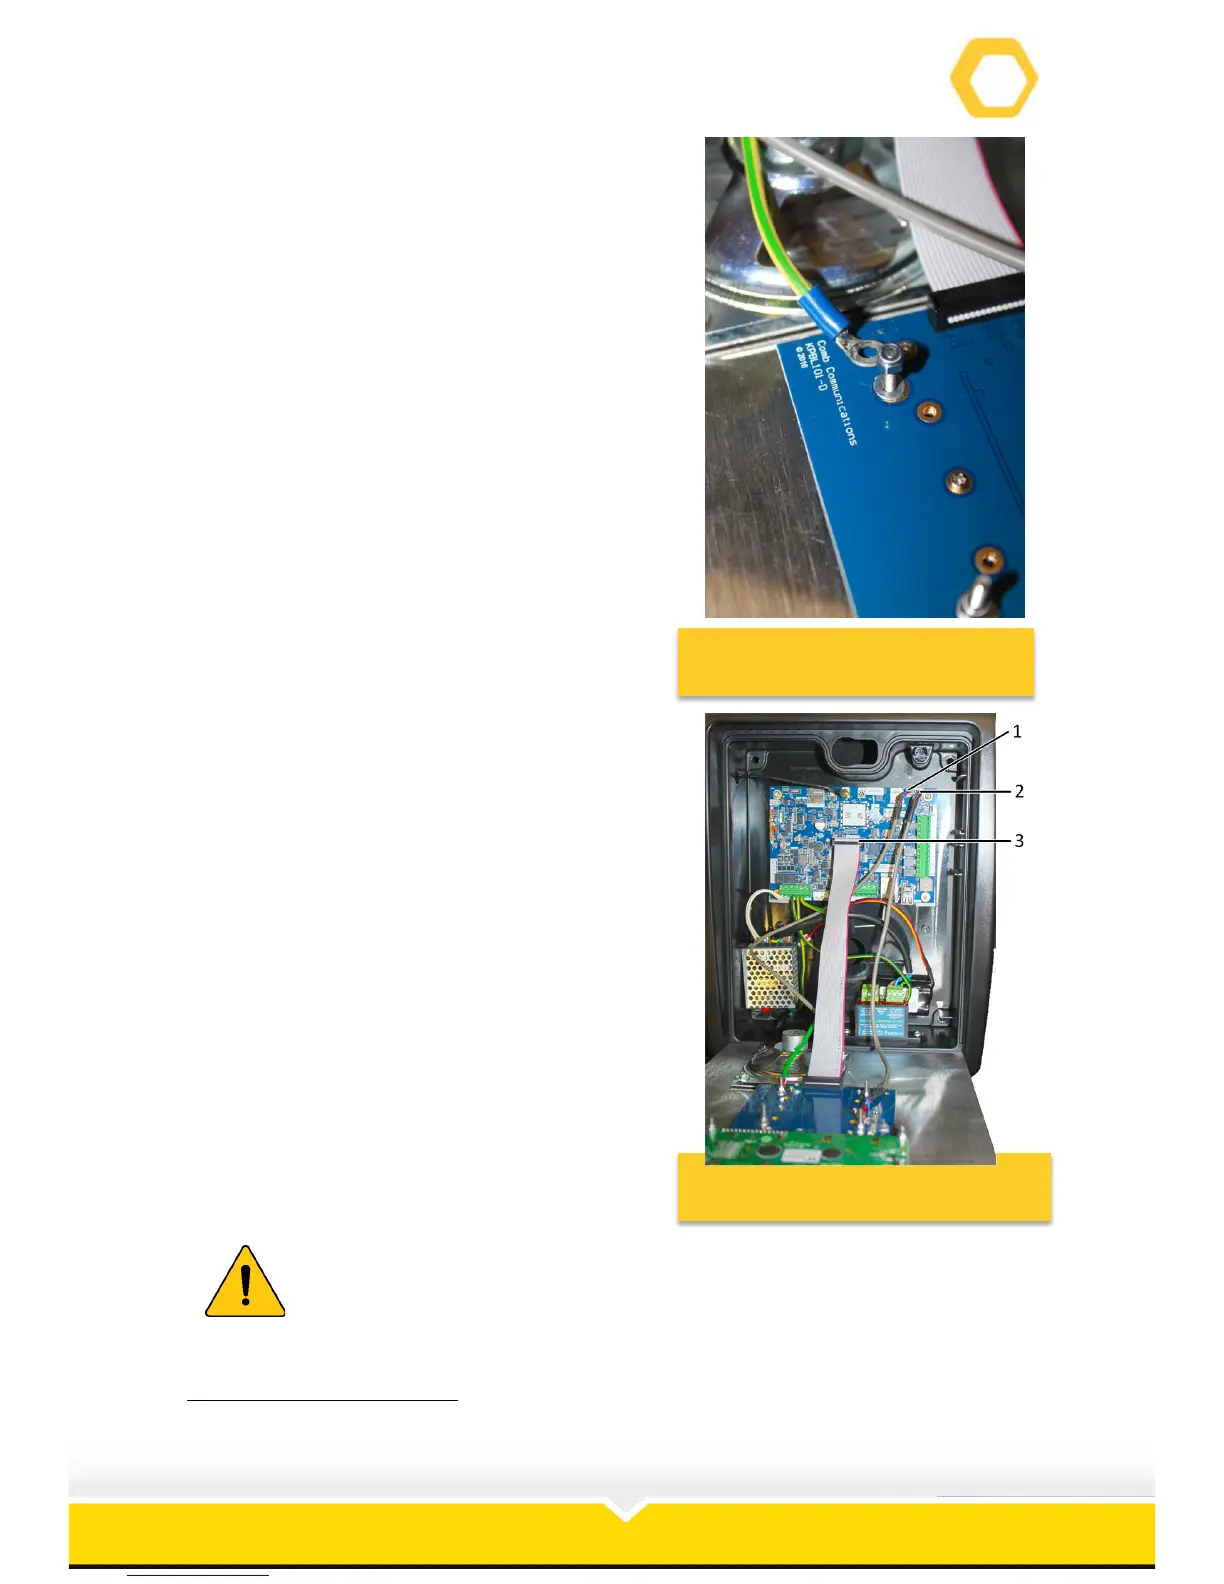
9. Disconnect the Front Cover from the PCB
(See Figure 16)
2
:
a. Disconnect the microphone connector
(1) from the PCB.
b. Disconnect the speaker connector (2)
from the PCB.
c. Disconnect the ribbon connector (3) from
the PCB.
10. Lift the front plate from the slots in the
housing.
Figure 16: Disconnect Front Cover
From PCB
Place the front cover on a clean, dry surface to prevent water and dust
damage.
!!!!!!!!!!!!!!!!!!!!!!!!!!!!!!!!!!!!!!!!!!!!!!!!!!!!!!!!!!!!!
2
!MKII!Plus!PCB!used!for!illustrative!purposes.!
 Loading...