12
Coded actuator: button programming
Other functions: button programming
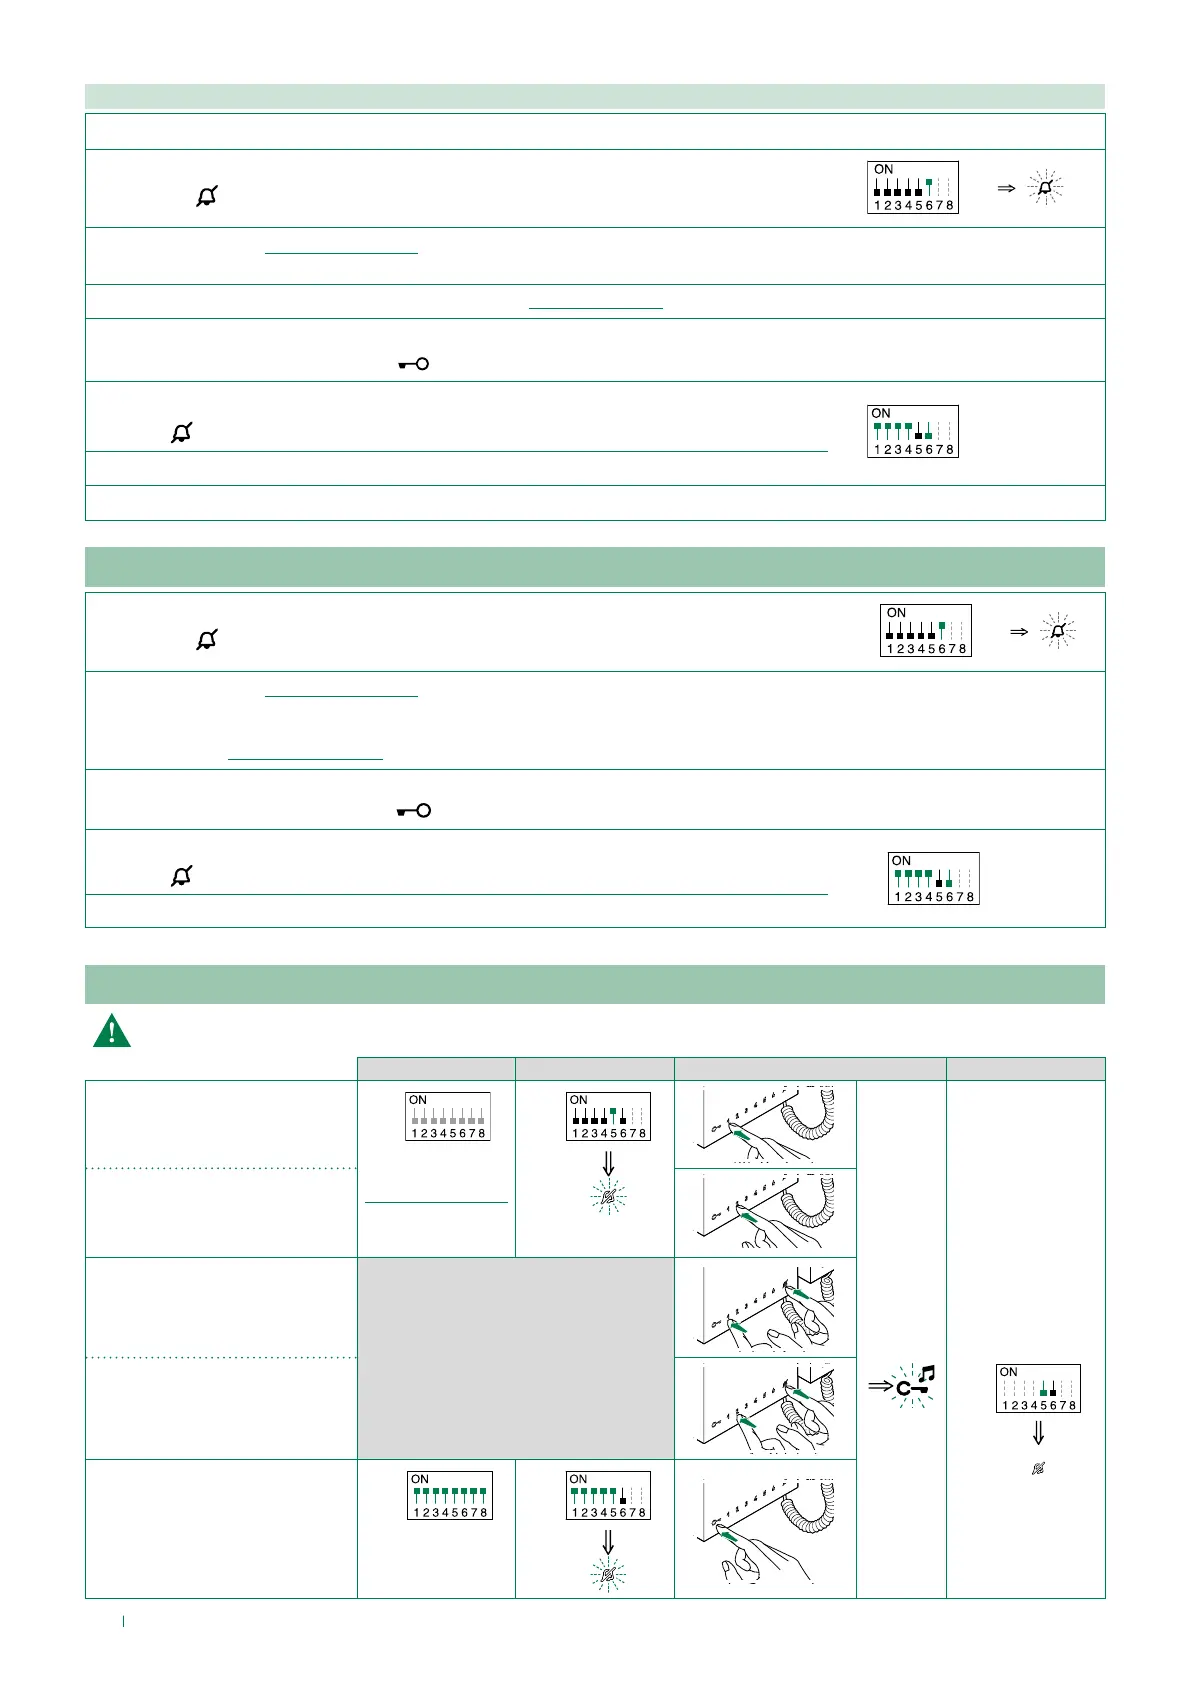
Programming range
1. 2. 3. 4.
Range minimum address
S1
set code.
“Addressing table”
S2
S2
Range maximum address
Enable range
Disable range
Deleting the range
S1
S2
2 sec
Take note of the S2, S1 settings and restore on completion of programming
1. Take note of the S1 DIP-switch settings.
2.
Exit programming mode by setting S2 DIP 6 to OFF.
» the LED
flashes
S2
3.
Refer to the table “Basic configuration” to identify a DIP-switch combination in which the actuator function (ACT)
corresponding to the button you want to program appears, then set the S2 DIP-switches.
4. Set the S1 DIP-switches with the desired code, according to “Addressing table”
5. Press and release the button to be associated with the function.
» Correct procedure indication
: the LED flashes for a few seconds and a confirmation tone sounds
6.
Exit programming mode by setting
S2 DIP-switch 6 to OFF.
» LED
switches off
S2
7. Set S2 DIP-switches 1-2-3-4 to ON.
8. Return S1 DIP-switches to the original combination.
1.
Exit programming mode by setting S2 DIP 6 to OFF.
» the LED
flashes
S2
2.
Refer to the table “Basic configuration” to identify a DIP-switch combination in which the desired functions corresponding to the buttons you
want to program appear, then set the S2 DIP-switches.
Example: For button 1= Call to secondary switchboard (CCS) and button 2= Self Activation (AI), set S2 DIP-switches 1-2-3-4 as specified in row
"C" in the table “Basic configuration”.
3. Press and release the buttons involved in the change.
» Correct procedure indication: the LED
flashes for a few seconds and a confirmation tone sounds.
4.
Exit programming mode by setting S2 DIP 6 to OFF.
» LED
switches off
S2
5. Set S2 DIP-switches 1-2-3-4 to ON.