IP CAMERA QUICK START GUIDE
INSTALLATION
Fix the installation bracket
1. Get the mounting template from the accessory
package, remove the paper from the label, and
stick the label to the place where the camera is
to be installed.
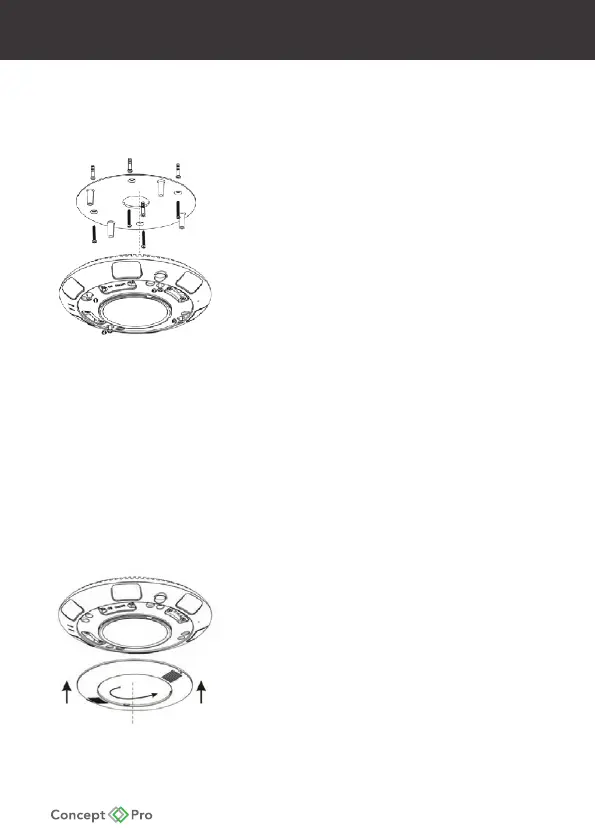
Figure 1-3 Fix the installation bracket
2. Use a drill with a diameter of 5.5mm to drill four
round holes with a depth of 40mm.
Use a hammer or any other rigid object to nail
the four white plastic buttons into the round holes.
Ensure that the wall surface is level and the plastic
buttons align with the wall surface.
3. Drill a thread hole with a diameter of 30mm in the
centre of the positioning labelling to route the
multi-head cable.
4. Aim the four through-holes of the installation
bracket at the white plastic buttons, and use four
black self-tapping screws with a length of 30mm to
x the installation bracket.
Install the camera
1. Connect the standard Ethernet cable and power
supply, ensure that the NIC indicator and power
supply indicator on.
2. Aim the four holes of the camera at the four screw
bolts, use the Allen key to fasten the four star screws.
3. Aim the two buckles of the cover at the gap and
push in, then rotate the cover to fasten in, shown
in Figure 1-4.
Figure 1-3
Figure 1-4