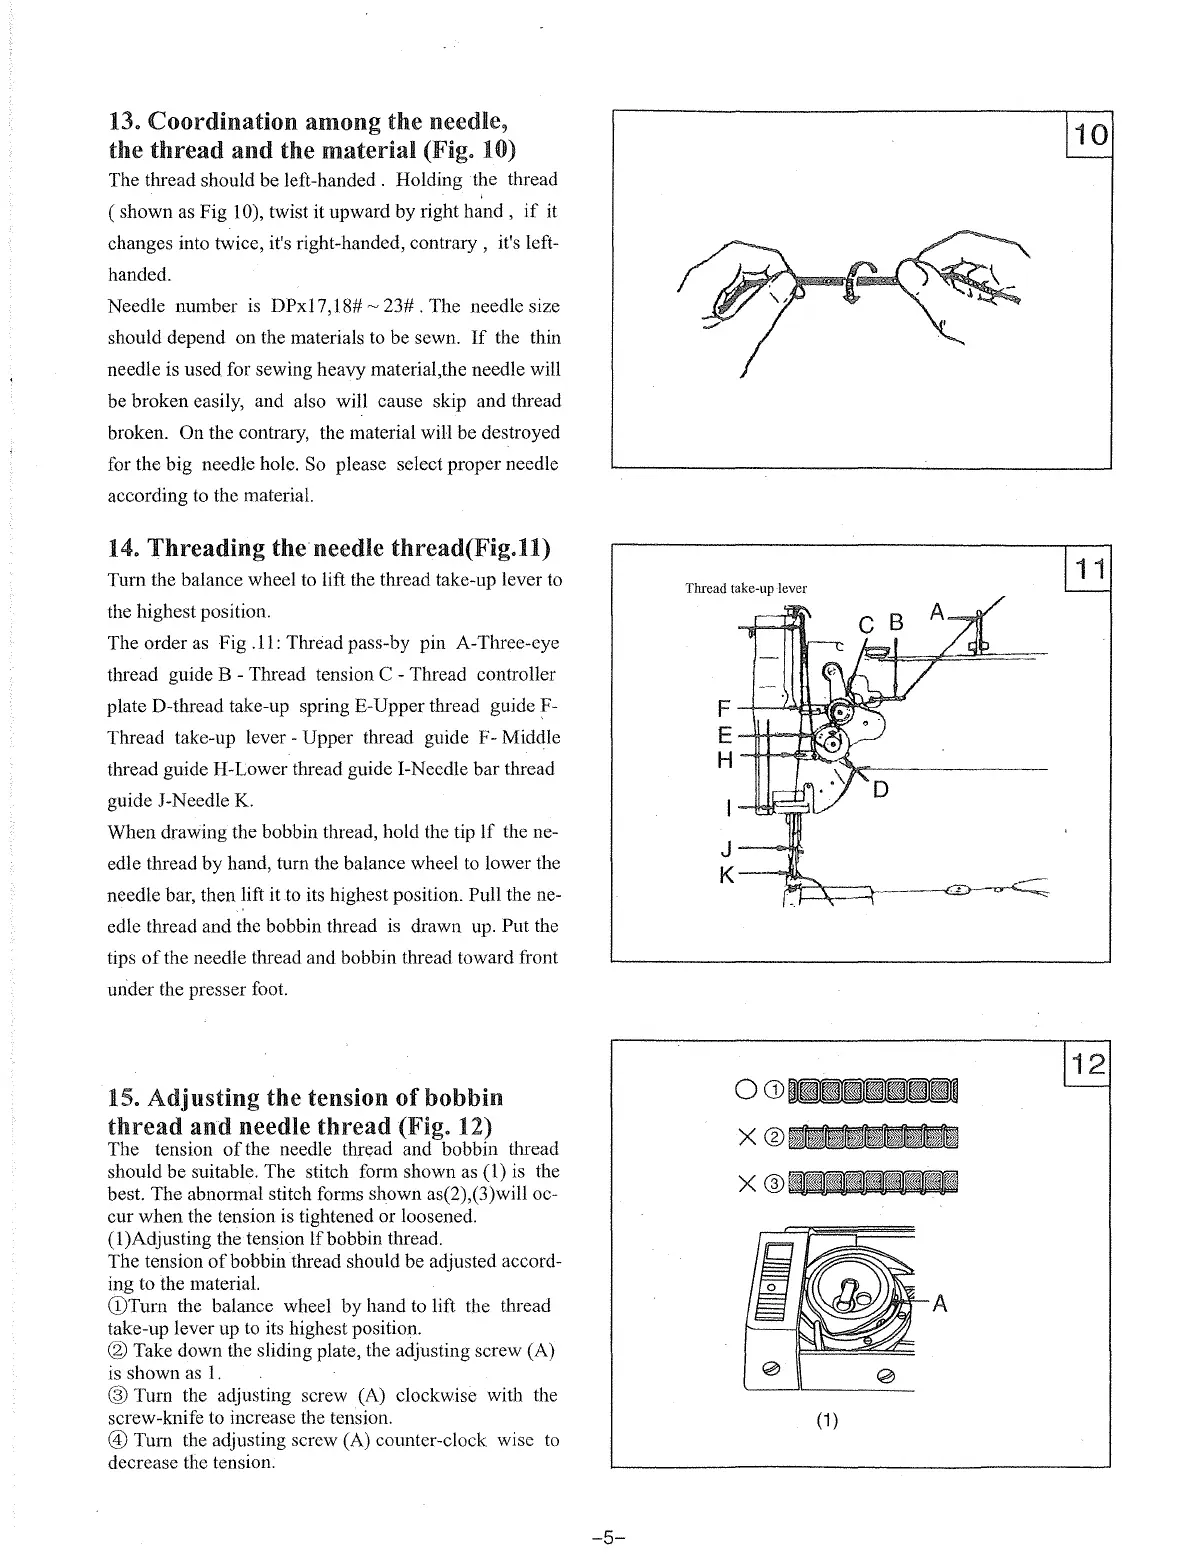
13.
Coordination
among
the
needle,
the
thread
and
the
material
(Fig. 10)
The thread should be left-handed . Holding the thread
( shown as Fig 1 0), twist it upward by right hand ,
if
it
changes into twice, it's right-handed, contrary , it's left-
handed.
Needle number is
DPxl7,
18#
~
23# . The needle size
should depend on the materials to be sewn.
If
the thin
needle is used for sewing heavy material,the needle will
be broken easily, and also will cause skip and thread
broken. On the contrary, the material will be destroyed
for the big needle hole. So please select proper needle
according to the material.
14.
Threading
the needle
thread(Fig.ll)
Tum
the balance wheel to lift the thread take-up lever to
the highest position.
The order as Fig .11: Thread pass-by pin A-Three-eye
thread guide B - Thread tension C - Thread controller
plateD-thread take-up springE-Upper thread guide F-
Thread take-up lever - Upper thread guide F- Middle
thread guide H-Lower thread guide !-Needle bar thread
guide J-Needle K.
When drawing the bobbin thread, hold the tip If the ne-
edle thread
by
hand, turn the balance wheel
to
lower the
needle bar, then lift it to its highest position.
Pull the ne-
edle thread and the bobbin thread is drawn up.
Put
the
tips
of
the needle thread and bobbin thread toward front
under the presser foot.
15.
Adjusting
the tension
of
bobbin
thread
and
needle
thread
(Fig. 12)
The tension
of
the needle thread and bobbin thread
should be suitable. The stitch form shown as (1) is the
best. The abnormal stitch forms shown as(2),(3)will oc-
cur when the tension is tightened or loosened.
(!)Adjusting the tension
lfbobbin
thread.
The tension
of
bobbin thread should be adjusted accord-
ing to the material.
CDTurn
the balance wheel
by
hand to lift the thread
take-up lever up
to
its highest position.
@Take
down the sliding plate, the adjusting screw (A)
is shown as
1.
@Turn
the adjusting screw (A) clockwise with the
screw-knife to increase the tension.
®Tum
the adjusting screw (A) counter-clock wise
to
decrease the tension.
-5-
Thread take-up lever
F-l-~~~~
E......jl........,~
H
--#-f~~A
~~--------------
I
~E;;;;:JiV
J-~
K---...t......
~:>..c----.._~
OCD-
X®-
X®-
A
(1)
From the library of: Superior Sewing Machine & Supply LLC