EasyManua.ls Logo

Contex HD Ultra Series - User Manual

Contex HD Ultra Series
71 pages
Print Icon
To Next Page IconTo Next Page
Loading...
Model: HD Ultra series
User’s Guide
Wide Format Scanners

Table of Contents

Questions and Answers

  • A
    Ashley RamirezAug 19, 2025
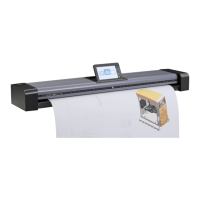
    How to fix 'No functional drivers found' error for Contex Scanner?
    • C
      cphamSep 12, 2025
      If you see a yellow error icon for your Contex Scanner in the Device Manager, it means no functional drivers were found. This often happens if you connected the scanner before installing WIDEsystem. To fix this: 1. In the Device Manager, remove the scanner entry. 2. Shut down the PC, scanner and unplug the scanner from the PC. 3. Perform the installation from step 1, ensuring you install WIDEsystem before connecting the scanner.
  • R
    Ruth KennedyAug 21, 2025
    What to do if I get a 'Paper Jam' error message on my Contex Scanner?
    • R
      rodneyalvarezAug 21, 2025
      A Paper Jam error on your Contex Scanner means the scanner has stopped scanning and the Paper-Ready LED is off. To resolve this: 1. Press and hold the Paper-Backwards or Paper-Forward key to eject the document. 2. If it doesn't eject, open the scanner lid by pushing up the lid release buttons. 3. Gently open the lid and remove the document. 4. Close the lid and reload the document to scan again. 5. If the error persists, repeat the steps and select the Soft-handling option in your software.
  • L
    Luis BrownAug 23, 2025
    Why does my Contex Scanner show an 'Unknown device is found' message?
    • C
      Courtney CarrollAug 23, 2025
      If you see an “Unknown device is found“ message related to your Contex Scanner, it could be due to several reasons: * The interface is not enabled or set up correctly. Ensure the Windows device manager lists the interface option and its drivers function correctly. * WIDEsystem drivers were not installed before connecting the scanner. Shut down the scanner and PC, unplug power and USB connections, and restart the installation from step 1. * There may be a loose interface connection. Unplug and firmly plug in the interface cable. * The system may need rebooting. Shut down the scanner and PC, unplug power and USB connections, then plug in the USB connections and turn on the PC. When Windows is loaded, plug in the scanner power and turn on the scanner main power switch.
  • J
    Jonathan MeltonAug 27, 2025
    Why does my Contex Scanner produce images with vertical lines?
    • P
      Pamela VasquezAug 28, 2025
      If you notice thin vertical lines in the scanned image from your Contex Scanner that are not present in the original, it's often due to an unclean glass plate. Clean the glass plate and rollers as described in this users' guide.
  • M
    melodyespinozaAug 30, 2025
    What does it mean when the Error Indicator LED is blinking on my Contex Scanner?
    • S
      shepherdsabrinaAug 30, 2025
      If the Error Indicator LED is blinking on your Contex Scanner, it means an error has been detected. The information on your screen may include instructions and actions to remedy the error. Follow the instructions on your screen.
  • K
    Kevin EllisSep 1, 2025
    Why are the application control keys not working on my Contex Scanner?
    • S
      spenceraguirreSep 1, 2025
      If the application control keys (one touch) are not working on your Contex Scanner, check the One Touch setup entries in WIDEsystem. Click on the scanner icon to open WIDEsystem and select the One Touch tab. Also, verify that the applications defined in the WIDEsystem One Touch setup entries are installed on your PC and compatible with your scanner’s application control keys.
  • Y
    youngdorothySep 3, 2025
    What does 'Correction of Camera X failed' mean on my Contex Scanner?
    • B
      Brittney MorganSep 3, 2025
      If you receive an error message 'Correction of Camera X failed' on your Contex Scanner, it could be due to your scanner continuously monitoring its cameras. Clean the scanning area, reboot the scanner and then complete the maintenance steps (alignment and calibration). The problem could also be caused by a loose object in the optical path. Remove any torn pieces of paper or other loose objects from the scanning area.
  • S
    Sarah HudsonSep 5, 2025
    What does 'Stitching of Camera X/Y failed' mean on my Contex Scanner?
    • D
      dpattersonSep 5, 2025
      If you receive an error message: Stitching of Camera X/Y failed on your Contex Scanner, it could be due to your scanner continuously monitoring its cameras. Clean the scanning area, reboot the scanner and then complete the maintenance steps (alignment and calibration). The problem could also be caused by a loose object in the optical path. Remove any torn pieces of paper or other loose objects from the scanning area.
  • M
    Melanie ClarkSep 7, 2025
    What does 'Unable to Adjust Camera' mean on my Contex Scanner and how to fix it?
    • L
      levydanaSep 7, 2025
      If you receive an error message: Unable to Adjust Camera on your Contex Scanner, ensure the scanner is set for Normal (lowest) media thickness. The scanner’s pressure-platen must not be raised; lower the original guide plate on both sides to let the scanner make its adjustments. Also, check for any loose objects in the optical path and remove them. The problem is often caused by an unclean or smudged internal glass plate or white background platen. Clean the scanning area, reboot the scanner and then complete the maintenance steps (alignment and calibration).
  • M
    Melanie SmithSep 9, 2025
    What to do if I can’t operate my Contex Scanner after a failed firmware upgrade?
    • M
      Mary BlackwellSep 9, 2025
      If you cannot operate or contact the scanner after a Firmware upgrade failure of your Contex Scanner, it may be due to a power failure interrupting the firmware upgrade. Reboot the scanner to Safe Mode to reapply the firmware. Restart the scanner; if it detects corrupted firmware, it will start up in Safe Mode.

Summary

Scanner Overview

Scanner Installation

System Requirements

Lists hardware and software requirements for installation.

Installation Steps

Provides a sequence of actions for installing the scanner.

Install WIDEsystem and Scan;Copy Software

Clean Scanner Feeding Bed

Clean Internal Scan Area

Connect Power Cable to Scanner

Connect Scanner to Power Outlet

Turn ON Scanner Power

Connect USB Interface Cable to Scanner

Connect USB Interface Cable to PC

Scanner Installation Wizard Starts

Windows Installs the Scanner

Scanner Activation

Activate the Scanner

Procedure for activating the scanner using its license key.

Online Activation

Manual Activation

Calibrate Scanner - Camera Alignment

Enabling Gigabit Interface

Scanner Power Management

Wake and Sleep Modes

Loading Originals

Automatic Loading

Manual Loading

Scanning Operations

Batch Scanning

Monitoring Scanner with WIDEsystem

Scanner Maintenance

Cleaning

Procedures for thoroughly cleaning the scanner's internal scan area.

Calibration and Camera Alignment

Performing scanner calibration and camera alignment for accuracy.

Cleaning the Scan Area

Turn Scanner Power Off and Disconnect

Clean the Glass-Plate

Clean the White-Background Platen and Upper Rollers

Clean the Lower Rollers

Clean the Scanner Feeding Bed

Scanner Calibration and Alignment

Launch the Scanner Calibration Wizard

Select the Calibration Type

Insert the Calibration Sheet

The Program Calibrates the Scanner

Replacing Scanner Parts

Replacing the Glass Plate

Pull Back the Glass Plate Levers

Tilt the Glass Plate Back

Lift the Glass Plate from the Scanner Bed

Insert a New Glass Plate

Replacing the White-Background Platen

Locate the Red Cover Strip

Remove the Red Cover Strip

Locate the Edge of the White-Background Platen

Pull the White-Background Platen Out of the Lid

Insert a New White-Background Platen

Reattach the Red Strip

Replacing the Scanner Lamp Unit

Locate the Lamp Cover

Remove the Lamp Cover

Remove the Old Lamp-Unit

Insert the New Lamp-Unit

Replace the Lamp Cover

Firmware Management

How to Identify Firmware Version

How to Install New Firmware

Troubleshooting

Correcting Common Errors

General steps and procedures for remedying common scanner errors.

Technical Assistance

Troubleshooting Scanner Installation

Unknown Device is Found Message

Troubleshooting the 'Unknown device' message during scanner installation.

No Functional Drivers Found (Yellow Error Icon)

Resolving driver issues indicated by a yellow error icon in Device Manager.

WIDEsystem Does Not Detect Scanner

Troubleshooting WIDEsystem failing to detect the connected scanner.

Troubleshooting Scanner Operation

Error Message: Paper Jam

Error Message: Camera Correction Failed

Error Message: Camera Stitching Failed

Error Message: Unable to Adjust Camera

One-Touch Keys Not Working

Firmware Upgrade Failure Recovery

Troubleshooting Scanning Results

Important Safety Instructions

General Safety Guidelines

Essential safety precautions for operating and maintaining the scanner.

Contex HD Ultra Series Specifications

General IconGeneral
Optical Resolution1200 dpi
Maximum Resolution9600 dpi
Color Depth48-bit
Grayscale16-bit
Maximum Scan Width36 inches
File FormatsTIFF, JPG, PDF

Related product manuals