10
Fig. A
Fig. B
Fig. C
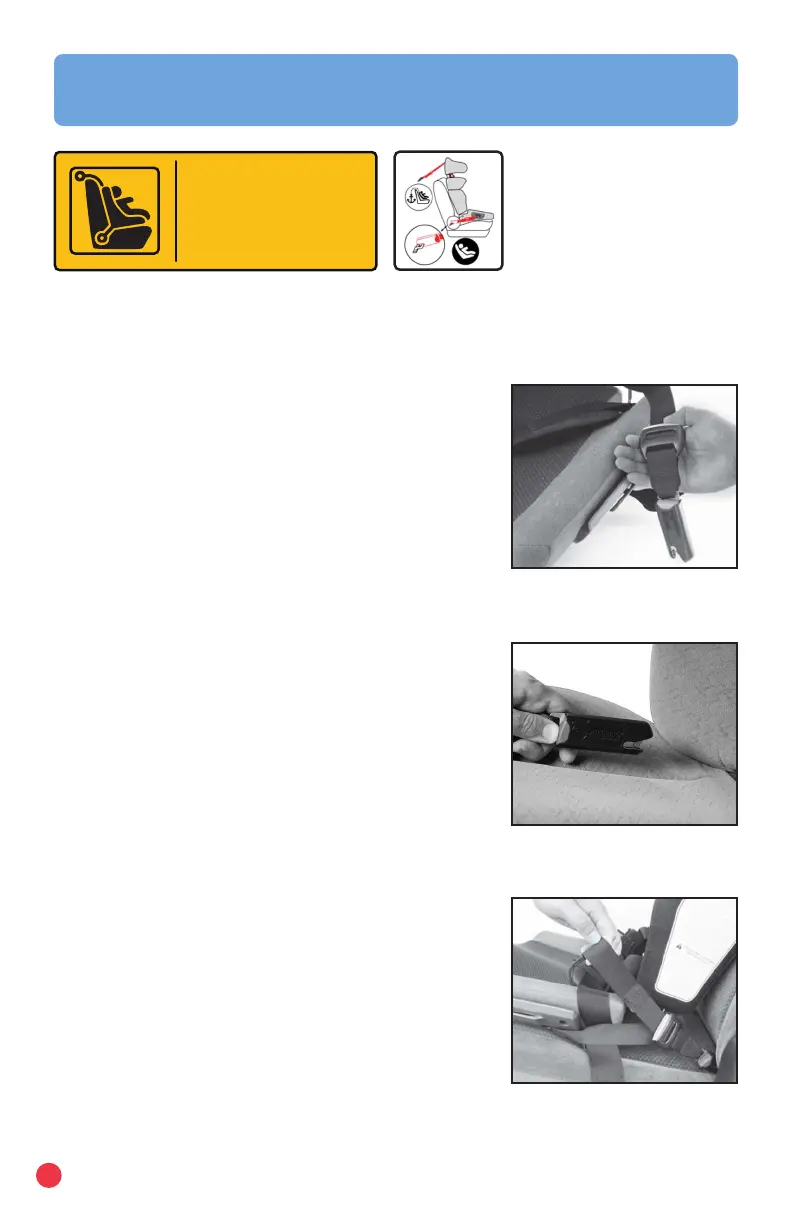
LATCH Installation
Carrot 3 system is recommended for use in a vehicle with LATCH anchors. Verify
that your vehicle is equipped with LATCH anchors. If your vehicle is not equipped
Anchor. Tether.
The next generation
of child safety.
LATCH
Lower Anchor and Tethers for Children
with LATCH anchors refer to page 13 regarding
installation and use of lower securement strap.
Lower LATCH Installation:
1. Press and hold the rst LATCH adjuster release
button, then pull the LATCH strap to full length.
Repeat for the remaining LATCH connector (Fig. A).
2. Place the Carrot 3 forward-facing on the vehicle
seat.
3. Attach one LATCH connector to its adjacent vehicle
LATCH anchor (Fig. B).
a. An audible click conrms attachment
b. Ensure that the LATCH strap is not twisted.
4. Attach the remaining LATCH connector to its
adjacent vehicle LATCH anchor.
a. An audible click conrms attachment
b. Ensure that the LATCH strap is not twisted.
5. Push the Carrot 3 into the vehicle seat while pulling
each LATCH strap tight (Fig. C).
NOTE:
If an audible click is not heard when connecting
either LATCH connector, the LATCH strap may
be twisted, or there may be debris in the LATCH
connector. Correct either situation before continuing
with the installation process.
IMPORTANT:
Ensure the LATCH strap does not fold into the LATCH
adjuster while tightening.
Vehicle Installation
 Loading...