CH1500, CH2000 & CH3000 Chiller Operator’s & Installation Manual
© 2010-2014, Cornelius Inc. - 5 - Publication Number: 621055837OPR
PLUMBING
Follow standard plumbing practices and local codes in making water connections. The chiller inlet and outlet
connections are 3/4 inch. Flexible hoses and fittings are recommended for plumbing the system. A No. 20 mesh
strainer should be installed on the chiller inlet to prevent foreign particles from entering the system and should be
cleaned monthly (field installation, not provided with chiller). Lines should be routed with as few bends as possible.
Prevent lines from running near radiators, hot water pipes, etc. Any lengths of tubing that are exposed to high ambient
temperatures should be insulated to prevent condensation and/or significant liquid heat loss.
Chiller with Reservoir
The reservoir can be filled by removing the water fill cap located on the upper rear of the Chiller (See Fluid
Recommendations). After ensuring that the drain valve is closed, fill the reservoir via the full port with clean water until
the water level sight glass on the front of the unit indicates “FULL” the fill cap should then be reinstalled before
operation begins.
Chiller without Reservoir
The chiller and system piping should be filled with clean water or proper fluid ensuring that all air is purged from the
system.
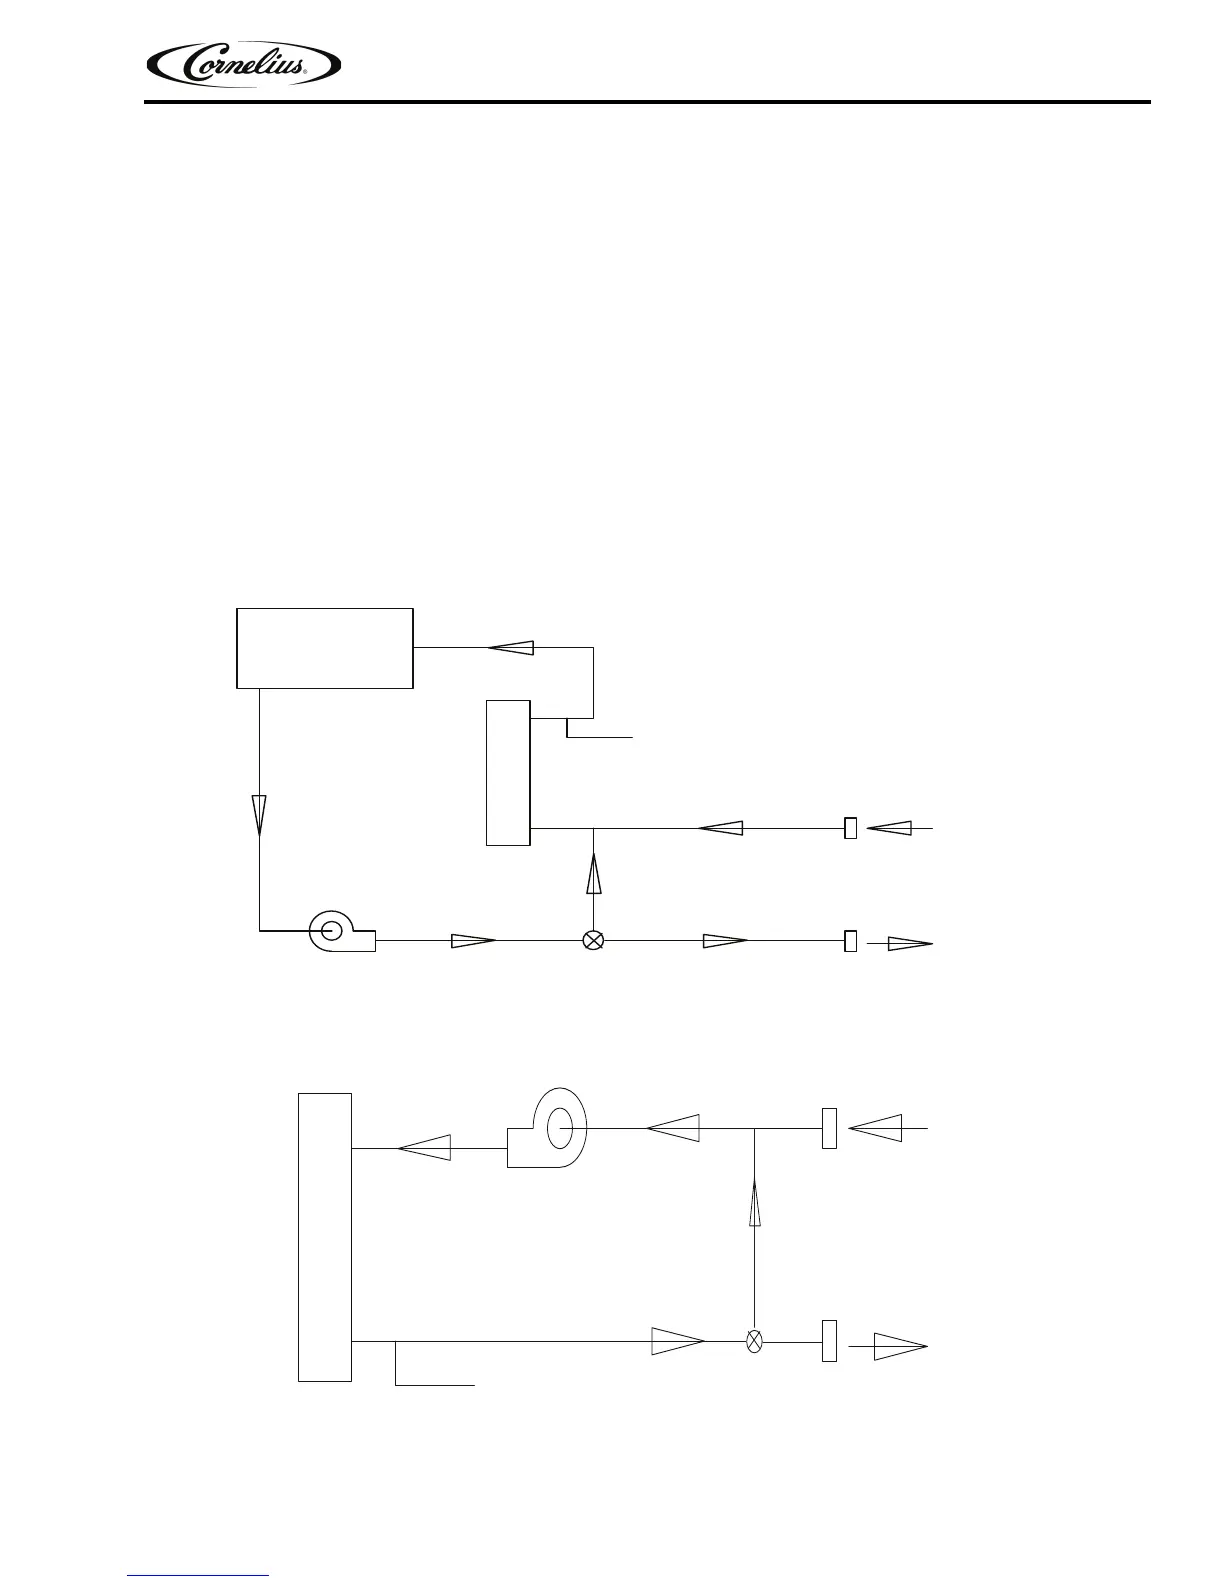
RESERVOIR
LOW TEMP. CONTROL
FROM PROCESS
CHILLER INLET
EVAPORATOR
EVLAV SSAPYBPMUP
CHILLER OUTLET
TO PROCESS
Figure 2. Chiller Plumbing Schematic with Pump and Tank (Standard)
Figure 3. Chiller Plumbing Schematic, no Tank (Option)
CHILLER INLET
FROM PROCESS
EVAPORATOR
LOW TEMP. CONTROL
CHILLER OUTLET
TO PROCESS
BYPASS VALVE