4. INSTALL THE WIRE ROLLER - The wire roller has been factory installed. However, check to
make certain the correct wire groove is in place to accommodate the size of wire you are using.
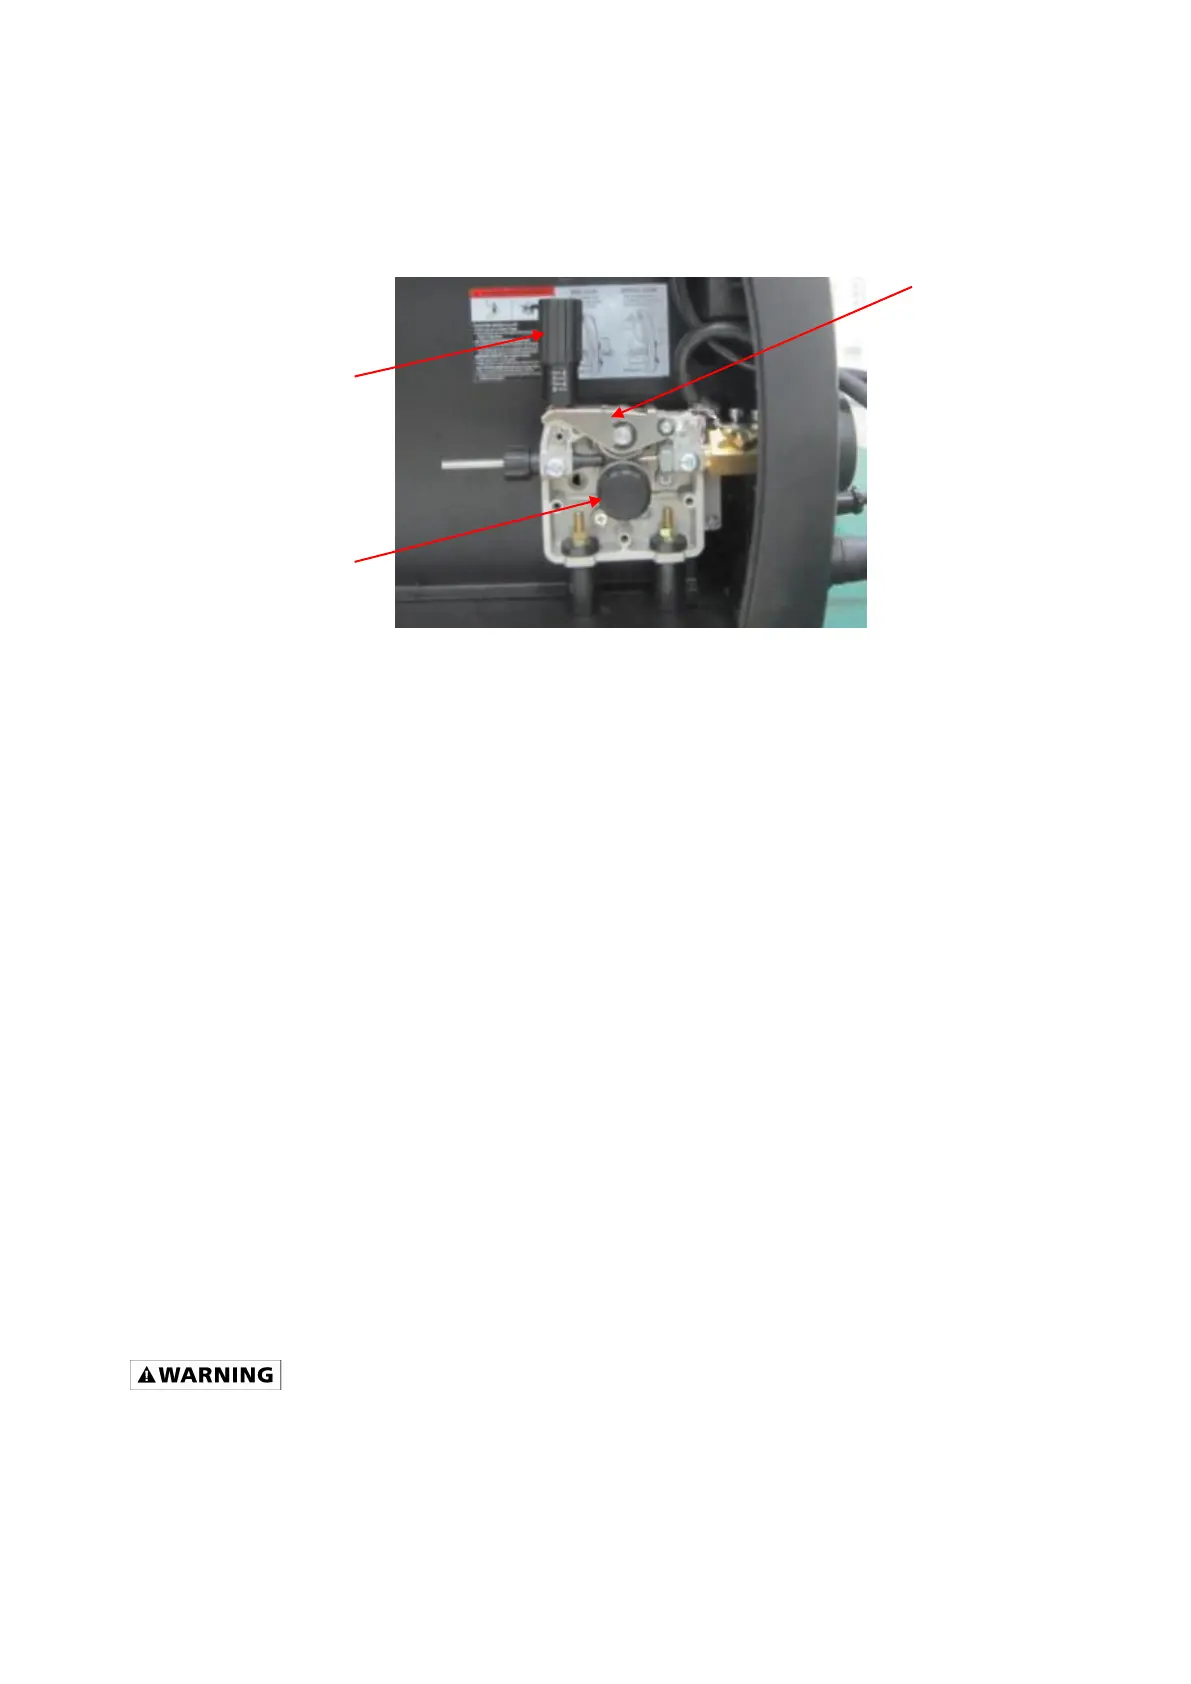
Open the wire feed compartment. Adjust the drive roller according to the following steps. See
Figure 2 about the wire feeder structure:
Figure 2
4.1 Open the door to the welder drive compartment.
4.2 Remove the drive tension by loosening the Drive Tension Adjuster (1) and moving the
Drive Tension Adjustor away from the Drive Tension Arm (2). Lift the Drive Tension
Arm away from the Drive Roller (3).
4.3 If there is wire already installed in the welder, roll it back onto the wire spool by
hand-turning the spool clockwise. Be careful not to let all the wire come out of the rear
end of the inlet guide tube. Hold onto it or the wire spool will unspool itself. Put the
end of the wire into the hole on the outside edge of the wire spool and bend it over to
hold the wire in place. Remove the spool of wire from the drive compartment of the
welder.
4.4 Remove the drive roller by turning the drive roll knob (3) counterclockwise. Carefully
slide the drive roll assembly off of the drive shaft. This drive roll assembly consists of
three pieces. The outer drive roll, inner drive roll, and a key. Be careful not to
misplace the key.
4.5 Based on the wire diameter, select the correct groove. When installing the drive roller,
the number stamped on the drive roller for the wire size you are using should be
facing you. Push the Drive Roller onto the Drive Roller Shaft.
4.6 Reinstall the Drive Roller knob and tighten clockwise.
4.7 Close the door to the welder drive compartment.
Electrical Shock
• Electric shock can kill! Always turn the POWER switch OFF and unplug the power cord
from the AC power source before installing wire.
NOTE: Before installing, make sure that you have removed any old wire from the torch
assembly. This will help to prevent the possibility of the wire jamming inside the gun liner.


 To Next Page