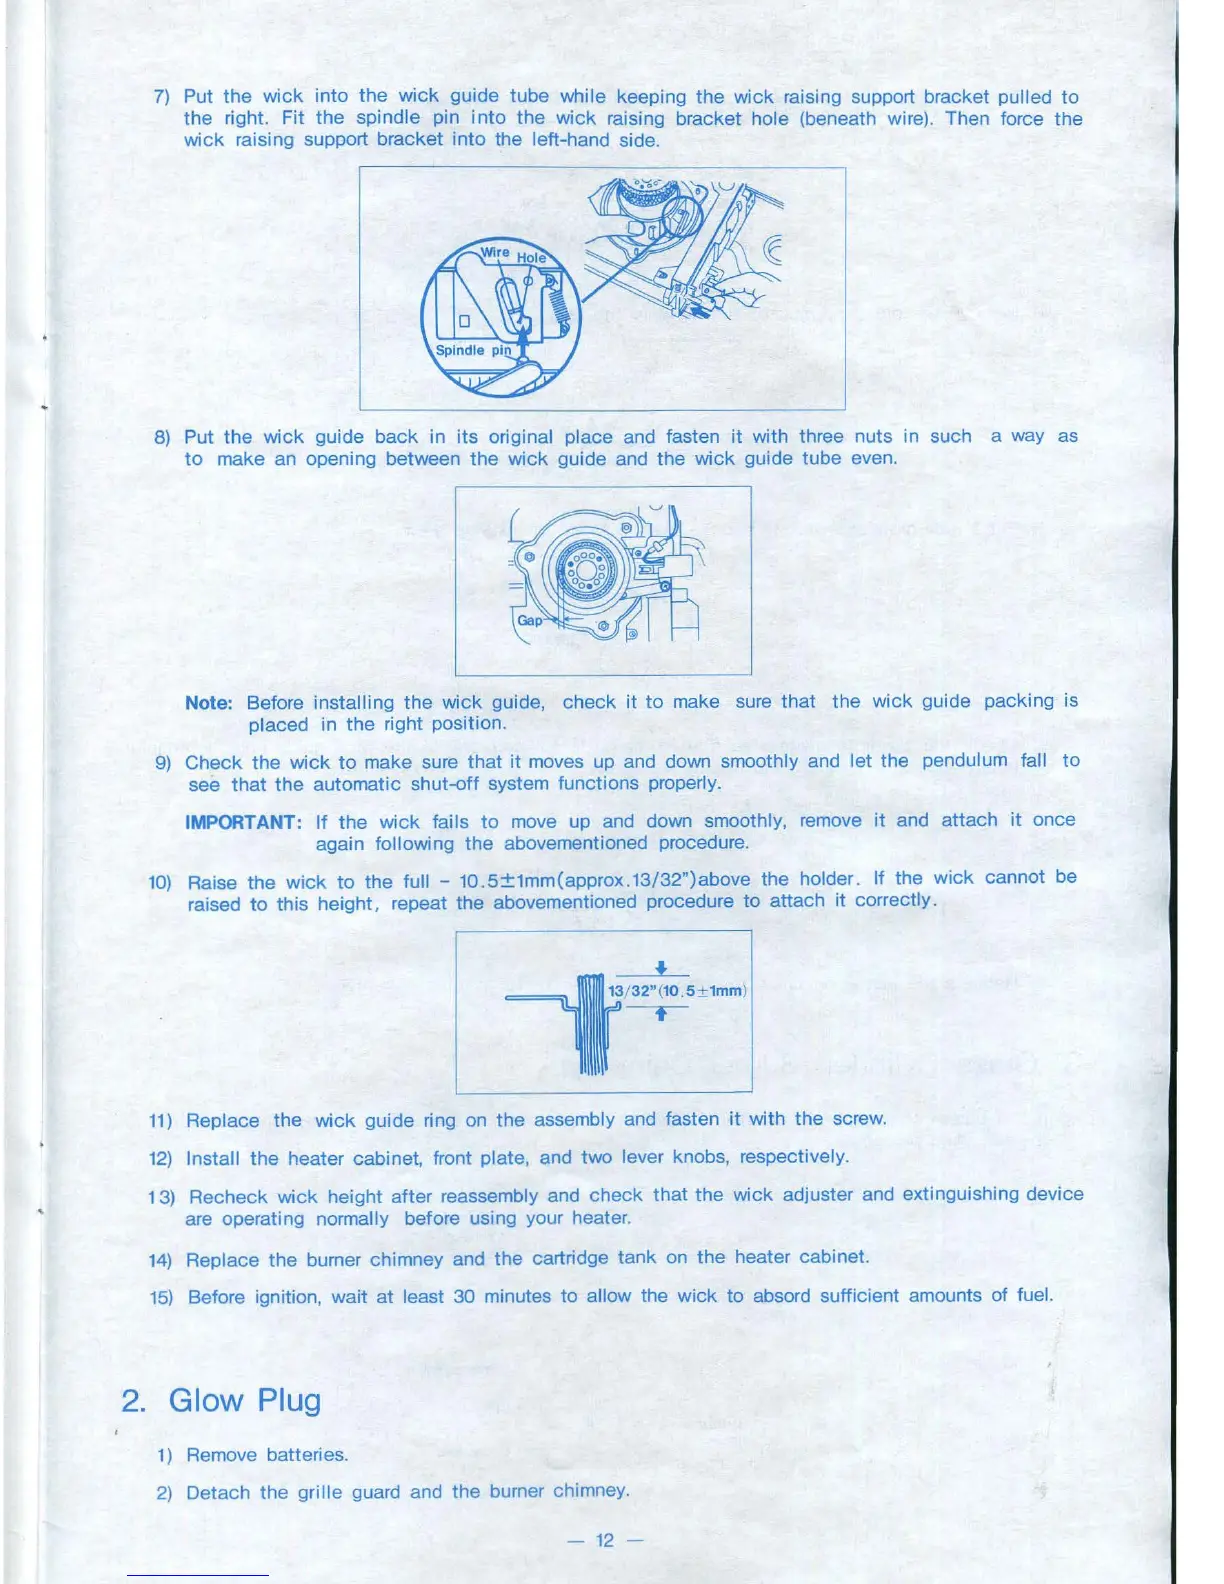
7)
Put
the
wick
into
the
wick
guide
tube
while keeping
the
wick
raising support bracket pulled
to
the
right. Fit
the
spindle pin
into
the
wick
raising br
acket
hole (beneath wire). Then force
the
wick
raising support bracket into
the
left-hand side.
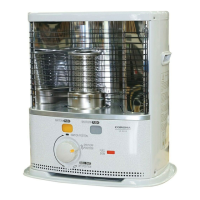
8) Put
the
wick
guide
back
in
its
original place and fasten
it
with three nuts in such a way as
to
make an opening between
the
wick
guide and
the
wick
guide tube even.
Note: Before
installing
the
wick
guide,
check
it
to
make sure
that
the
wick
guide packing
is
placed in
the
right position.
9)
Check
the
wick
to
make sure
that
it
moves up and down smoothly and
let
the
pendulum fall
to
see
that
the
automatic
shut-off
system functions properly.
IMPORTANT:
If
the
wick
fails
to
move up and down smoothly, remove
it
and
attach
it
once
again
following
the
abovementioned procedure.
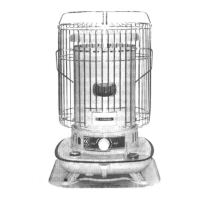
10)
Raise
the
wick
to
the
full -
10
.
5±1mm(approx
.13/32")above
the
holder. If the
wick
cannot be
raised
to
this
height, repeat
the
abovementioned procedure
to
attach
it
correctly.
+
~
/
32"
(
10
.
5
±
1mm
)
I
~
11)
Replace
the
wick
guide ring on
the
assembly and fasten
it
with
the
screw.
12)
Install
the
heater cabinet, front plate, and two lever knobs, respectively.
13) Recheck
wick
height
after
reassembly and
check
that
the
wick
adjuster and extinguishing device
are operating
normally before using your heater.
14)
Replace
the
burner chimney and
the
cartridge
tank
on
the
heater cabinet.
15)
Before ignition,
wait
at
least
30
minutes
to
allow the
wick
to absord sufficient amounts
of
fuel.
2.
Glow
Plug
1) Remove batteries.
2)
Detach
the
grille
guard and
the
burner chimney.
-
12-