1
Installing the Intel Backplate
Installation de la plaque arrière Intel • Installation der Intel-Rückwand
Instalación de la placa de soporte para Intel • Установка опорной пластины Intel
安装Intel背板
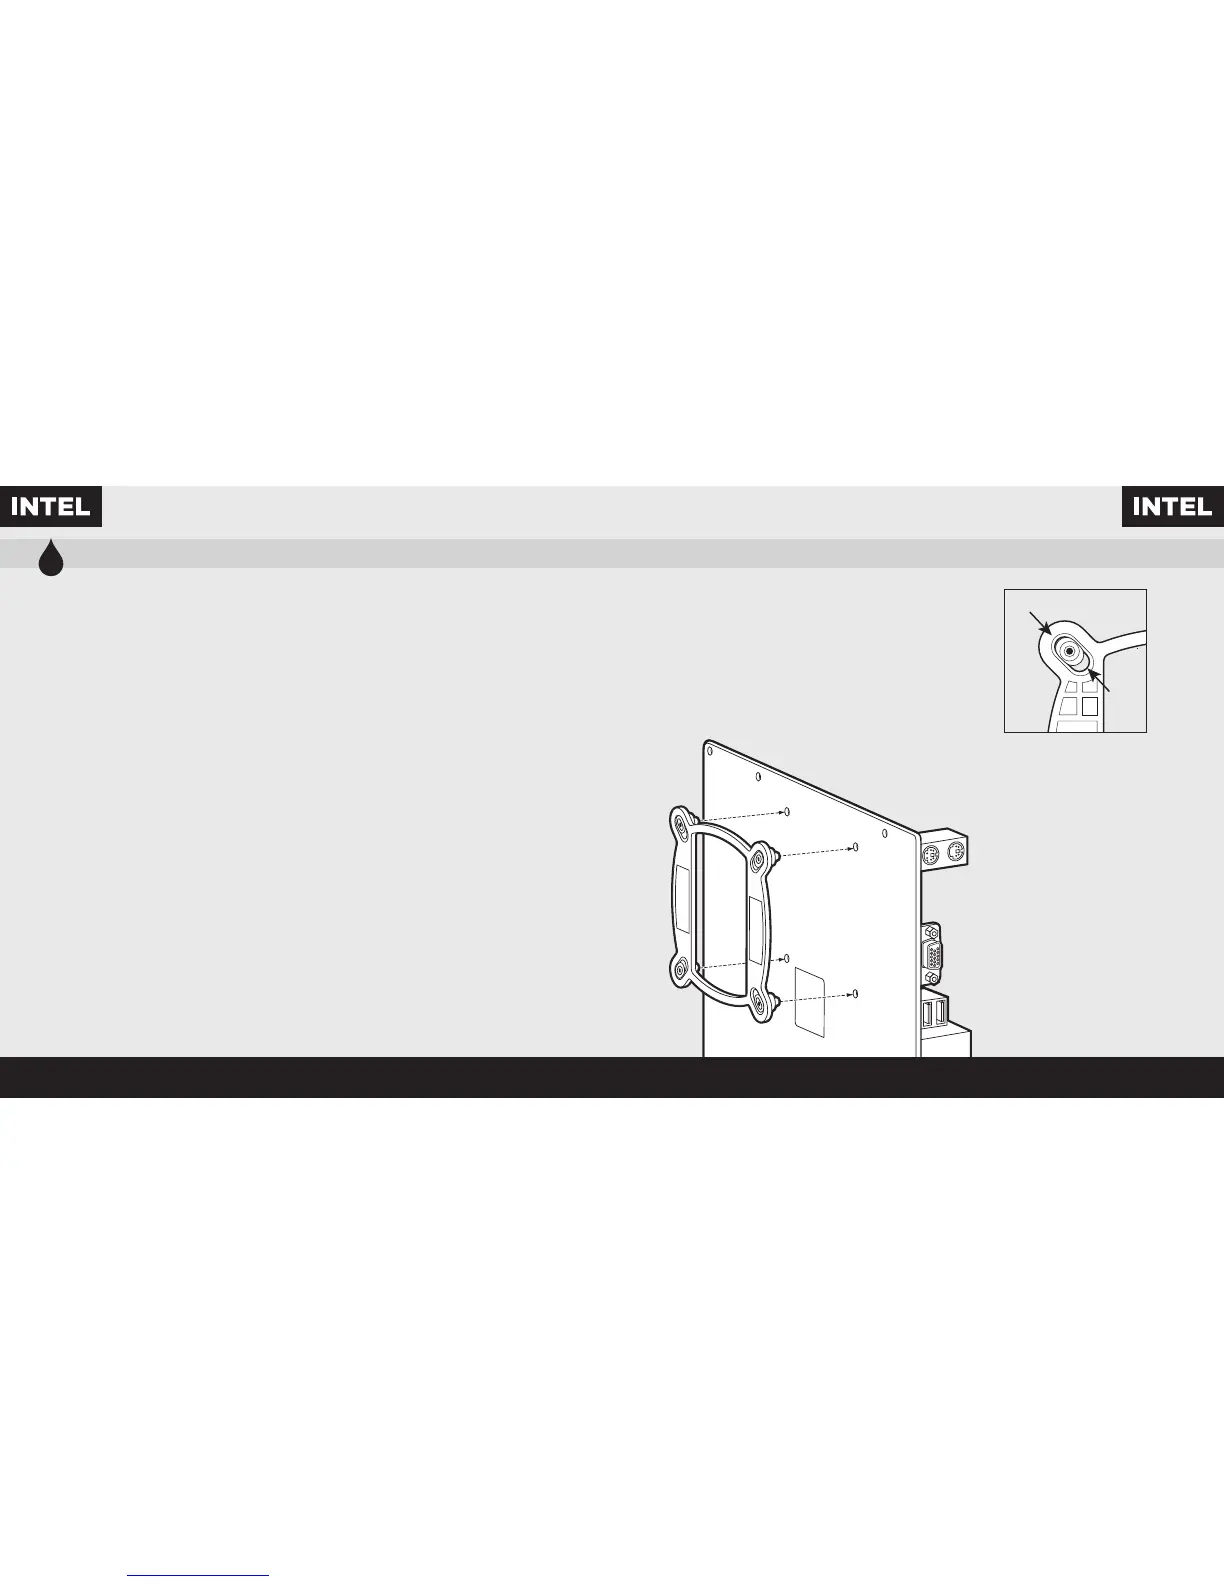
• For LGA 115X installation, slide the backplate
pins inside (figure 1).
• For LGA 1366 installation, slide the backplate
pins outside (figure 1).
• Install the assembled backplate (figure 2).
Note: Intel LGA 2011 does not require backplate
installation. Proceed to step 2.
• Pour l'installation sur un socket LGA 115x, faites glisser
les broches de la plaque arrière vers l'intérieur (figure 1).
• Pour l'installation sur un socket LGA 1366, faites glisser
les broches de la plaque arrière vers l'extérieur (figure 1).
• Installez la plaque arrière assemblée (figure 2).
Remarque: Le socket Intel LGA 2011 ne requiert pas
l'installation d'une plaque arrière. Passez à l'étape 2.
• Schieben Sie die Stifte der Rückwand nach innen,
um LGA 115X zu montieren (Abbildung 1).
• Schieben Sie die Stifte der Rückwand nach innen,
um LGA 1366 zu montieren (Abbildung 1).
• Montieren Sie die zusammengebaute Rückwand
(Abbildung 2).
Hinweis: Für den Intel LGA 2011 ist keine Rückwand
erforderlich. Fahren Sie mit Schritt 2 fort.
• Para instalación en LGA 115X, deslice la placa de soporte
con las patillas hacia dentro (figura 1).
• Para instalación en LGA 1366, deslice la placa de soporte
con las patillas hacia fuera (figura 1).
• Instale la placa de soporte ensamblada (figura 2).
Nota: Intel LGA 2011 no requiere que se instale
una placa de soporte. Siga con el paso 2.
• При установке LGA 115X задвиньте штырьки
внутрь (Рис. 1).
• При установке LGA 1366 задвиньте штырьки
наружу (Рис. 1).
• Установите собранную опорную пластину. (Рис. 2)
Примечание. Для Intel LGA 2011 установка опорной
пластины не требуется. Перейдите к шагу 2.
• 要安装LGA 115X,请将背板针脚插入(图1)。
• 要安装LGA 1366,请将背板针脚拔出(图1)。
• 安装组装好的背板(图2)。
注:Intel LGA 2011不需要安装背板。继续执行步骤2。
LGA 1366
LGA
115X
figure 1
figure 2
 Loading...