2
Installing the AMD Mounting Bracket
Installation du support de fixation AMD • Installation der AMD-Montagehalterung
Instalación del soporte de montaje para AMD • Установка монтажного кронштейна AMD
安装AMD安装支架
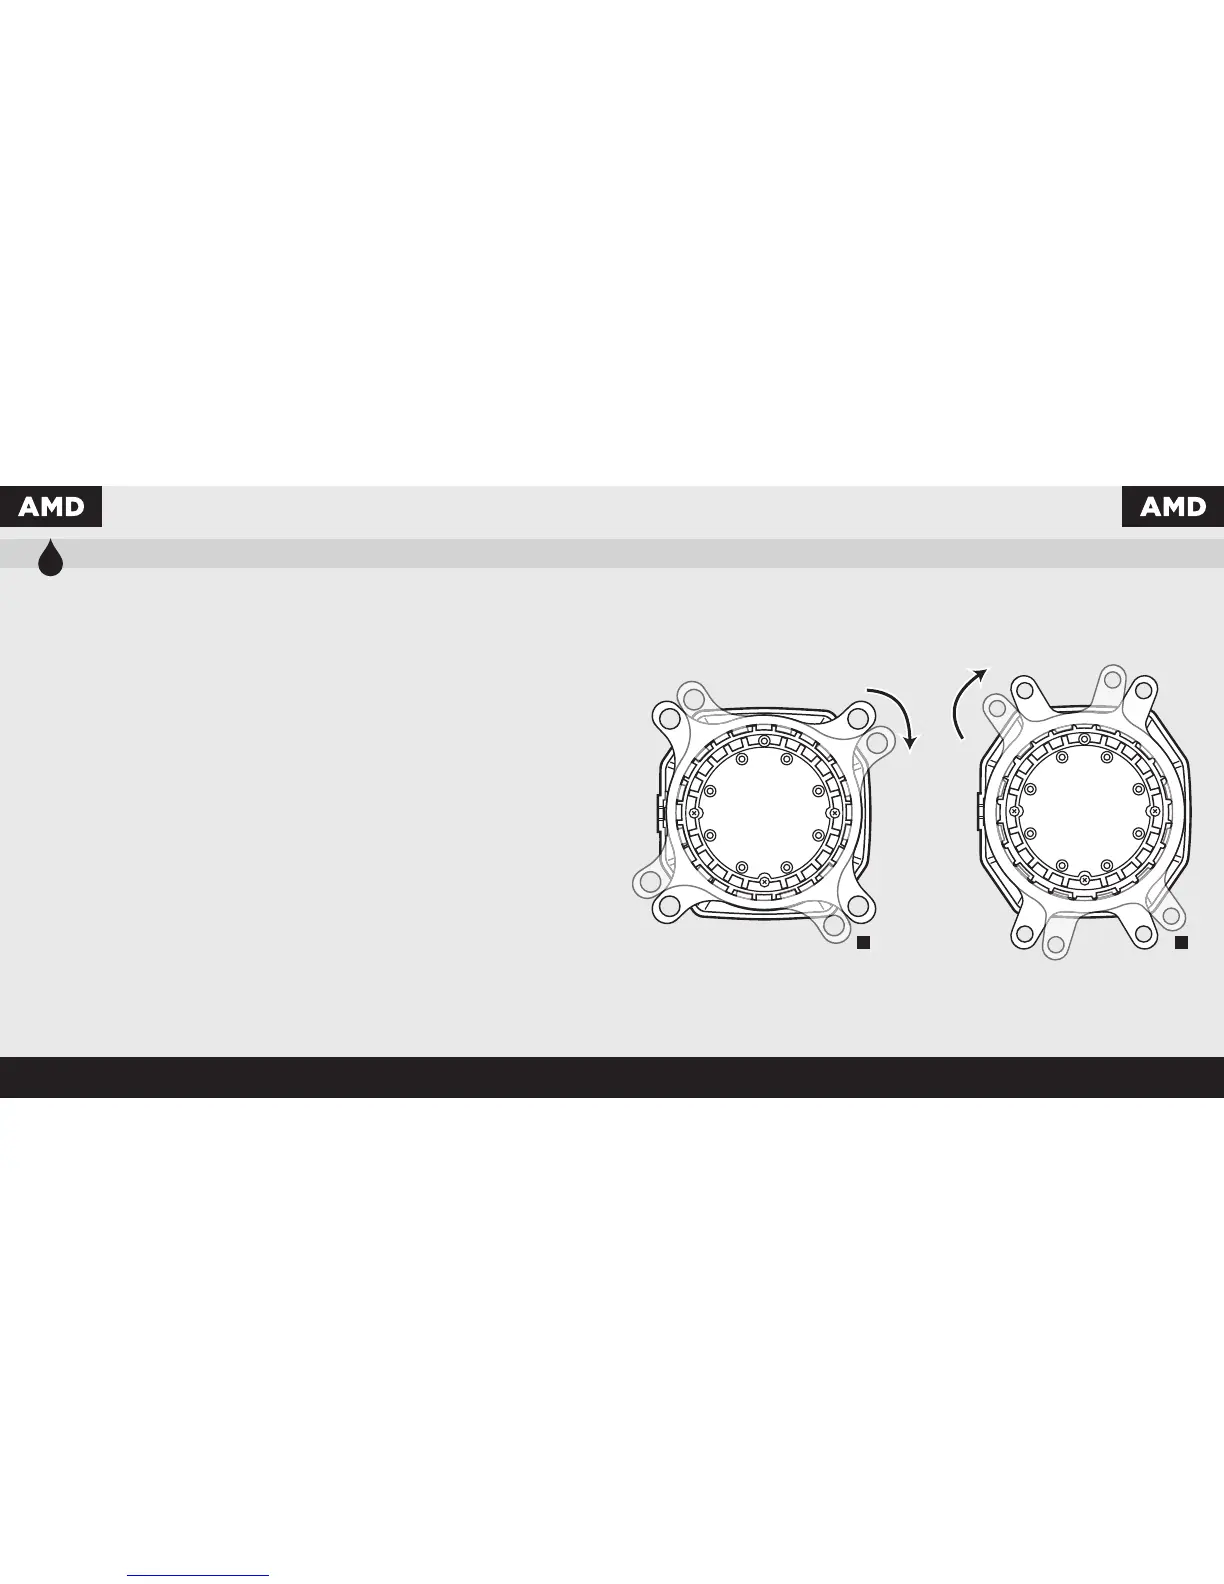
Note: It is important that the AMD retention bracket be
evenly secured on all sides before installation!
• Remove the integrated Intel mounting bracket by
pushing on the metal piece, turning 1/8th turn,
and pulling away from the copper coldplate (figure 1).
• Install the AMD bracket by aligning the metal teeth,
pushing in, turning 1/8th turn the opposite direction,
and allowing bracket to secure (figure 2).
Remarque : il est important que le support de retenue
AMD soit bien sécurisé des deux côtés avant de
procéder à l'installation!
• Pour retirer le support de montage Intel intégré,
poussez-le sur la pièce en métal, tournez-le d'1/8 de
tour et éloignez-le de la plaque froide en cuivre (figure 1).
• Pour installer le support AMD, alignez-le avec les dents
en métal, poussez-le, tournez-le d'1/8 de tour dans le
sens inverse et vérifiez qu'il est bien immobilisé
(figure 2).
Hinweis: Es ist wichtig, dass der AMD-Montagebügel
vor der Installation an allen Seiten gleichmäßig
gesichert wird!
• Entfernen Sie die integrierte Intel-Halteklammer durch
Drücken auf das Metallteil. Machen Sie eine
Achteldrehung und ziehen Sie sie von der
Kupfergrundplatte (Coldplate) weg (abbildung 1).
• Bringen Sie die AMD-Halterung an, indem Sie die nach
innen drückenden Metallzinken ausrichten und dann mit
einer Achteldrehung in die entgegengesetzte Richtung
drehen, bis die Halterung sicher sitzt (abbildung 2).
注:安装前,请务必将AMD挡圈平稳地固定在所有侧面
上。
• 拆卸集成式Intel安装支架时,轻推动金属片,旋转1/8圈
,并将其从铜质冷排上取下(图1)。
• 安装AMD支架时,对齐金属齿,推入支架,反方向旋转
1/8圈,使支架固定(图2)。
Nota: Es importante que el soporte de retención
AMD esté uniformemente fijado a todos los lados
antes de la instalación.
• Extraiga el soporte de montaje Intel integrado
presionando en la pieza de metal, girando 1/8 de vuelta
y desprendiéndolo de la placa refrigerante de cobre
(figura 1).
• Instale el soporte AMD alineando los dientes metálicos
aplicando presión y girándolos 1/8 de vuelta en la
dirección opuesta hasta que el soporte quede
totalmente asegurado (figura 2).
Примечание. Очень важно перед установкой
равномерно закрепить крепежный кронштейн
AMD на всех сторонах!
• Извлеките встроенный монтажный кронштейн Intel. Для
этого нажмите на металлическую часть, поверните на
1/8 оборота и извлеките его из медной платы
охлаждения (Рис. 1).
• Установите кронштейн AMD. Для этого выровняйте
металлические зубцы, нажмите, поверните на 1/8
оборота в противоположном направлении и закрепите
кронштейн (Рис. 2).
1/8”
I
1/8”
J
figure 1 figure 2
 Loading...