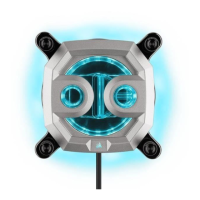
EasyManuals Logo

Corsair Hydro Series Installation Guide

Corsair Hydro Series
66 pages
To Next Page IconTo Next Page
To Previous Page IconTo Previous Page
Page #8 background imageLoading...
Page #8 background image
6
HG10 – N780 Edition
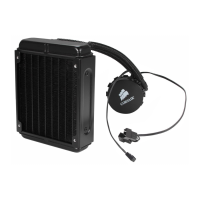
4. Install the fan shroud
5. Install the bracket
Now that the stock blower has been installed onto the bracket, place the HG10 fan shroud onto the bracket and
tighten the four screws to secure.
Reconnect the stock blower’s power cable to the card and mount the bracket onto the card. Next, use the
provided M3 screws to secure the bracket. Hand tighten the screws until the bracket is snug, but do not
over torque.

Table of Contents

Other manuals for Corsair Hydro Series

Questions and Answers:

Question and Answer IconNeed help?

Do you have a question about the Corsair Hydro Series and is the answer not in the manual?

Corsair Hydro Series Specifications

General IconGeneral
TypeLiquid CPU Cooler
Radiator Size120mm, 240mm, 280mm, 360mm
CompatibilityIntel LGA 115x, 1200, 1700, 2011, 2066; AMD AM4
Noise Level10 - 36 dB
Warranty5 years
Fan Speed600 - 2400 RPM

Related product manuals