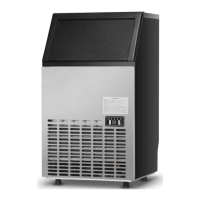
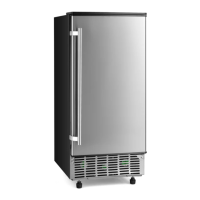
This document outlines the operation and maintenance of an automatic ice maker, designed for household and similar applications. The ice maker is a self-contained unit that produces ice cubes from a continuous water supply.
Function Description
The primary function of this appliance is to automatically produce ice cubes. It operates by drawing water into a tank, freezing it on an evaporator, and then harvesting the formed ice cubes into a storage bin. The unit is designed to detect when the ice storage bin is full and will automatically stop ice production until ice is removed. It also features an automatic self-cleaning program to maintain hygiene and efficiency.
Usage Features
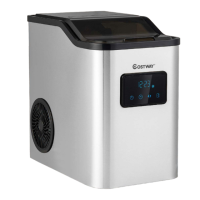
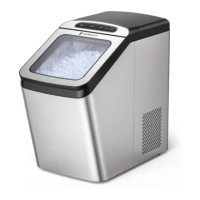
The ice maker is designed for ease of use with a clear operation panel.
Control Panel:
The control panel includes several indicator lights and buttons:
- "ADD WATER" light: This light flashes when water is being supplied to the unit and remains steadily on when there is an absence of water, indicating the need for water supply.
- "TIMER" light: Illuminates when the timer function is active. It can be used to set an ON-TIMER when the unit is off or an OFF-TIMER when the unit is on.
- "ICE" light: Stays on when the unit is actively making ice and flashes during the ice-harvest process.
- "FULL" light: Activates when the ice storage bin is full, prompting the unit to stop ice production.
- "CLEAN" light: Stays on when the water pump cleaning program starts and flashes when the water pump cleaning stops.
- “+” / “-” buttons: These buttons are used to adjust the duration of the ice-making process, which affects the thickness of the ice cubes. They also adjust the delay time for the timer settings. Each press adds or decreases 1 minute for ice-making duration or 1 hour for timer delay.
- "88" digital window: Displays the ambient temperature during normal operation. When flashing, it shows the remaining time in minutes for the current process (e.g., ice-making cycle, self-cleaning program).
- "ON/OFF" button: Turns the unit on or off. During self-cleaning or normal ice-making, pressing this button turns the unit off. If a timer is set, pressing this button cancels the timer. Holding it for more than 5 seconds during ice-making forces the unit into the ice harvest process.
- "TIMER CLEAN" button: A quick press enters the Timer setting program. Holding it for more than 5 seconds initiates the Cleaning program.
Ice-Making Process:
- After connecting the water pipes and plugging in the unit, press the "ON/OFF" button to start the ice-making cycle. The "ICE" light will illuminate.
- The digital window will display the ambient temperature. When it flashes, it indicates the remaining time for the current ice-making cycle. The compressor, fan motor, and water pump will operate.
- Each ice-making cycle typically lasts 11 to 20 minutes, depending on ambient and water temperatures. The first cycle may take slightly longer.
- Upon completion of ice-making, the unit switches to the ice-harvest process, during which the "ICE" light flashes, and the compressor continues to run.
- During ice harvest, the unit checks the water level. If it's below the set position, the "ADD WATER" light flashes, and the water inlet valve opens to refill the water tank. Once the water level is restored, the "ADD WATER" light turns off.
- After ice harvest, the ice-full detecting plate rotates downward and then returns to its original position, initiating the next ice-making process. If the plate remains pressed by ice cubes, the "FULL" indicator turns on, and the unit automatically stops making ice.
- If ice is removed from the bin when the "FULL" indicator is on, the unit will resume ice production after a 3-minute compressor interval.
- The thickness of ice cubes can be adjusted by pressing the "+" or "-" buttons during the ice-making process. The digital window will flash, and the setting will be remembered after 5 seconds.
- Poor water quality can negatively impact the quality and transparency of the ice cubes.
Timer Settings:
- ON-Timer: When the unit is off, press "TIMER/CLEAN" to set the ON-Timer. The "TIMER" light will turn on, and the digital window will flash to display the delay time. Use the "+" or "-" buttons to adjust the delay in 1-hour increments. The setting is saved after 5 seconds. To cancel, press "TIMER/CLEAN" again or "ON/OFF".
- OFF-Timer: When the unit is working, press "TIMER/CLEAN" to set the OFF-Timer. The "TIMER" light will turn on, and the digital window will flash to display the delay time. Adjust with "+" or "-" buttons in 1-hour increments. The setting is saved after 5 seconds. To cancel, press "TIMER/CLEAN" again or "ON/OFF" (which will also turn off the unit).
Normal Sounds:
Users may hear various sounds during operation, which are normal:
- Swooshing sound when the water valve opens to fill the tank.
- Rattling noises from refrigerant flow or the water line.
- Pulsating or high-pitched sound from the compressor.
- Splashing sounds as water runs from the tank to the evaporator plate and back.
- Gurgling sound from refrigerant flow at the end of each cycle.
- Sound of air being forced over the condenser by the fan.
- Sound of ice cubes falling into the storage bin during harvest.
- Continuous water running sound when starting the ice maker, as it performs a rinse cycle.
Maintenance Features
Regular cleaning and maintenance are crucial for the efficiency, performance, hygiene, and longevity of the ice maker.
General Cleaning:
- Before First Use: Thoroughly clean the ice maker. Open the ice door, clean with diluted detergent, warm water, and a soft cloth. Repeatedly clean water-contacting parts, draining water from the water tank and the unit's drain port. Reinstall all drain pipes and caps. Discard the first batch of ice.
- Exterior Cleaning: Clean the door and cabinet regularly with a mild detergent solution and warm water. Avoid solvent-based or abrasive cleaners. For stainless steel models, use a damp cloth and mild detergent to prevent discoloration from chlorine gas and moisture.
- Interior Cleaning (Ice Storage Bin): Sanitize the ice storage bin occasionally, especially before first use or after prolonged storage. Disconnect power, wipe the interior with a sanitizing solution (28g household bleach/chlorine in 7.5L hot water), rinse thoroughly with clear water, and drain. Reconnect power. The ice scoop should be washed regularly like other food containers. WARNING: Do not use solvent cleaning agents or abrasives inside, as they can impart taste to ice cubes or damage the interior.
Ice Making Parts Cleaning:
- Water Tank and Inner Parts: Regularly clean the water tank and other internal components.
- Water Dividing Pipe: If water flow is obstructed or minimal, carefully disassemble and clean the water dividing pipe, ensuring all small holes are unclogged. Reinstall it in its original location.
- Evaporator: If ice cubes stick to the evaporator, do not use force to remove them. Instead, press the "ON/OFF" button for more than 5 seconds to initiate the ice melting process. Once the ice falls, turn off the unit and unplug it to clean the evaporator surface.
- Water Tank and Ice-Full Detecting Plate: Maintain hygiene by spraying a mixture of neutral cleaner and water onto the inner surfaces of the tank and the ice detecting plate. Wipe with a clean cloth, then spray with clean water and wipe dry. Drain the cleaned water from the water tank.
- Suggestion: After cleaning interior parts and reassembling, discard the first batch of ice produced.
Automatic Self-Cleaning Program:
- Starting: After connecting all water pipes and plugging in, press the "TIMER CLEAN" button for more than 5 seconds to enter the self-cleaning program. The "CLEAN" light will be on, and the digital window will show the remaining time. The water pump runs for 8 minutes, stops for 3 minutes, and recycles. Water is supplied automatically when the pump stops. The total duration is 30 minutes.
- Canceling: The program completes automatically after 30 minutes, or it can be canceled by pressing the "ON/OFF" button.
Long Storage Preparation:
If the ice maker will be unused for an extended period or moved:
- Ensure all ice cubes are ejected from the evaporator.
- Turn off and unplug the unit.
- Shut off the main water supply.
- Disconnect the water supply hose from the inlet valve.
- Pull out the water drain pipe from the water tank to drain all water, then reinstall it.
- Drain all water from the unit's main drain port and plug the cap back on.
- Disconnect the water drain pipe from the main drainage pipeline.
- Leave the door open to allow air circulation and prevent mold/mildew.
- Keep the water supply hose and power cord disconnected.
- Dry the interior and wipe the exterior.
- Cover the unit with a plastic bag to protect against dust and dirt.
Semi-Monthly Cleaning:
The ice shovel, ice bin, water tank, ice-full detecting plate, and evaporator surface should be cleaned semi-monthly according to the interior cleaning program.
Semi-Annual Cleaning (Using Nu-Calgon Nickle Safe Ice-machine Cleaner):
All water- or ice-exposed components (ice storage bin, water tank, door, evaporator, water pump, silicone tube, water dividing pipe) should be cleaned every 6 months by a serviceman using Nu-Calgon Nickle Safe Ice Machine Cleaner (or similar).
- Turn off the ice maker, keep it connected to water supply and drainpipe, but shut off the main water faucet.
- Open the door and remove all ice cubes.
- Prepare the cleaning solution: Mix 300 ml of Nu-Calgon Nickle Safe Ice Machine Cleaner with 2.8 liters of warm water (50-60°C). Divide into two equal cups. WARNING: Wear rubber gloves and safety goggles when handling the cleaner.
- Ensure the water drain pipe of the water tank is properly installed. Pour one cup of solution into the water tank and wait 5 minutes.
- Turn on the ice maker, then press the "TIMER CLEAN" button for more than 5 seconds to enter the self-cleaning program. The "CLEAN" light will be on, and the digital window will show the left time. The water pump will run for 8 minutes and stop for 3 minutes, cycling for a total of 30 minutes.
- After the 30-minute program, pull out the water tank's drain pipe to drain the solution into the lower ice storage bin. Shake the unit slightly to ensure complete drainage, then reinstall the drain pipe.
- Repeat steps 4-6 to clean the ice-making assembly system again.
- Open the main water faucet. Press "TIMER CLEAN" for more than 5 seconds to run another 30-minute self-cleaning program. This rinses the water dividing pipe, evaporator, water pump, silicone pipe, and water tank.
- After this program, pull out the water tank's drain pipe to drain the cleaning solution completely, shaking the unit slightly. Reinstall the drain pipe.
- Repeat steps 8-9 two more times for thorough rinsing.
- Clean the ice storage bin.
- After this special cleaning, return to regular ice-making mode. Discard the first batch of ice.
What Shouldn't Be Done:
Never store anything other than ice in the ice storage bin, as it is unsanitary and labels could obstruct the drain pipe.