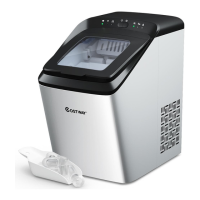
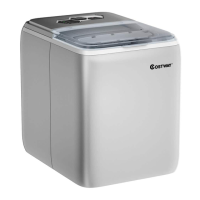
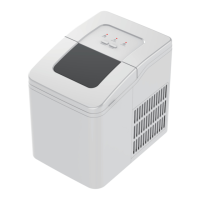
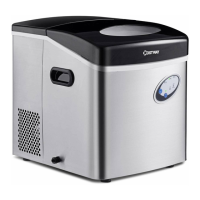
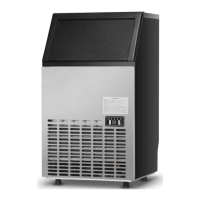
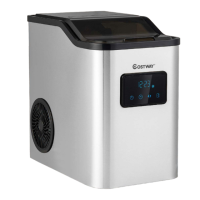
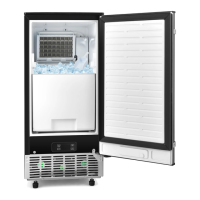
This document describes the COSTWAY Ice Maker, Model EP24483US, a portable appliance designed to produce ice.
Function Description
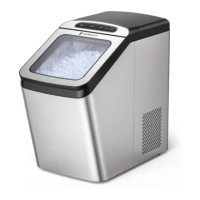
The ice maker is designed to produce ice cubes for household use. It operates by freezing water in a tray, then releasing the ice into a basket. The device features an infrared light-emitting diode and receiving diode to detect the ice level and ensure proper operation. It has a control panel with indicator lights for various statuses, including power on/off, ice basket full, water reservoir low, and selected ice size (small or large). The ice maker also includes a self-cleaning function to maintain hygiene.
Important Technical Specifications
- Model: EP24483US
- Applicable climate: ST/SN/N/T
- Class: I
- Electrical Rating: AMP 1.8A 120V AC 60HZ
- Rated power: 130W
- Refrigerant/Refrigerant amount: R600a/0.0605LBS
- Design Pressure: High Side 290Psig, Low Side 138Psig
- Foaming agent: C5H10
- Net weight: 24LBS
- Housing: SUS304
- Unit size (WXDXH): L 15.75xW 9.69xH 16.93 in
Usage Features
Before You Start:
- Ensure the voltage corresponds to the appliance nameplate.
- Do not remove any safety, warning, or product information labels.
- Plug the ice maker into an exclusive grounded power outlet.
- The appliance must be grounded.
- Avoid using an extension cord unless it's a heavy-duty, three-wire grounding type.
- Position the ice maker on a stable, flat surface, away from heat sources or direct sunlight.
- Allow the appliance to sit upright for at least 2 hours before plugging it in to allow refrigerant to settle.
- Clean the ice maker before first use.
Control Panel and Indicators:
- Key (with indicator):
- Power button (red indicator): Starts or stops the appliance.
- Small ice size (green indicator): Lights when small ice size is selected.
- Large ice size (green indicator): Lights when large ice size is selected.
- Cleaning (green indicator): Lights when the appliance needs to be cleaned.
- Ice basket full (red indicator): Lights when the ice basket is full.
- Water reservoir low (red indicator): Lights when the water reservoir is low.
- Select ice size button (S): Press to choose between small or large ice.
Operating Instructions:
- Ensure the drain plug is well closed.
- Plug the ice maker into the wall outlet. The "O" indicator blinks.
- Open the top lid and remove the ice basket.
- Fill the water reservoir with potable water only, not exceeding the MAX water level mark.
- Replace the ice basket and close the top lid.
- Press "O" key to select the ice size. "O" means small ice while "O" means large ice.
- Press the "O" key and the "O" indicator lights solidly.
- The ice-making cycle will last approximately 7-15 minutes, depending on ambient temperature and water temperature.
- The ice-making cycle starts with water being pumped into the ice tray situated below the evaporator.
- Once ice cubes are formed, the ice tray tilts, and the remaining water drains back into the reservoir. The ice cubes are then pushed from the evaporator and into the ice basket by the ice shovel.
- The "O" indicator will light up when the ice basket is full, and the ice maker will stop the ice-making cycle automatically.
- When the water reservoir is low, the "O" indicator will light up, and the ice maker will stop. Add water and press the "O" key to restart.
- Open the top lid and transfer the ice to a freezer. The ice will last in the ice maker for up to 18 hours depending on ambient temperature.
- Allow the ice maker to warm up to room temperature if storing for a long time.
- Suggest replacing the water every week.
Maintenance Features
Cleaning and Maintenance:
- To keep your ice tasting fresh and your ice maker looking great, regular cleaning is recommended.
- Daily Cleaning:
- Stop the ice-making cycle by pressing the "O" key. Unplug the ice maker from the wall outlet and allow it to warm up to room temperature.
- If residual water is found in the ice tray, gently push the ice tray back so that all water drains into the water reservoir.
- Move the appliance forward to a place 60mm away from the working table and open the drain plug to drain out excess water (see Fig.1, Fig.2 and Fig.3).
- Check and make sure the drain plug must be closed well. Fill the water reservoir with clean water, press until the "O" indicator flashes, then press the "O" key. The pump will start to pump water and keep running for 6 minutes, and it will enter into standby condition after running for 6 minutes. Finally, open the drain plug and empty the water.
- Remove the ice basket.
- Clean the ice maker interior with a soft cloth soaked with warm water and vinegar, then rinse with clean water and then drain all the water.
- Replace the drain plug well in position. Wash the ice basket and ice scoop in warm soapy water. Rinse and dry.
- Clean the exterior of the ice maker with a soft damp cloth. Use a mild dishwashing soap, if necessary.
- Important Notes for Cleaning:
- Do not use organic solvent, boiled water, detergent, strong acid and strong alkali, etc. for cleaning.
- Please empty the water reservoir and dry it for storage if the ice maker is not used for a long time.
Troubleshooting:
The manual provides a detailed troubleshooting guide for common issues:
- Low water level or lack of water: Refill water and press "O" key to restart.
- Water screen at bottom of water reservoir is blocked: Clean the blocked area.
- Pump malfunction: Send it to an authorized department for repair.
- Ice basket is full and the infrared light is blocked by ice: Remove ice from the ice basket. Wipe foreign objects on the infrared light-emitting diode & light-receiving diode and restart the ice maker. If the issue persists, contact customer service.
- Infrared light-emitting diode & light-receiving diode do not work: Contact customer service.
- Ice shovel is blocked: Remove the ice if the ice shovel is blocked by ice, otherwise, call customer service.
- Ice tray is not in the right position: Remove the ice in the ice tray and press the "O" key to restart the appliance. If the issue persists, call customer service.
- Ice "full" condition cannot be detected as the infrared light module is interfered by the sunlight: Unplug the appliance and move it to a place not exposed to sunlight, then plug the appliance and activate it again.
- Ice making takes too much time: The ice collects together. This could be due to low water reservoir temperature or high ambient temperature. Solutions include filling the reservoir with water between 46.4 ℉ and 77 ℉, starting the ice-making cycle at an ambient temperature less than 89.6 ℉, and filling the water reservoir with some cold water.
- Refrigerating system leaks or blocks: Call customer service.
- Poor heat dissipation, high water temperature, or high ambient temperature: This results in poor ice-making. Solutions include leaving an 8-inch (20cm) clearance on all sides for proper ventilation, filling the water reservoir with water between 46.4 ℉ and 82.4 ℉, and operating the ice maker at an ambient temperature between 50 ℉ and 89.6 ℉.
Environmental Friendly Disposal:
The device should be disposed of responsibly. It should not be discarded with general household waste. Please respect local regulations and deliver electrical equipment to an appropriate waste disposal center.