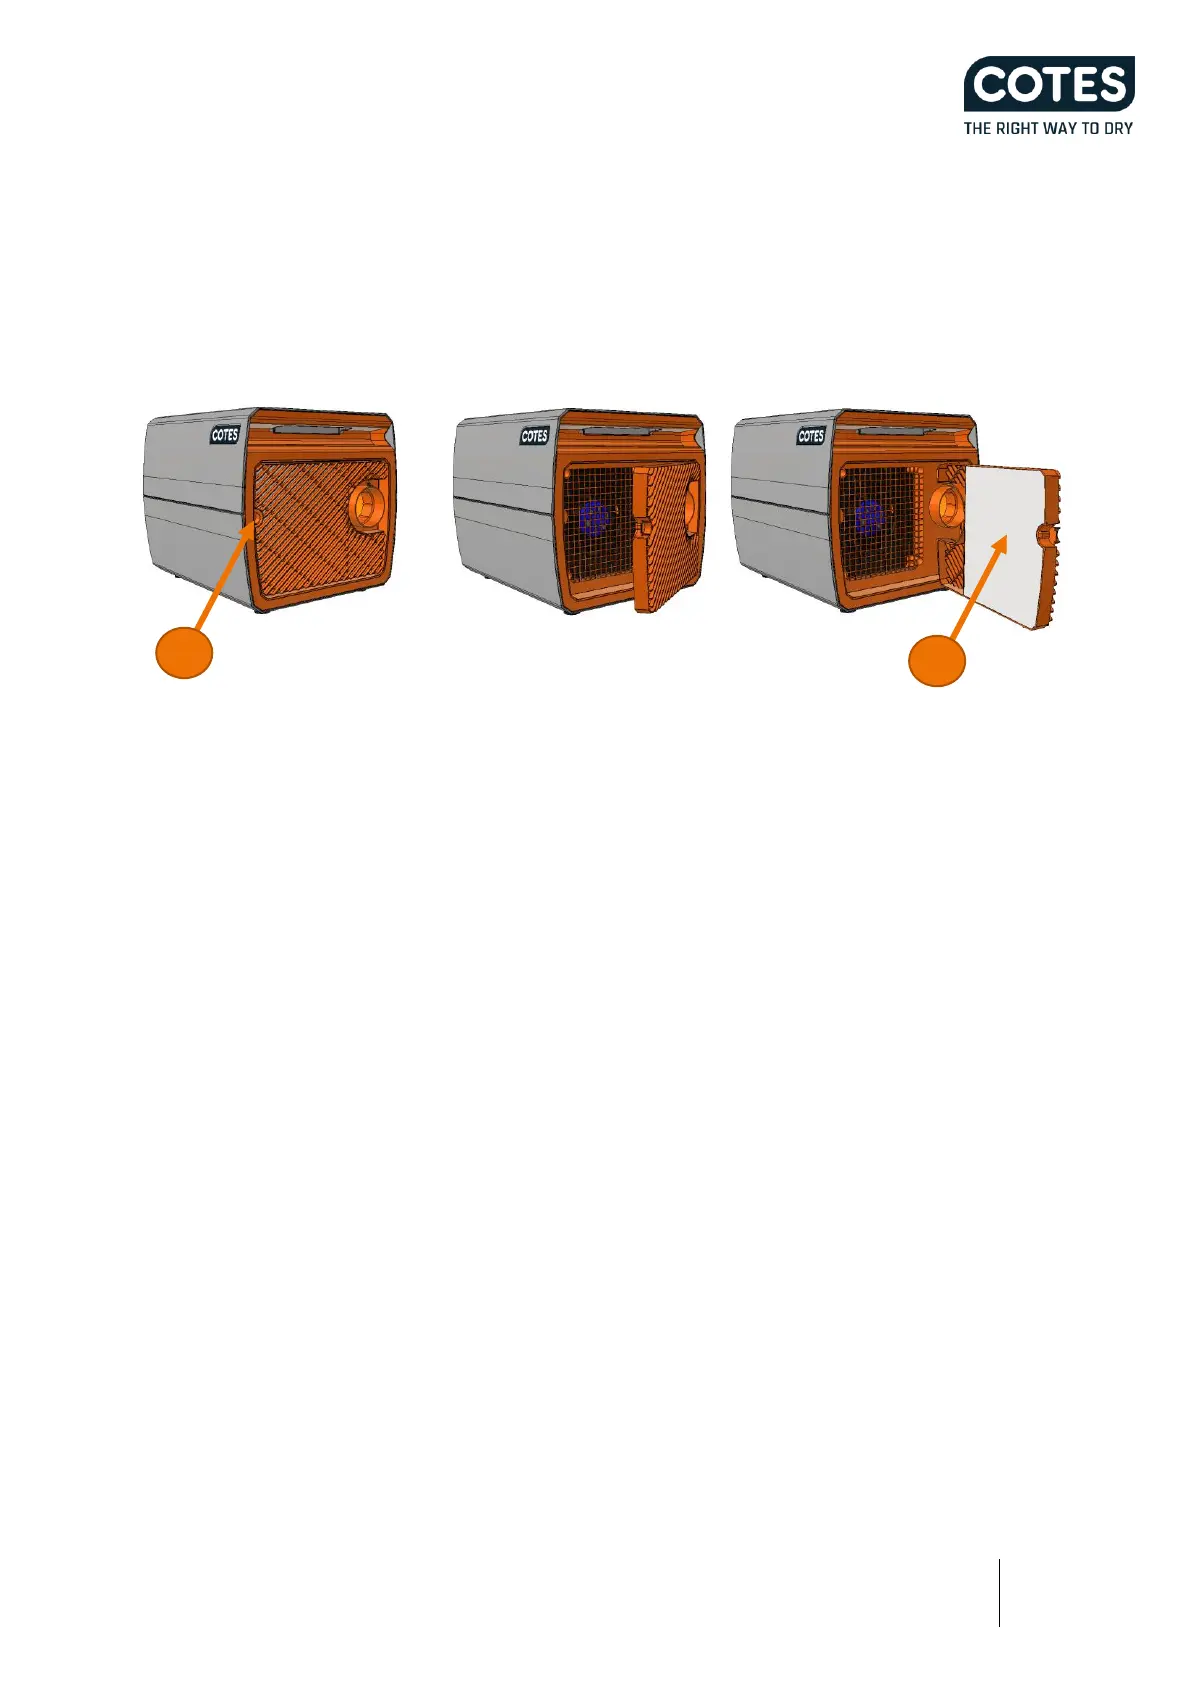
Air filter replacement
Access to the filter is done by tipping the finger tap (1) to the right and remove the filter lid. Once accessed, the
filter (2) can be removed and replaced. The filter can be replaced without turning the dehumidifier off, but it is
easier when turned off. Replacement filter (no. 650009) fits into the shape of the filter lid. When reattaching
the filter lid, make sure the lid is properly placed. No unnecessary force should be used, but the lock should be
pressed back into place to lock the filter lid.
Access for service/repair
To access components inside the machine, remove the top cover.
The top cover is fastened with 4 screws on the top of the device.
Air fan replacement
To replace the fan, disconnect the fan electrical connectors, and then proceed to unscrew the screws securing
the fan. The screws (4 pcs) are located inside the air filter box and can be accessed from the outside by
removing the filter cover. For easier access, remove the 2 rubber feet that hold the fan section. Finally, the fan
section can be separated from the bottom shell.
Rotor, drive belt, gearmotor and electrical heater replacement
To replace the rotor, drive belt or gear motor, but also the electrical heaters, you need to:
1. Disconnect the flexible hose from the Rotor section and the Fan section.
2. Disconnect the ground connection, 1x Power, 1x Selector, 1x Potentiometer, and 2x Fan - connectors.
3. Lift the complete rotor section and place it on a flat horizontal surface.
Now all components are easily accessible for replacement.
Reassembly of the dehumidifier
Reverse the workflow and be observant when refitting the rotor section back in the bottom shell. Ensure that
the sheet metal is correctly fitted into the bottom rib, ribs on the control panel, and grabs the plastic part on
each side. No unnecessary force should be used. When fitting the lid, hold it with one hand on each side and
press the walls slightly outwards until it is past the inner “air trap foil”. Then look at the 'teeth' and press lightly
on the side wall to make sure that the 'teeth' is held correctly. Do not use a lot of force. When all the teeth on
both sides are in place, you can use force on the top and fix the lid with the 4 screws.