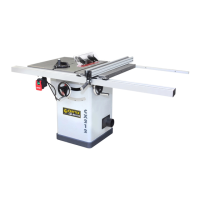
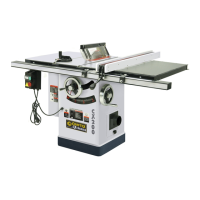
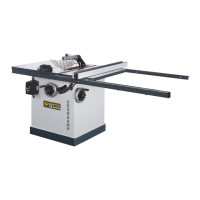
This document is a user manual for the Craftex CX-Series Model CX230 / CX250 fence system, designed for use with table saws. It details the physical features, installation, adjustment, and parts diagrams for both the 30" and 50" versions of the fence. The manual also includes a Craftex 3-year limited warranty policy.
Function Description:
The Craftex CX230 / CX250 fence system provides a precise and stable guide for cutting operations on a table saw. Its primary function is to ensure that the workpiece is held parallel to the saw blade, allowing for accurate and repeatable cuts. The system includes a fence body, front and rear fence rails, and a scale for precise positioning. The fence can be locked into position using a lock lever, and its parallelism to the miter slot can be adjusted using levelling set screws. The scale allows users to set the fence at specific distances from the blade, enhancing cutting accuracy.
Important Technical Specifications:
The manual outlines two models: CX230 and CX250, corresponding to 30" and 50" fence capacities, respectively.
-
CX230: Requires twelve hex bolts for installation into the open slot on the fence rail. The parts list for the CX230 includes 42 distinct components, with varying quantities. Key components include:
- Rear Rail (1)
- Rear Rail End Cover (2)
- Bolt M8x25 (8)
- Nut M8 (16)
- Bolt M6x12 (6)
- Washer (6)
- Nut M6 (6)
- Fence End Cover (1)
- Nut M12 (2)
- Shaft (1)
- Bearing (1)
- Screw M6x12 (1)
- Fence Assembly (1)
- Side Plate (2)
- End Cover (4)
- Bolt M8x85 (1)
- Handle Cover (1)
- Handle Sleeve (1)
- Screw Rod 1 (1)
- Eccentric Wheel (1)
- Screw M8x8 (3)
- Compression Spring (1)
- Steel Ball (1)
- Scale Label(Left) (1)
- Screw (2)
- Bolt M8x25 (8)
- Front Rail End Cover (Right) (1)
- Front Rail (1)
- Front Rail End Cover (Left) (1)
- Pointer Plate (2)
- Screw M6x8 (4)
- Bolt M10x45 (1)
- Nut M10 (1)
- Bolt M6x12 (1)
- Nut M6 (1)
- Spring Washer (1)
- Washer (1)
- Spring Plate (2)
- Thin Nut M10 (1)
- Screw M10 (1)
- Screw M10x17 (2)
- Nut M10 (2)
-
CX250: Requires eight hex bolts for installation into the open slot on the fence rail. The parts list for the CX250 also includes 42 distinct components, with some differences in quantities and bolt specifications compared to the CX230. Key components include:
- Rear Rail (1)
- Rear Rail End Cover (2)
- Bolt M8x30 (12)
- Nut M6 (24)
- Bolt M6x12 (6)
- Washer (14)
- Nut M6 (6)
- Fence End Cover (1)
- Nut M12 (2)
- Shaft (1)
- Bearing (1)
- Screw M6x12 (9)
- Fence Assembly (1)
- Side Plate (2)
- End Cover (4)
- Bolt M8x85 (1)
- Handle Cover (1)
- Handle Sleeve (1)
- Screw Rod 1 (1)
- Eccentric Wheel (1)
- Screw M8x8 (3)
- Compression Spring (1)
- Steel Ball (1)
- Scale Label(Left) (1)
- Screw (2)
- Bolt M8x30 (12)
- Front Rail End Cover (Right) (1)
- Front Rail (1)
- Front Rail End Cover (Left) (1)
- Pointer Plate (2)
- Screw M6x8 (4)
- Bolt M10x45 (1)
- Nut M10 (1)
- Bolt M6x40 (1)
- Nut M6 (1)
- Spring Washer (1)
- Washer (1)
- Spring Plate (2)
- Thin Nut M10 (1)
- Screw M10 (1)
- Screw M10*15 (2)
- Nut M10 (2)
Usage Features:
- Easy Installation: The manual provides clear, step-by-step instructions for installing the front and rear fence rails, including how to insert hex bolts and secure end caps.
- Quick Locking Mechanism: The fence features a lock lever that allows users to quickly secure the fence in position on the rails.
- Precise Scale and Cursors: A scale is provided for accurate measurement, with cursors to indicate the cutting position. The scale can be adjusted to ensure the "0" mark aligns with the cursor hairline for precise cuts.
- Adjustable Parallelism: The fence's parallelism to the miter slot can be adjusted using levelling set screws, ensuring consistent and accurate cuts. This is a critical feature for maintaining woodworking precision.
- Model-Specific Bolt Quantities: The manual specifies different bolt quantities for the CX230 (twelve hex bolts) and CX250 (eight hex bolts) during installation, indicating tailored designs for each model.
Maintenance Features:
- Adjustment Procedures: The manual outlines specific adjustment procedures for fence parallelism and scale installation/adjustment. These procedures are crucial for maintaining the accuracy and functionality of the fence system over time.
- Fence Parallelism Adjustment: Involves disconnecting power, aligning the fence with the miter slot, locking it, checking alignment, unlocking, flipping the fence, and adjusting set screws. This ensures the fence remains parallel to the blade.
- Scale Installation and Adjustment: Requires the machine to be off and unplugged, raising the blade, positioning the fence against the blade, carefully positioning the scale, aligning the "0" mark with the cursor hairline, and performing a test cut to verify accuracy.
- Parts Diagrams and Lists: Detailed exploded diagrams and comprehensive parts lists for both the CX230 and CX250 models are provided. These resources are invaluable for identifying specific components, facilitating ordering of replacement parts, and understanding the assembly of the fence system.
- Warranty Information: Craftex offers a 3-year limited warranty on parts and 90 days on labour for the original purchaser, covering defects in materials. This provides assurance for potential repairs or replacements. The warranty details the conditions for returns, repairs, and replacements, including requirements for proof of purchase and pre-authorization for returns. It also specifies that consumable products are not covered and outlines procedures for contacting Busy Bee Tools for parts and service.


 To Next Page

 General