8
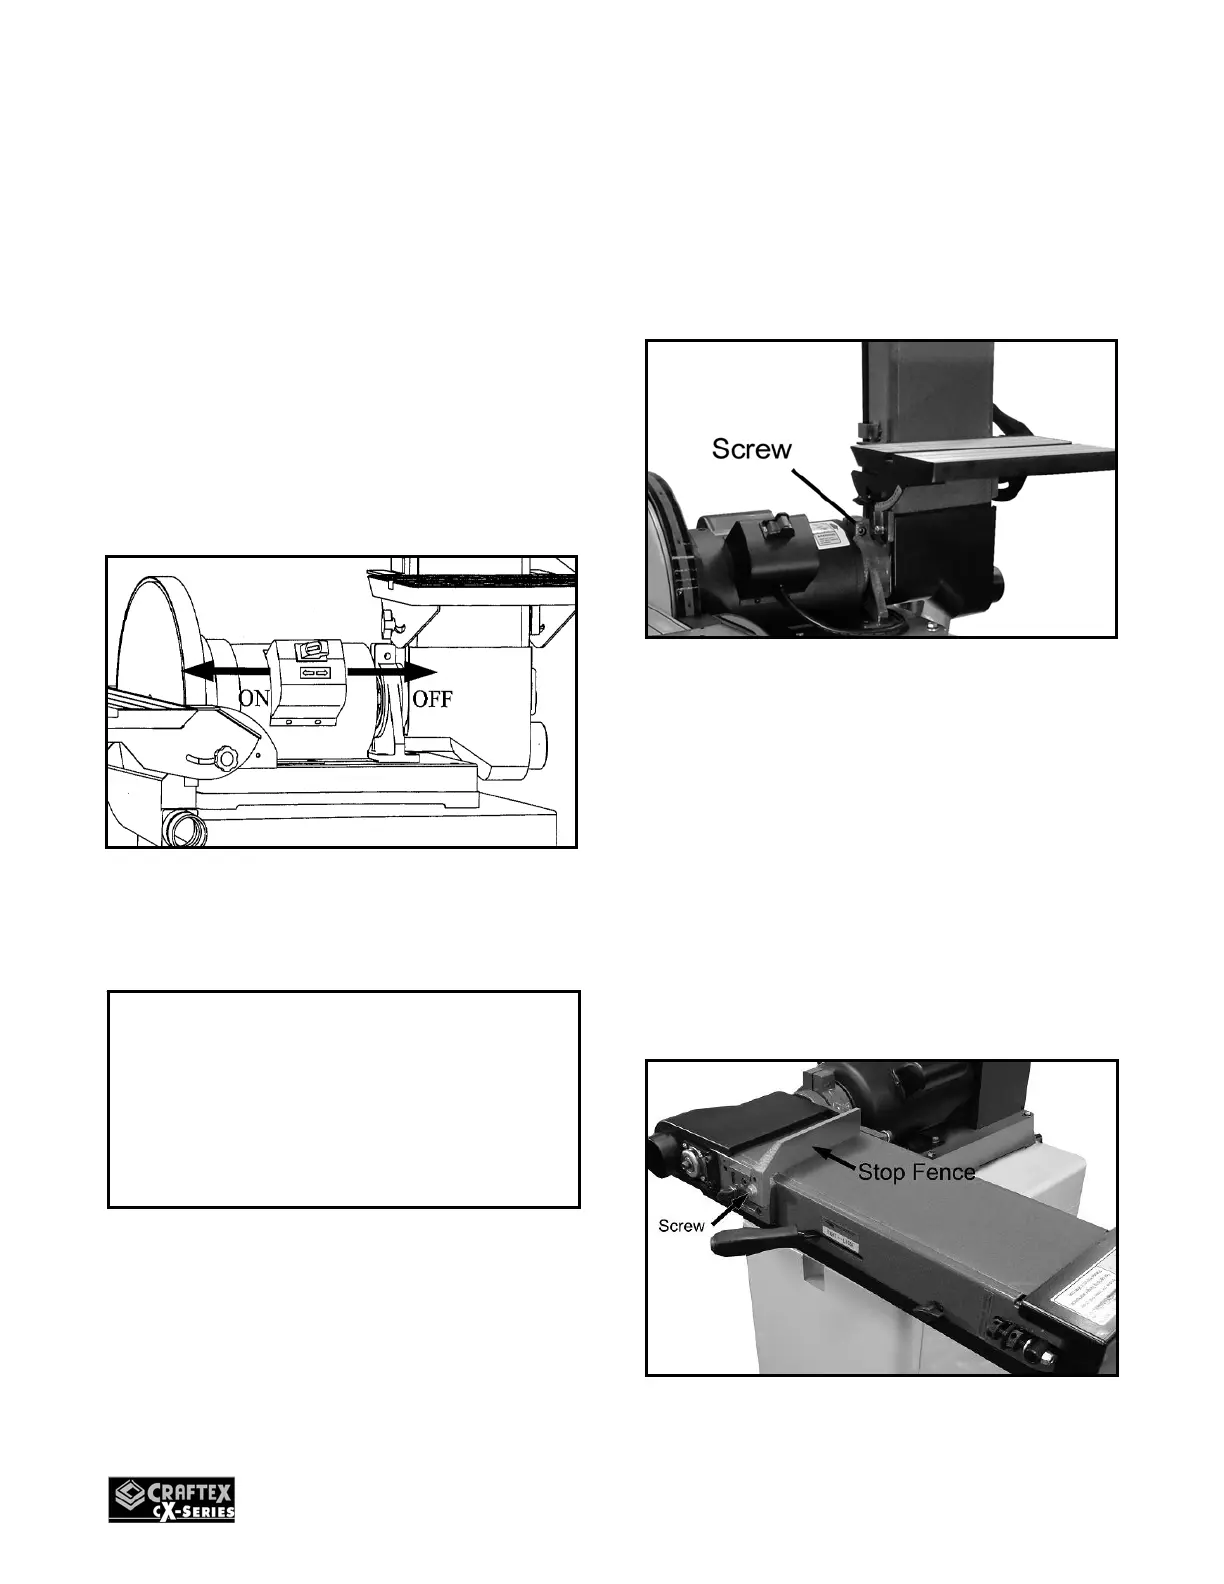
ON/OFF POWER SWITCH
CX501 is equipped with a rocker-type
power switch which starts and stops the
motor and is located on the junction box of
the motor. The switch features a removable
locking key to prevent unauthorized
operations. When the sander is not in use
for a long period of time, simply remove the
locking key and store it in a safe place.
To start the sander, insert the locking key
and shift the switch to the left.
Figure-2 On/Off Switch
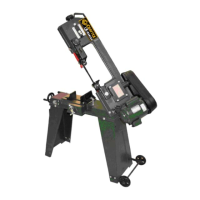
HORIZONTAL/VERTICAL
SANDING
1. Loosen the screw securing the sander
frame to the motor bracket using a 6
mm hexagonal wrench.
Figure-3 Removing the screw
2. Remove the belt sander table.
3. Move the belt sander to horizontal /
vertical position manually.
4. Tighten the screw securely after the belt
sander has been positioned horizontally
/ vertically.
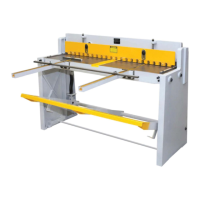
Make sure to mount the stop fence as
shown in figure-4 when performing flat
surface sanding.
Figure-4 Installing stop fence
IMPORTANT
To prevent any type of accidental
injuries, make sure the power switch is in
the OFF position before connecting the
sander to the power source.