34
A. Motherboard Firmware
• When the power is off, insert the TF card into the card slot of the device. The device
will automatically update when powered on. The buzzer will sound during the update
process. When the sound stops, the update is complete.
Do not turn off the power during the update process.
B. Laser Module Firmware
• When the power is off, insert the TF card into the card reader, then connect it to the
Type-C interface on top of the laser module via the A-to-C adapter. The device will
automatically update when powered on. The indicator lights on the laser module will
flash orange in sequence and turn solid green when the update is complete.
Do not turn off the power during the update process.
4. Software Installation & Use
• The device can work online via Type-C cable (LaserGRBL, LightBurn) or offline
via TF card (LightBurn). For detailed software tutorials, refer to the file in the TF
card.
Note: The TF card contains:
• Product manual, assembly instructions, camera calibration and alignment, parameter
recommendations, software operation tutorials, G-code, error codes description, GRBL
Configuration Parameters, FAQ, etc.
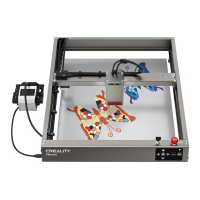
Control from PC
Connect the device to a PC via a USB-C cable. While controlling from the PC, you can also
control it through the Pause / Play button on the control panel of the device.
Steps:
1. Assemble the device.
2. Place the materials.
3. Focus the laser module using the multi-level fixed focus block.
4. Connect the device to the computer.
5. Install the required software (e.g., LaserGRBL or LightBurn).