9
ENGLISH
INSTALLATION GUIDE
• Be sure to remove all packing materials from the inside of the door.
Warning: Check oven for damage such as misaligned or bent door, damaged door seals and
sealing surface, broken or loose door hinges and latches, and dents inside cavity or on door.
If there is any damage, do not use the oven and contact qualied service personnel.
• This microwave oven must be placed on a at, stable surface to support its weight and the
heaviest foods that can be cooked in the oven.
• Do not locate the oven where heat, humidity or high humidity will be generated, or near
combustible materials.
• For proper operation, the oven must have sufcient airow. Leave a minimum of 20 cm of
free space required on the top surface of the oven and 5 cm on both sides. The back plate of
the microwave oven should be placed close to the wall. Do not cover or block the openings
of the appliance. Do not remove the legs.
• Do not use the oven without the glass plate, support and shaft in their correct positions.
• Make sure the power cord is not damaged and does not run under the oven or over any hot
or sharp surface.
• The plug must be easily accessible so that it can be easily unplugged in an emergency.
• Do not use the microwave oven outdoors.
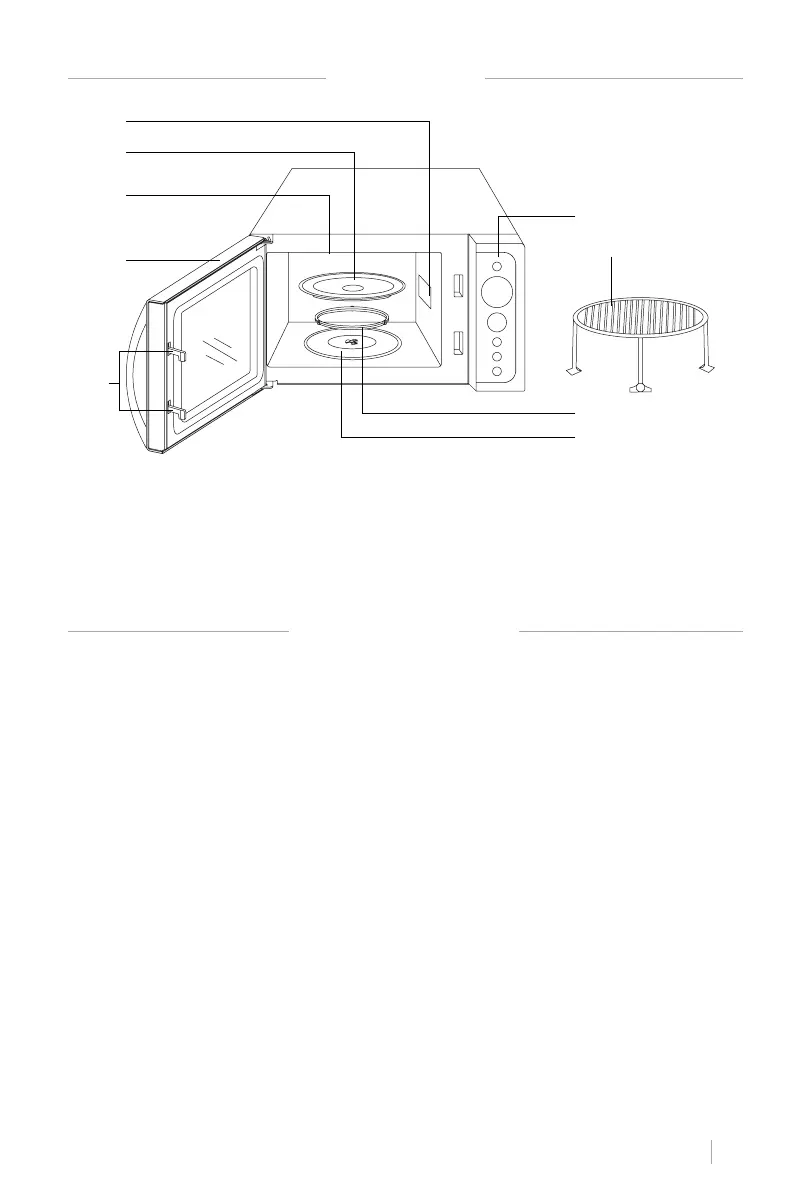
LIST OF PARTS
1. Waveguide
(Do not remove the
mica plate covering the
waveguide)
2. Glass tray
3. Grill
4. Door
5. Door security lock system
6. Control Panel
7. Metal grid for cooking
with grill
8. Rotating ring
9. Axis
1
2
3
4
5
6
8
9
7
 Loading...