Product Manual — Doc. 9368A DIN-1TSTAT8 • 11
Install the DIN-1TSTAT8
NOTE: Observe the following points when installing the DIN-1TSTAT8.
l
Use the DIN-1TSTAT8 in an electrical panel with DIN rail mounting provisions.
l
Mount the DIN-1TSTAT8 in a well-ventilated area.
l
Do not block venting holes.
l
Certain third-party DIN cabinets provide space for an informational label between
each DIN rail row. Crestron’s Engraver software (version 4.0 or later) can generate
appropriate labels for all Crestron DIN rail products.
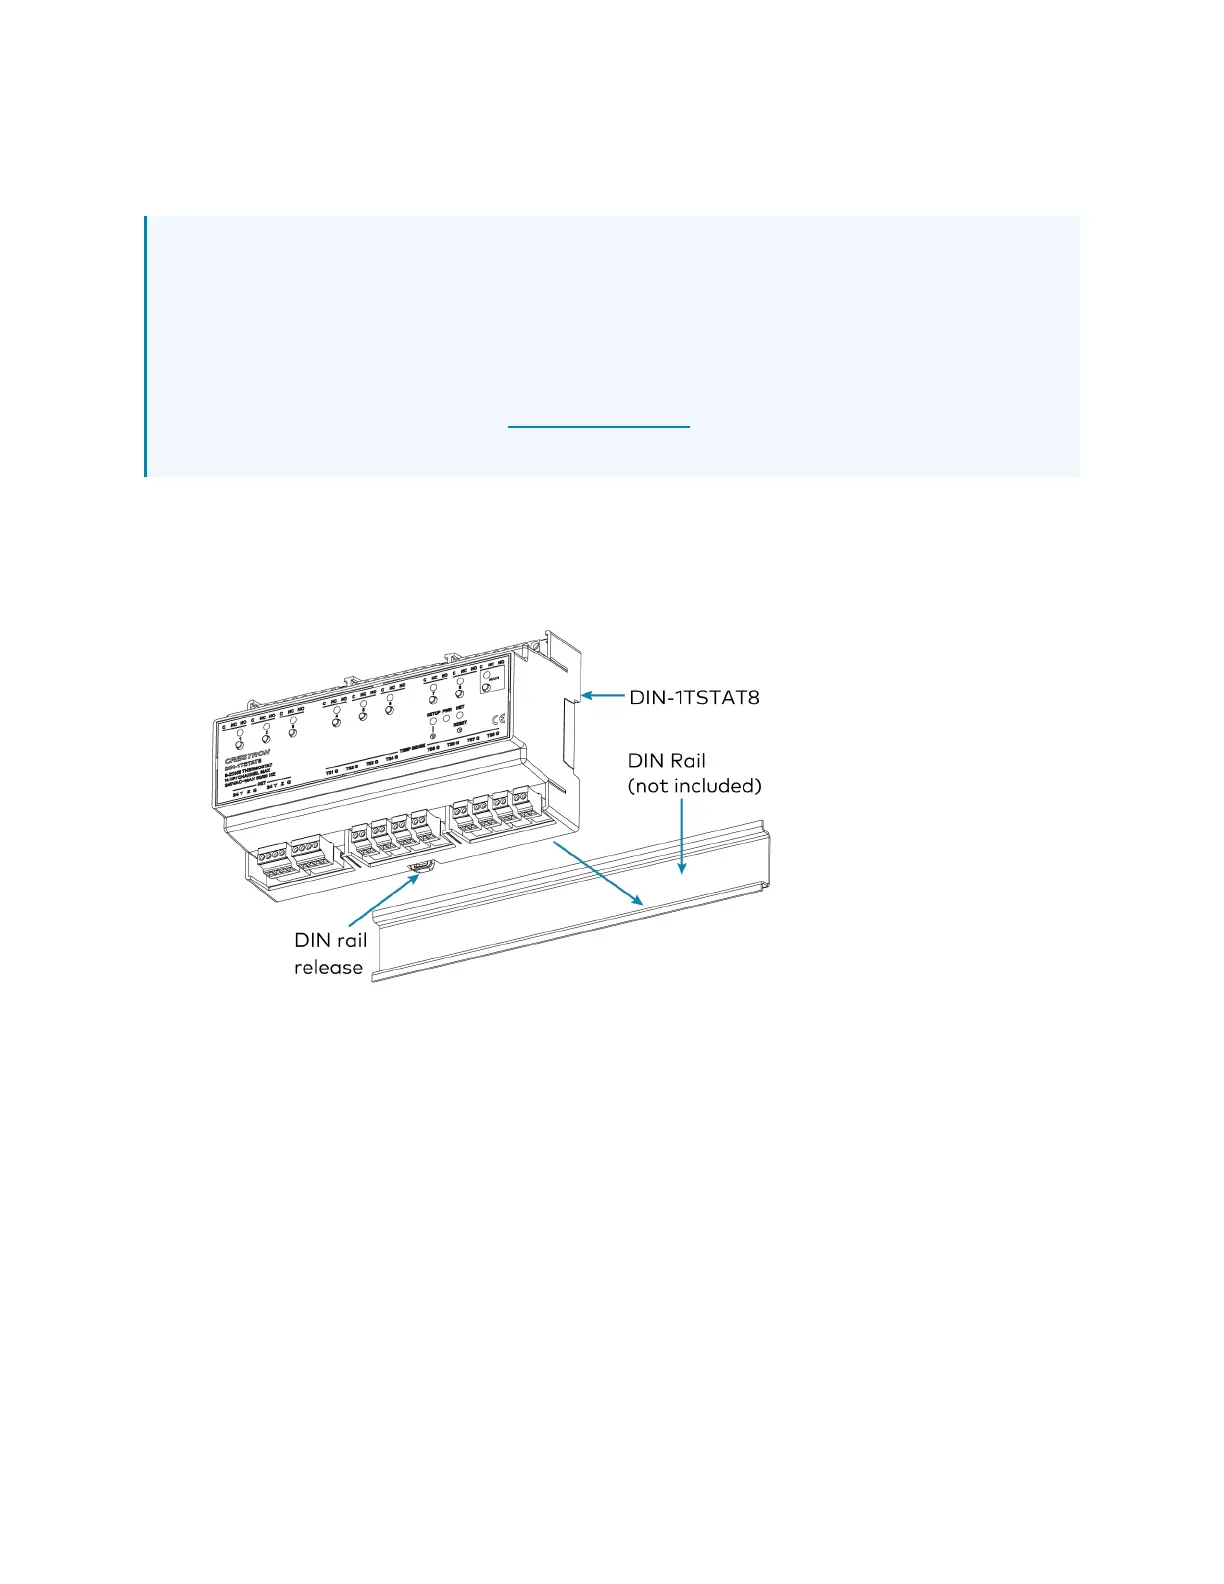
Mount the DIN-1TSTAT8 to the DIN rail
1. Hang the DIN-1TSTAT8 on the top of the DINrail.
2. Press the bottom toward the DINrail and snap it into place.
Remove the DIN-1TSTAT8 from the DINrail
1. Turn off power to the thermostat and the heating system.
2. Remove all connections from the DIN-1TSTAT8.
3. Use a small, flat-head screwdriver to pull the DIN rail release tab down.
4. Tilt the bottom of the DIN-1TSTAT8 away from the bottom of the DIN rail and then
remove the thermostat.