1.7
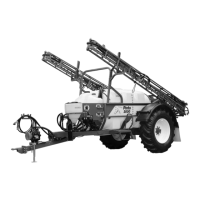
Pinto BT-POM 1212 - Revision 5
Section 1
Pre-Delivery Check List
1 Operator’s Manuals Supplied:
• Pinto Parts & Operators Manual ................
❑
• Auto Spray-Rate Controller Manual
(if fi tted) ...............................................................
❑
2 Trailer
• Undamaged ......................................................
❑
• Hitch height adjusted .....................................
❑
• Hitch Jack lubricated ......................................
❑
• Axle adjustment bolts tight (if applicable)
❑
• Axle nut adjustment, split pin in place ......
❑
• Lubricate spring rockers (if applicable).....
❑
• Check mudguards (if fi tted) ..........................
❑
• Check paint .......................................................
❑
3 Wheels & Hubs:
• Greased .............................................................
❑
• Bearings adjusted ...........................................
❑
• Split pin and dust caps in place .................
❑
• Wheel nuts tight & threads greased .........
❑
• Check tyre pressure .......................................
❑
4 Tank
• Undamaged ......................................................
❑
• Agitator adjusted correctly .........................
❑
• Check main lid opens and seals
shut correctly ....................................................
❑
• Basket strainer in place .................................
❑
5 Check All Tank Fittings Are Sealed
• Agitators .............................................................
❑
• Sump outlets .....................................................
❑
• Tank rinse nozzle ............................................
❑
6 Boom & Lift Device
• Undamaged ......................................................
❑
• Check hydraulic height adjustment ...........
❑
• Check boom mounting bolts tight ..............
❑
• Unfold the boom, and ....................................
❑
• Align wing sections ..................................
❑
• Align wing extensions .............................
❑
• Align balancing device ...........................
❑
• Adjust sliding surfaces ...........................
❑
• Grease the lift ..................................................
❑
• Check nozzle spacings .................................
❑
• Check nozzle mountings tight ....................
❑
• Check all pins in place ..................................
❑
• Check shock absorber springs (if fi tted) .
❑
• Lubricate boom hinge points ......................
❑
• Fold boom to transport po si tion, and
• Check transport cradles ........................
❑
• Check that hoses are not kinked or
jammed on folding ...................................
❑
7 Power Drive
(a) PTO
• Check quick release pins operate
easily and lock into place .............................
❑
• Check universal joints work correctly ......
❑
• Adjust PTO length to suit tractor ...............
❑
• Grease telescopic sliding shaft ..................
❑
• Grease universal joints .................................
❑
• Check safety shields are in place .............
❑
(b) Hydraulic Pump Drive & Filling Pump
(if fi tted)
• Check pressure & return lines are
identifi ed for Hydraulic pump drive .........
❑
• Check revs set correctly for hydraulic
pump drive ..............................................
❑
• Check liquid pump operates correctly ....
❑
• Check fi lling pump operation &
control tap ...............................................
❑
8 Pump
• Check mountings ............................................
❑
• Check oil level ..................................................
❑
• Check air chamber pressure -
70-100kPa (10-15 psi) ..................................
❑
• Check operation ..............................................
❑
9 Suction Lines
• Undamaged ......................................................
❑
• Hoses - no kinks or restrictions .................
❑
• All joins sealed (no air leaks) ......................
❑
• Filter clean & sealed ......................................
❑
10 Pressure Lines
• Undamaged ......................................................
❑
• Hoses - no kinks or restrictions .................
❑
• All hoses sealed (no leakages) ..................
❑
• Filter clean & sealed ......................................
❑
11 Bottom-Fill (Spray/Flush Tanks)
• Check bottom-fi ll operates ...........................
❑
• Filter clean & sealed ......................................
❑
• Check hoses properly sealed .....................
❑
• Check caps & plugs in place ......................
❑
12 Nozzles
• Undamaged ......................................................
❑
• Nozzle fi lters clean .........................................
❑
• Nozzles correct type throughout ...............
❑
• Nozzle caps sealed (no leakages) ...........
❑
• Non-drip diaphragms working ....................
❑
• Check fenceline sprayer operation (if fi tted)
❑
13 Agitation
• Check agitator works correctly ..................
❑
• Check hoses are properly sealed .............
❑
14 Chem-E-Flush (if fi tted)
• Check unit is undamaged ............................
❑
• Check hoses/fi ttings seal correctly ...........
❑
• Check Chem-E-Flush operation ................
❑
15 Chemical Probe (if fi tted)
• Undamaged ......................................................
❑
• Check fi ttings seal correctly ........................
❑
• Check probe operation .................................
❑
• Check caps & plugs in place .....................
❑
16 Electric Controls (Standard)
• Check installation ...........................................
❑
• Check battery connection ............................
❑
• Fully check controls operation ...................
❑
17 Auto Spray-Rate Controller (if fi tted)
• Check installation ...........................................
❑
• Check battery connection ............................
❑
• Calibrate controller .........................................
❑
• Fully check controller operation .................
❑
18 Fresh Water & Flushing Tanks
• Undamaged .....................................................
❑
• Check fi ttings ...................................................
❑
• Check operation .............................................
❑
19 Main Control & Drain Valves
• Check there are no leaks ............................
❑
• Check all valves open & close easily ......
❑
20 Foam Marker (if fi tted)
• Check installation ...........................................
❑
• Check battery connection ............................
❑
• Check foam tank mountings .......................
❑
• Hoses - no kinks or restrictions .................
❑
• All joins sealed (no air leaks) .....................
❑
• Check fi lters are clean .................................
❑
• Check foam marker & in-cab control
operation ...........................................................
❑
21 Gooseneck Option (if fi tted)
• Gooseneck correctly fi tted to vehicle ......
❑
• Electric/hydraulic power pack & loom
fi tted correctly to vehicle ..............................
❑
• Electric brakes working & adjusted
correctly (if fi tted) ............................................
❑
• Gooseneck complies with State &
Federal Road Laws .......................................
❑
• Honda pump drive fully operational & oil
level checked ...................................................
❑
22 Decals
• Check all decals are in place .....................
❑
The Pre-Delivery Check List must be completed by the Dealer & signed by both the Dealer and the Owner, and the white copy returned by the Dealer to Croplands.
✔✔✔✔
Tick each box to affi rm completion
DEALER:
Dealership Name: (Print)
.................................................................................
Address: ..................................................................
.................................................................................
.......................................... Postcode: ......................
Signature of Dealer Representative
.................................................................................
Date: .............................
OWNER: Farmer ❑ Contractor ❑
Owner's Name: (Print)
.................................................................................
Address: ..................................................................
.................................................................................
.......................................... Postcode: ......................
Phone: .....................................................................
Mobile: .....................................................................
Email: ......................................................................
Signature of Owner
.................................................................................
Date: .............................
Tick each box to affi rm completion Tick each box to affi rm completion Tick each box to affi rm completion
Top Copy (White) - Forward to Croplands; Second Copy (Yellow) - Dealer’s Copy; Third Copy (Blue) - Owner’s Copy.
✔
Tick appropriate box


 To Next Page
 Loading...