6. Stopping machine:
A. Electric motor powered units:
a. Move the power engagement clutch to
the left to disengage the mixing ele-
ments.
b. Empty the drum of the mortar mixture.
c. Unlatch and open the hood.
d. Turn the power switch OFF.
e. Close and latch the hood.
B. Gas engine powered units:
a. Move the power engagement clutch to
the left to disengage the mixing ele-
ments.
b. Empty the drum of the mortar mixture.
c. Unlatch and open the hood.
d. Move the throttle to its low idle position.
e. Stop the engine by turning the switch
OFF or depressing the kill switch or strap.
f. Close and secure the engine compart-
ment hood.
7. Emergency Stopping:
If an emergency arises, stop the machine by mov-
ing the power engagement clutch to the left to
disengage the mixing elements and then pushing
the kill switch in.
8. Machine placement:
Always place the Mixer in a location so the opera-
tor has easy access to the mixture ingredients
21
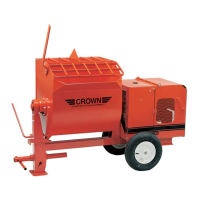
Machine is shown with engine
hood open for illustrative purposes
only. Never operate with hood
open.
WARNING
Power Switch
Fig. 9 STOPPING
External Emergency Stop Switch (Typical)
NOTE
Add sand a little at a time until
the desired consistency is
obtained.
when adding to the mixing drum. Always position to
provide adequate clearance for the machine or
equipment removing the concrete mixture from the
mixing drum. On the electric motor models, route
the power cord out of the way to prevent damage.
Do not run the mixture in an explosive atmosphere
or in a poorly ventilated or enclosed area.
9. Filling:
When mixing mortar, follow this procedure:
a. Clear the working area of unauthorized person-
nel.
b. Start the motor or engine.
c. Engage the mixing elements.
d. Add half the required amount of water into the
mixing drum.
e. Add half the required amount of sand into the
drum.
f. Add the required mortar mix (cement, lime,
etc.).
g. Add the cement required for the batch.
h. Add the rest of the water.
i. Add the rest of the sand until the desired work-
ability is obtained.
j. Mix until there is an even consistency
throughout the mixture. Look into the drum
and watch until the mixture is the same
color throughout. This means the mortar
mix is evenly distributed throughout the
mixture.
k. Disengage the mixing clutch.
l. Release the drum lock and slowly tilt the
drum down to discharge the mixture.
m. Raise the hinged grill out of the way when
discharging the mixture.
n. Move the drum back into its mixing position
and lock. Immediately engage the mixing
clutch and add half the water for the next
batch. This will help to keep the drum and
mixing elements clean and prevent lumps
from forming in the mortar.