700 Series Installation Instructions TES1589 Iss.B Page 6
FITTING THE KEYBOARD AND MOUSE
To fit the Keyboard, Mouse and Monitor follow the procedure detailed below, observing the
correct sequence of actions:
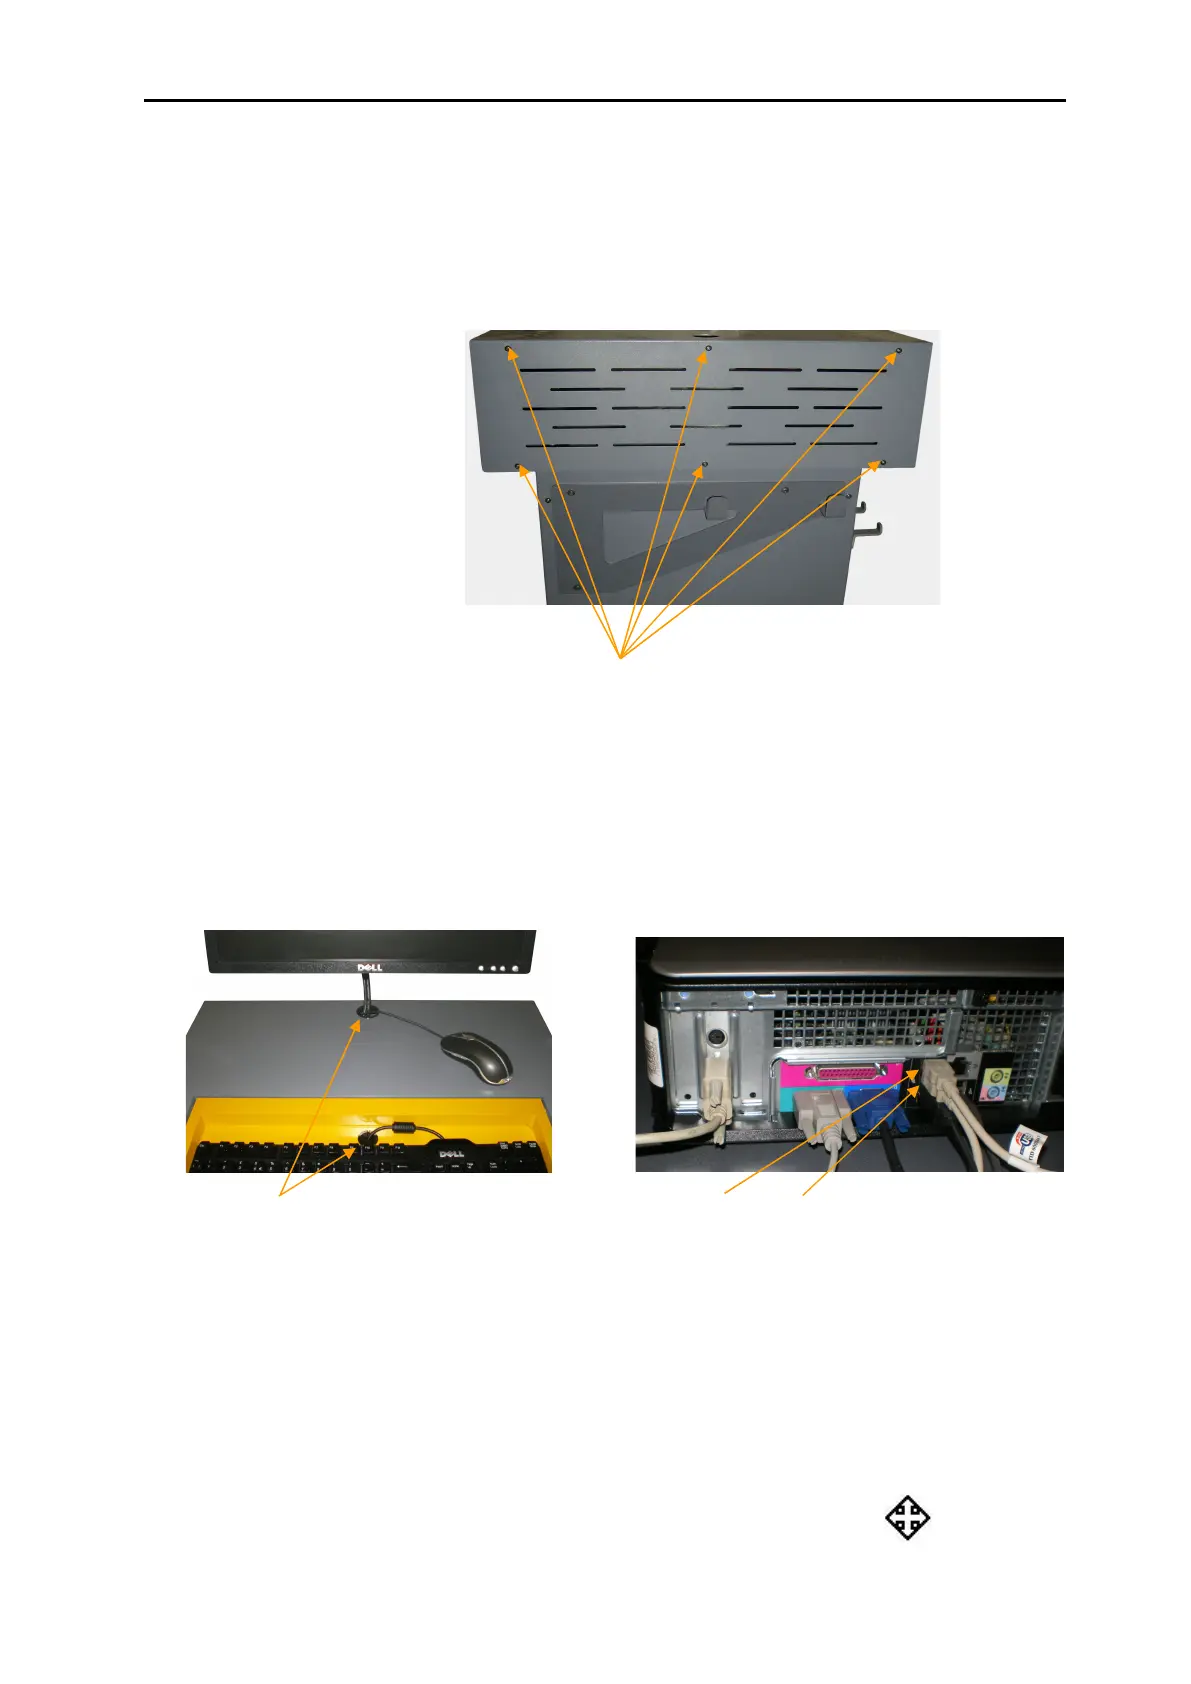
1. Remove the back panel as shown in Fig. 1 by unscrewing the 6 earth nib Philips screws.
2. Place the keyboard in the recessed tray of the trolley lid. Feed the cable through the
holes behind the keyboard (Fig.2), over the top of the PC and plug in to the USB
connectors on the back of the PC (Fig.3). The keyboard should be secured to the tray
using the supplied Velcro strips.
Feed the mouse cable through the hole at the top of the trolley (Fig.2),
and plug in to the USB connectors on the back of the PC (Fig.3).
Note: If a wireless mouse has been provided the USB receiver should be positioned in the
lower of the two USB ports on the front of the PC.
The wireless mouse can be used in conjunction with the standard mouse.
When in use the mouse pointer can be changed to a larger format for a better distance
visibility of the pointer. To change the pointer do the following from the main desktop:
Select Start/Control Panel/Mouse/Pointers
then double-click on ‘Normal Select’ and select a larger pointer.
We suggest the following pointer for high visibility at a distance:
Keyboard Mouse
Connectors
Fig. 3
Keyboard & Mouse
Cable holes
Fig. 2
Unscrew the six earth nib screws and remove the back panel.
Fig. 1
 Loading...