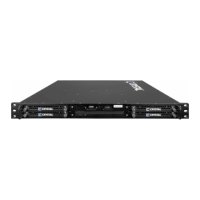
RS112 Rugged Server
Using Jonathan Rails
To install RS112 with Jonathan Rails in an equipment rack, complete the following
steps below and see Figure 3 on the following page.
1.
Attach a bracket (see #6 in Figure 3) to the smooth side of the Jonathan rail that has four
or more holes in a row (see #9 in Figure 3). There are five slots on each bracket; when
attaching to the rail side with the row of holes, place the first screw in the second slit back
from the ear. Make sure the arrow marking is pointing downward.
2.
Slowly extend the rail to see the screw access hole that will allow attachment of the four
8-32 x 0.313 screws with four 8-32 X 0.344 keps nuts (see #10 in Figure 3). Place a screw
in the first hole and slide the rail to the next hole to insert a screw. Continue until all four
screws have been inserted. If the rail slides too far before placing a screw in one of the
holes, it may lock into position. Unlock rail by pressing down on the lock mechanism (see
# 11 in Figure 3).
3.
Rail should be fully extended after placing the four screws in the holes and securing to
the bracket.
4.
Set the appropriate length and attach two 8-32 x 0.313 screws with two kep nuts in the
two longer slits provided. Make sure the arrow marking is pointed downward. Keep rail
fully extended (see # 1 & 2 in Figure 3).
5.
Repeat steps 1-4 for the second rail.
6.
With rails fully extended, locate the four holes used to attach the rails to each side of the
server. Make sure the rails are positioned with the arrow markings pointed downward.
7.
Secure to the server using four 8-32 x 0.313 screws for each side.
8.
An assistant may be needed: Attach the server into the rack mount by installing eight
10-32 x 0.50 screws into the top and bottom holes of the bracket ears (two for front
right; two for front left; two for back right and two for back left bracket holes) (see # 3,
6, 7 in Figure 3).
9.
To secure the server when transporting or when extension of the chassis from the rack
mount is not necessary, screw two 10-32 x screws in the middle hole on the front
bracket ears (see #4 in Figure 3).
The images on the following page may not depict the product received.
RS112 Rugged Server User Guide Page 12 of 26