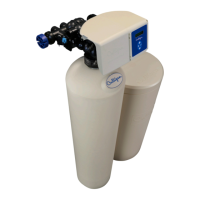
42 Culligan® CSM Series Softeners
42 Cat. No. 01016370
Multiple Unit Communication Setup
Anytime two or more units are connected, each must have a specific ID # assigned. When new, a circuit board does not
have an ID #. Once used, a board will have an ID # assigned and saved in EEPROM. Please refer to the appropriate
paragraph concerning the establishment or re-establishment of a board ID#.
Boards With No ID# Established (Initial Programming)
1. Verify communication cable is properly connected to each board in the system.
2. One (and only one) circuit board in the system should have the #9 DIP switch (MASTER) setting turn to the ON
position.
3. On the Master unit, press Statistics once and then press “-” until “Unit 1 Master” is displayed. Wait a few sec-
onds for all other units to display, “Set ID”. This will be followed by the term “take 2” in the display.
4. Press Status on the second unit. The second unit display will show “ID 2” which indicates it now has a recog-
nized ID#. Once this occurs, the Master unit will display “Unit 2 Master” and all remaining units needing an ID #
will display “take 3”.
5. Repeat step four for each unit in the system and until all units have ID#’s and the Master unit shows all other
units accounted for.
6. When done assigning ID #’s, press Statistics once on the Master unit. This returns all other controllers back to
a time clock display.
7. The Master unit can now be programmed.
Establishing a New ID#
When adding a board to a new or existing system follow these steps to re-establish an ID# if the existing ID# matches that
of another board. (Multiple boards with identical ID#’s will initiate an error code of “ERR 4” in the display of the offending
board).
1. “ERR 4” will be displayed. On this unit, press and hold Status for (10) seconds. This will reset the board,
remove the error from the display and erase the ID# from EEPROM.
2. The board can now accept a new ID#.
3. Press Statistics once on the Master unit, then press “-” until “Unit # Master” is displayed (‘#’ represents how
many units are connected). After a few moments all units that require an ID# will display “Set ID” followed by
the display, “take #”. Those units that have an ID# will display “net ID” followed by “ID#”.
4. Pressing Status on the unit that requires an ID# will assign one.
5. Repeat the process for each unit requiring an ID#.
6. When done assigning ID #’s, press Statistics once on the Master unit. This returns all other controllers back to
a time clock display.
7. The Master unit can now be programmed.
Single Unit Communication Set Up
Erasing an ID# from a board to be used to operate a single unit.
1. If attached, disconnect communication cable from the desired unit. (If that unit happens to be the one with the
#9 DIP switch ON, then switch it off).
2. Wait 60 seconds (If the MASTER icon was indicated in the display, it will disappear).
3. Press the Statistics key once and then press “-” until “Unit 1 MASTER” is displayed.
4. Press and hold the Regeneration key for (3) seconds. The unit will home and the ID# will have been success-
fully erased.
 Loading...

