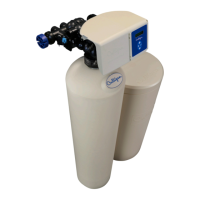
56 Culligan® CSM Series Softeners
56 Cat. No. 01016370
Before Leaving the Installation Site
1. Retighten the nuts on all hand-hole covers, if applicable.
2. Clean up the unit and the installation site, removing any soldering or pipe threading residues from the equip-
ment with a damp towel.
3. For units with steel tanks, place the Culligan label (packed with the media tank) on the front of the tank.
4. Explain the operation of the softener and bypass valves to the customer.
5. Advise the customer to check and replenish the salt supply regularly.
Wrap Up Checklist
Once you have completed the installation the system is ready to be placed in service. Prior to placing the system in ser-
vice review the following checklist to be sure the system is properly installed.
CHECK LIST
The media tank(s) has been properly loaded with gravel and media.
Retighten the nuts on all hand-hole covers, if applicable. The drain line has been properly installed.
All option kits have been properly installed.
The system has been properly piped and tubed.
Air has been bled from the MVP controller pilot valve tubing and the system has been properly pressurized.
Each media tank has been backwashed manually.
The MVP controller(s) have been correctly and completely wired, including differential pressure switches if
equipped.
All MVP controllers have been properly programmed and are active (power on).
All manual isolation valves are open and system by-pass valves are closed.
Clean up the unit and the installation site, removing any soldering or pipe threading residues from the equipment
with a damp towel.
For units with steel tanks, place the Culligan label (packed with the media tank) on the front of the tank.
Explain the operation of the system and the Suggested Preventative Maintenance Inspection Schedule (page
58) to the customer.
 Loading...
