68 Culligan® CSM Series Softeners
68 Cat. No. 01016370
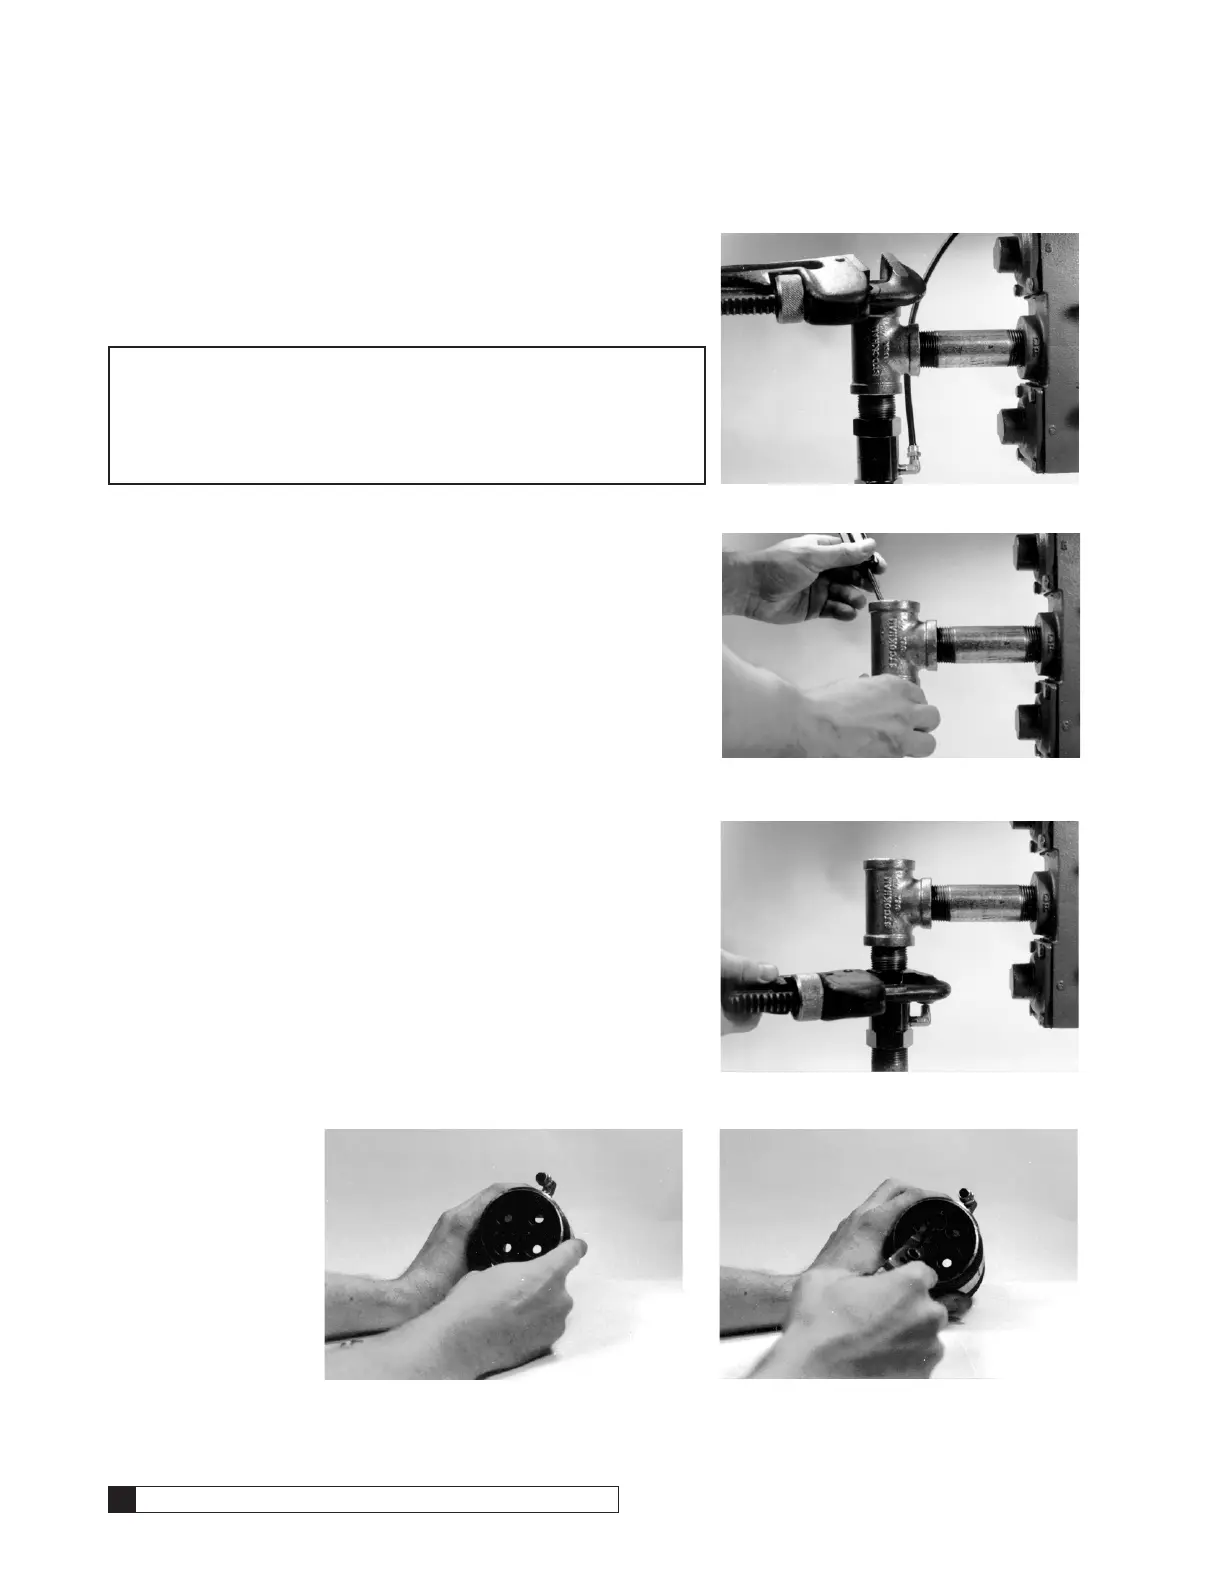
Backwash Flow Controller Disassembly
1. Remove clean-out plug and inspect the flow washer area (Figure
108).
2. Remove any foreign material lodged in or near the flow washer(s)
(Figure 109).
NOTE AVOID USING A SHARP OBJECT WHICH MIGHT CUT OR
DAMAGE THE RUBBER FLOW WASHER(S). SHOULD
IT NOT BE POSSIBLE TO CLEAR THE CONTROLLER
THROUGH THE CLEAN OUT PLUG, REMOVAL OF THE
FLOW CONTROL NIPPLE WILL BE REQUIRED TO GAIN
BETTER ACCESS TO THE FLOW WASHER AREA.
If removal of the Backwash Flow Control nipple is necessary, disconnect
the flexible tubing from the compression fitting. Carefully separate the nipple
from both the drain line and the Brunermatic valve (Figure 110). Inspect and
clean flow washer(s) (Figure 111 and Figure 112).
Backwash Flow Controller Reassembly
1. When replacing the Backwash Flow Control nipple, make certain
the compression fitting is downstream of the flow washer.
2. Connect the flexible tubing to the compression fitting located in the
side of the Backwash Flow Control nipple.
3. Insert and tighten clean-out plug. (Figure 108)
Figure 108.
Figure 109.
Figure 110.
Figure 111.
Figure 112.

 Loading...


