pump away from the engine slowly when the
flow of fuel decreases. Fig. 10 and ultimately
the flow nearly stops, giving a drop in 15
to 20 seconds. Fig. 11. Check flywheel
position once again to make sure that the
yellow mark (18 before TDC) on the
flywheel aligns with the pointer.
9. Tighten fuel injection pump bolts (4 numbers)
carefully so as not to disturb the position
of the fuel injection pump.
10.Turn crankshaft in the reverse direction by
approx. 30 degrees. The fuel will start flowing
freely. Then slowly turn crankshaft in the
forward direction till the fuel flow nearly
stops and a drop forms on the swan
neck in 15 to 20 seconds.
The position should coincide with 20 degrees
before TDC mark on flywheel aligning with
the pointer. Fig. 12. This check confirms that
the fuel injection timing has been correctly set.
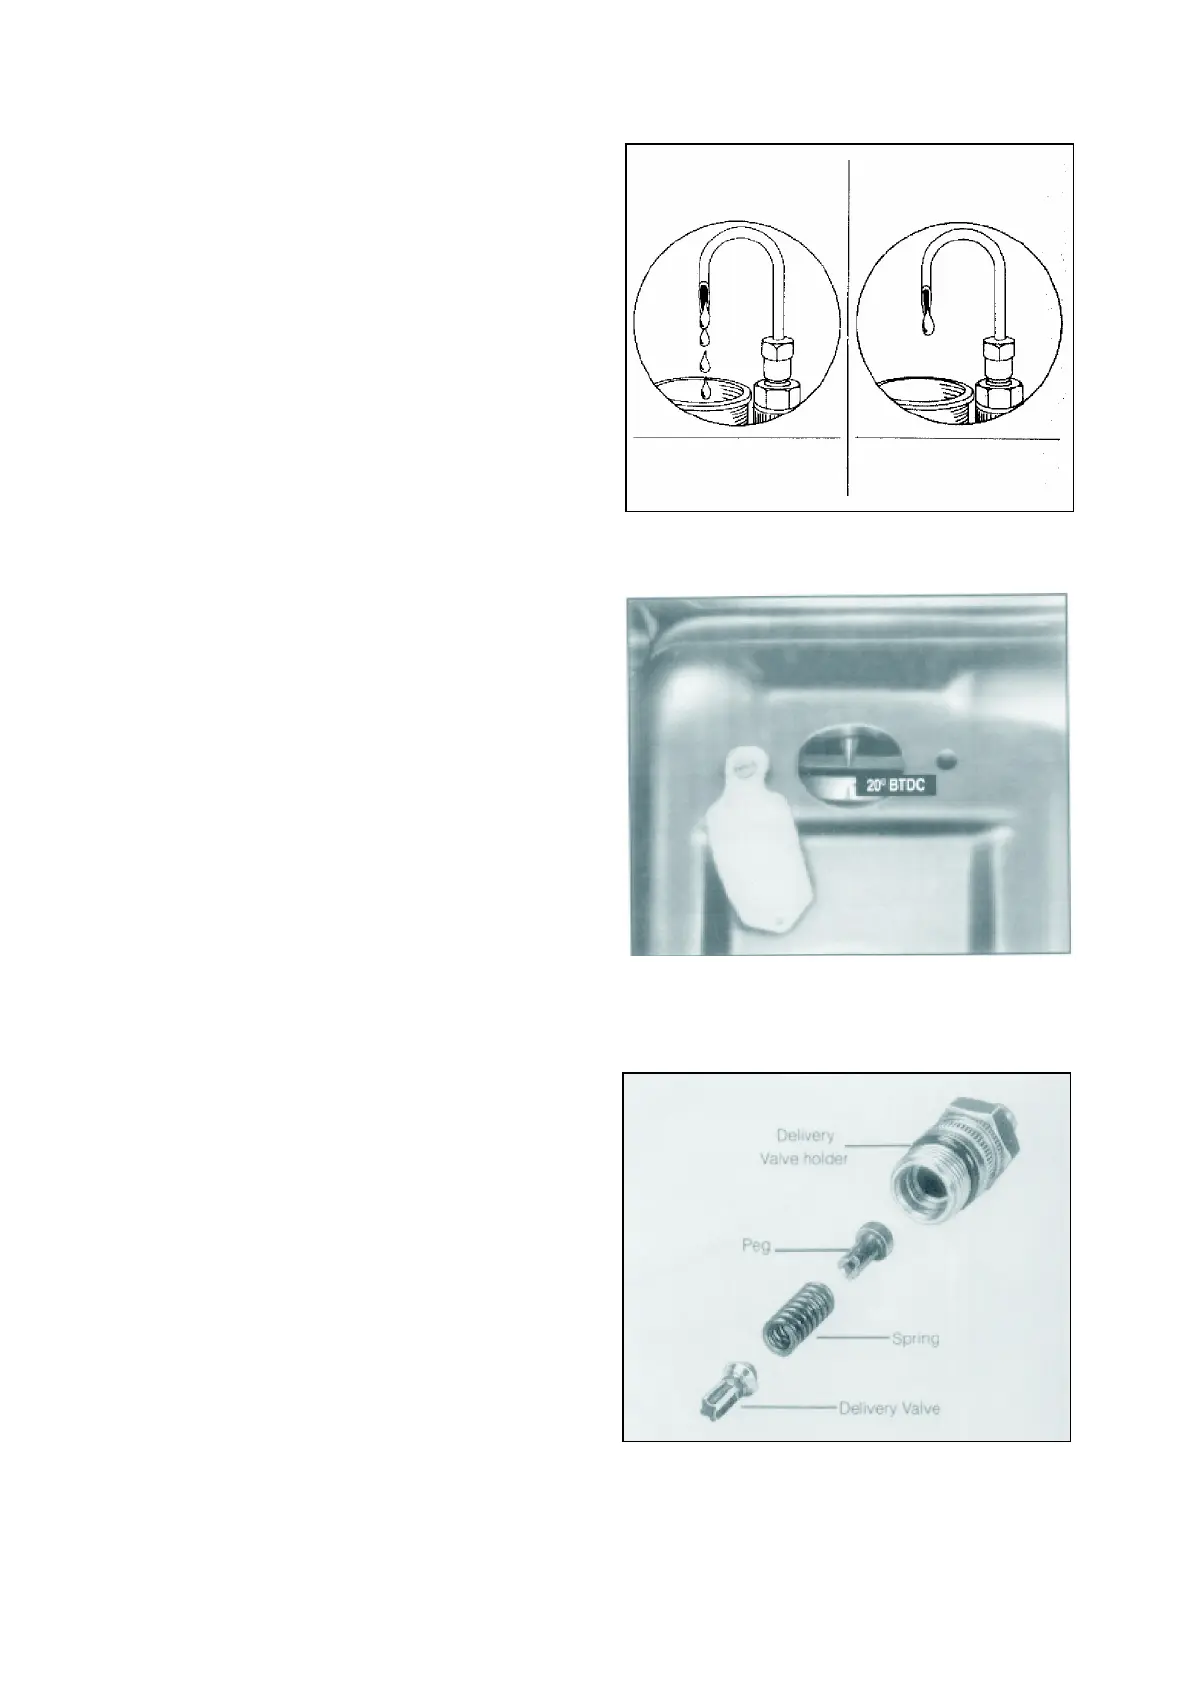
11. Disconnect swan neck and fit back delivery
valve, spring and peg after cleaning them.
Fig. 13. Tighten delivery valve holder to 4.5
mkg. Fit delivery valve holder clamps.
12.Refit timing gear housing plug and clutch
housing inspection cover.
13.Disconnect diesel bowl from the fuel injection
pump gallery.
14. Connect fuel hoses to the feed pump and
fuel injection pump main gallery.
15.Connect high pressure lines to injection
pumps. Tighten cap nuts to 2.5 mkg. Ensure
that the high pressure lines are free from
tension. If necessary, align high pressure lines
with special tools, Part No 312 580 0085.
16.Bleed the fuel system as follows. Unscrew
and operate hand primer (up and down
strokes) until resistance is felt. Loosen the
bleeding screw on the fuel filter and allow air
to escape. Operate the primer slowly with the
bleeding screw open till bubble free fuel starts
flowing. Tighten the bleeding screw. Bleed the
fuel injection pump gallery in the same
manner and tighten bleeding screw. Operate
the hand primer for a few strokes. Check for
Fig. 10 Fig. 11
Fig. 12
Fig. 13
Workshop Manual
S3.8 Engine
A030K288 (Issue 2)
01-2010
 Loading...