19
5. TROUBLESHOOTING
To maximize the life of this meter, please read all
instructions carefully and review Safety Precautions
on inside front cover of this manual. Most minor prob-
lems can be resolved by removing all power for at least
10 seconds and then reconnecting.
Problem Possible Causes
No Display Power not connected or too low.
Display Present, but Input (or enable) wire not connected.
counter does not activate. Start Input not connected.
Input voltage not reaching specified
minimum signal level.
LED not turning ON during Switch or switch-connection faulty.
activation condition.
6. MAINTENANCE
Curtis Model 700 & 732 Series hour meters are not serviceable
in the field. Units returned to the factory within the warranty
period (see inside backcover) will be replaced without charge.
!
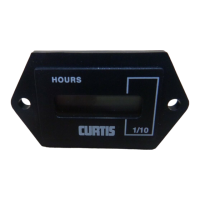
732 Hour Meter (DC Only)
To Activate Display: Apply DC+ to pin 1 and DC- to pin 2.
To Activate LED: Apply DC+ (for active-high models) or DC-
(for active-low models) to pin 3 during indicator-on condition.
To Activate Elapsed Time: For models without separate
enable option - elapsed time is activated when power is
applied to pins 1 & 2. For models with enable option - apply
signal to pin 4. Note: Power (to pins 1 & 2) must be applied
before or at the same time as signal to pin 4.
Operation: Apply DC+ to pin 4 for 1 millisecond minimum.
Activation (accumulation) of elapsed time is indicated by the
hourglass icon flashing. Time accumulated will be stored into
non-volatile memory when power is removed, if power (to pins
1 & 2) has been applied for the minimum of 5 seconds.
Reset: (for resettable models), Apply DC+ to pin 4 for
1
/2 sec-
ond minimum, while power to pins 1 & 2 has been applied for
5 seconds minimum. Note: The reset voltage must be at the
same level as the voltage used to power the unit.
18
 Loading...