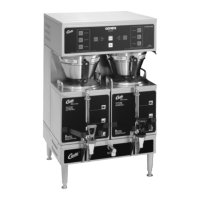
I. Instructions for replacing a valve:
A. Shutoffthewaterlinerunningintotheunit.
B. Drainapproximately½to¾gallonofwaterfromthetankbypressingonofthedispense
buttons.Thiswillinsurethatthewaterlevelisbelowthelevelofthevalves.Removethewiresand
watertubingfromthedefectivevalveandpullitfromthesiliconetting.
C. Disconnectthepowercordorturnofftheunitatthetoggleswitchbehindtheunit.
E. Beforeinstallingonthetank,makeaninitialadjustmentwiththevalveoffofthetank.
1. Loosenthescrewonthemetalguard.Rotateawayfromtheadjustmentscrew(g.1.).
2. Carefully,turnowadjustmentscrewclockwiseallthewayin(seegure2.).Observerestrictor
position.Donotovertighten.
3. Nowturntheowadjustmentscrewcounterclockwisethree[3]turns(or1½turnsfromthefully
openposition).
4. Replacethemetalguard.
5. Installthevalveonthetank,attachingwiresandsiliconetube.Pressthevalvefullyintothe
ttingontheheatingtank.
II. Dump valve, water ow adjustment:
TheWaterowispresettoensureoptimummixingandproperchamberrinsing.Thevalvescurrentlyinstalledonyourunithavebeenset
atthefactoryandshouldnotrequireadjusting.Thefactoryowratesettingis8oz.ofwaterin10seconds(or0.8oz./sec.).
4
Figure 2. Restrictor Closed.
Dump Valve Replacement
Werecommendthatyouregulatethewaterowinthevalve ONLYwhenreplacingavalve.
Figure 1. Adjustment
WARNING: As with all electrical equipment, caution must be taken to avoid electrical shock. Be
sure the power cord is disconnected before removing components. The following steps will also
involve working near hot surfaces.
Beforemountingawhipperplate,placeadabof
foodgradelubricantintherearhole of the seal.
WhipperPlateReplacement
Shaftsealsshouldbereplacedwiththegrovedsidefacingoutward.
Replacing Film in Light Box
1.TurnOFFpowerbyunpluggingthepowercord.
2.Openthefrontdoorandremovethesixscrewsthatattachthelightbox.
3.Pulloffthelightboxassemblyfromthedoor.Detachatthehookatthetopofthelightbox(illustra-
tion,rightitem1).
4.Takeoutoldlm,unhookingitfromthebottomtabsandslidingitoutoftheframe.
5.Insertthenewlm,slideitintotheframeandhookitunderthetabstosecureit(seeillustration
below).
6.Returnthelightboxtothefrontdoor.Frominsidethedoor,insertthesixscrewsthatwereremoved
instep#2.
7.Closethefrontdoorandpluginthepowercord.Thelightboxshouldcomeon.
8.Checkthatthelmliesatandthereisnolightleakingfromtheedges.Ifokay,theCurtis
CAFEPCunitisreadytouse.