Conventions
WARNINGS – To help avoid personal injury
Important Notes/Cautions – from the factory
Sanitation Requirements
1. Connectawaterlinefromyourfacilitytothe1/4”arewaterinletttingofthevalve,behindthemachine.Watervolumegoingtothe
machineshouldbestable.Usetubingsizedsufcientlytoprovideaminimumowrateofonegallonperminute.
2. Plugthepowercordintoanelectricaloutletratedat20A.
3. Switchonthetoggleswitch,behindtheunit,thatrunspowertothecomponentsinthemachine.ThedisplaywindowandStop/Wash
lightonthefrontdoorwillactivateandtheheatingtankwillstarttoll.
4. Waterintheheatingtankwillrequireabout½hourtoreachoperatingtemperature(factorysettingof190°F).AtthistimetheReady
LEDwilllight.
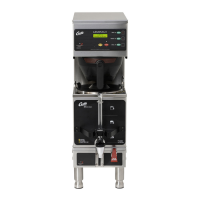
5. Removeandllthecanisterswithpowderedcappuccinomixes.
1
Service Manual – CAFEPC
For the Latest speciFications and inFormation go to www.wiLburcurtis.com
Thisapplianceisdesignedforcommercialuse.Anyservicingotherthancleaningandmaintenanceshouldbeperformedbyanautho-
rizedWilburCurtisservicecenter.
•DoNOTimmersetheunitinwateroranyotherliquid
•Toreducetheriskofreorelectricshock,doNOTopentoppanel.Nouserserviceablepartsinside.Repairshouldbedone
onlybyauthorizedservicepersonnel.
•Keephandsandotheritemsawayfromhotpartsofunitduringoperation.
•Nevercleanwithscouringpowdersorharshimplements.
Your Curtis ADS System is Factory Pre-Set and Ready to Go… Right from the Carton.
FollowingaretheFactorySettingsforyourPrimoCappuccinoBeverageSystem:
• Tank Temperature = 190°F
• Flavor Controls= Set at 50%
• Dispensing Mode Set for Manual Dispensing
Generallytherewillneverbeareasontochangeyourprogramming.However,shouldyouneedtomakeslightadjustmentstomeetyour
dispensingneeds,programminginstructionsareprovidedlaterinthismanual.
SystemRequirements:
• Water Source20–90PSI(MinimumFlowRateof1GPM)
• Electrical:Seeattachedschematicforstandardmodelorvisitwww.wilburcurtis.comforyourmodel.
Equipmenttobeinstalledtocomplywithapplicablefederal,state,orlocalplumbing/electricalcodeshavingjurisdiction.
SETUP STEPS
Theunitshouldbelevel(lefttorightandfronttoback),locatedonasolidcountertop.Connectawaterlinefromthewaterltertothe
brewer.NOTE:Sometypeofwaterltrationdevicemustbeusedtomaintainatrouble-freeoperation.(Inareaswithextremelyhard
water,wesuggestthatasedimentaryandtaste&odorlterbeinstalled.)Thiswillprolongthelifeofyourdispensingsystemandenhance
cappuccinoproductquality.
The National Sanitation Foundation requires the following water connection:
1. A quick disconnect or additional coiled tubing (at least 2x the depth of the unit) so that the machine can be moved for
cleaning underneath.
2. Insomeareasanapprovedbackowpreventiondevicemayberequiredbetweenthebrewerandthewatersupply.
Wilbur Curtis Company, inC.
FILL CANISTERS DAILY
1. Openthefrontdoortoaccessthecoffeecanisters.
2. Thecanistersmustberemovedfromtheunitforlling.Turntheproductdelivery
elbowsupward.
3. Repositionthecanistersonthemachine,turningtheproductdeliveryelbowsdown-
wardandaligningthegearsocketwiththemotorshaft.
Important Safeguards/Conventions
CAUTION: DO NOT
connect this unit to hot
water. The inlet valve is
not rated for hot water.
CAUTION: Please use
this setup procedure
before attempting to use
this appliance. Failure to follow the
instructionscanresultininjuryorthe
voidingofthewarranty.
WILBUR CURTIS COMPANY
Montebello, CA 90640
ISO 9001 REGISTERED
WARNING HOT LIQUID,
Scaldingmayoccur.
Avoid splashing.
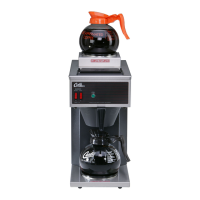
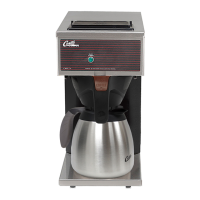
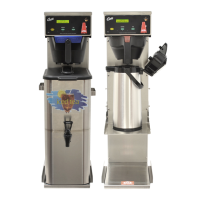
ModelsIncluded
uCAFEPC1
uCAFEPC1WITHLIGHTBOX
uCAFEPC2
uCAFEPC2WITHLIGHTBOX
uCAFEPC3
uCAFEPC3ICEDCAPPUC-
CINO
u CAFEPC3WITHLIGHTBOX
u CAFEPC4
u CAFEPC4WITHLIGHTBOX
Find out more
on
the web
www.wiLburcurtis.com
OPERATION INSTRUCTIONS
1. Chooseaavor.Placeyourcupunderthespoutbeneaththedesiredavor.
2. Pushandholdthedispensingbuttonforthisavor.
3. Releasethebuttonwhenthecupis¾ full.