EasyManua.ls Logo

Curtis GEMTIF - User Manual

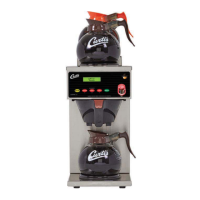
Curtis GEMTIF
18 pages
To Next Page IconTo Next Page
Loading...
1
Important Safeguards/Conventions
This appliance is designed for commercial use. Any servicing other than cleaning and preventive maintenance
should be performed by an authorized Wilbur Curtis service technician.
•DONOTimmersetheunitinwateroranyotherliquid
•Toreducetheriskofreorelectricshock,DONOTopenservicepanels.Nouserserviceableparts
inside.
•Keephandsandotheritemsawayfromhotsurfacesofunitduringoperation.
•Nevercleanwithscouringpowders,bleachorharshchemicals.
Symbols
WARNINGS – To help avoid personal injury
Important Notes/Cautions – from the factory
Sanitation Requirements
YourIntelliFreshbrewerisFactoryPre-SetandReadytoGo…RightfromtheBox.
FollowingaretheFactorySettingsforIntelliFreshbrewer:
•BrewTemperature=200°F •WaterBypass=OnLARGE&MEDIUMbrewonly
•BrewVolume=Large-Medium-Small •EnergySaveMode=Off
•QualityTimer=120Minutes
SystemRequirements:
•WaterSource20–90PSI(MinimumFlowRateof1GPM)
•Electrical:Seeattachedschematicforstandardmodelorvisitwww.wilburcurtis.comforyourmodel.
SETUPSTEPS
Theunitshouldbelevel(lefttorightandfronttoback)andlocatedonasecurecountertop.Connectawater
linefromthewaterltertothebrewer.
NOTE:Awaterltrationsystemmustbeusedtomaintainatrouble-freeoperation.(Inareaswithextremely
hardwater,wesuggestthatasedimentaryandtaste&odorlterbeinstalled.)Thiswillprolongthelifeofyour
brewingsystemandenhancecoffeequality.
1.A3/8”Flarex3/8”Malepipeelbowissuppliedwiththebrewerforwaterlineconnection.Usetubingsized
sufcientlytoprovideaminimumof1.0GPM.
2.Connecttheunittoanappropriateelectricalpowercircuit.
3.Turnonthetoggle(STANDBY/ON)switchbehindtheunit.Theheatingtankwillstarttoll.Whenthewater
levelinthetankrisestothecorrectvolume,theheatingelementswillenergizeautomatically.Withthe
IntelliFreshbrewer,thereisnodangerofelementburnoutcausedbyoverheatinganemptytank.
4.Theheatingtankwillrequire20to30minutestoreachoperatingtemperature(200°F),indicatedwhen
READYTOBREWisdisplayedontheLCDscreen.
5.Priortobrewing,dispense12ouncesofhotwaterthroughthehotwaterfaucet.
6. Brewacycleofatleast12ounces,topurgethewaterlinesofanyairthatmaybetrappedafterlling.
NSF International requires the following water connection:
1. A quick disconnect or additional coiled tubing (at least 2x the depth of the unit) so that the ma-
chine can be moved for cleaning underneath.
2. Insomeareasanapprovedbackowpreventiondevicemayberequiredbetweenthebrewerand
the water supply.
Wilbur Curtis Company, inC.
Models
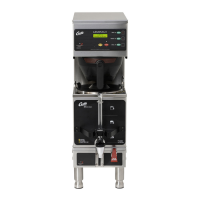
GEMTIF
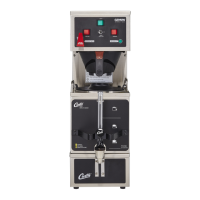
GEMSIF
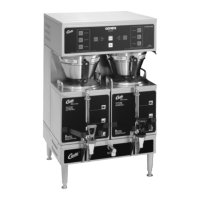
GEM3IF
ServiceManual–GeminiIntelliFreshBrewer
CAUTION: DO NOT
connect this brewer to hot
water. The inlet valve is
not rated for hot water.
CAUTION: Please use
this setup procedure
before attempting to use
this brewer. Failure to follow the
instructions can result in injury or the
voiding of the warranty.
IMPORTANT: Equipment
to be installed to comply
with applicable federal,
state, or local plumbing/electrical
codes having jurisdiction.
FOR THE LATEST SPECIFICATIONS AND INFORMATION GO TO WWW.WILBURCURTIS.COM
ISO9001:2008
Wilbur Curtis Company
Montebello,CA90640
Tel:(323)837-2300
www.wilburcurtis.com
Question and Answer IconNeed help?

Do you have a question about the Curtis GEMTIF and is the answer not in the manual?

Curtis GEMTIF Specifications

General IconGeneral
BrandCurtis
ModelGEMTIF
CategoryCoffee Maker
LanguageEnglish

Summary

Important Safeguards and Conventions

Symbols and Notes

Brewing Requirements and Settings

Initial Setup Procedure

IntelliFresh Brewing Instructions

Temperature Settings

How to select and adjust the holding temperature for brewed coffee.

Timer Functionality

Understanding the timer's role in indicating freshness and controlling the warmer.

Warmer Operation

Error Message Guide

Error Codes and Causes

Troubleshooting common error messages and their probable causes.

Cleaning and Maintenance

Quick Start Guide

Program Menus

Global Recipes and Non-Brew Settings

Accessing pre-set coffee recipes and configuring non-brewing related options.

Brew Button and Model Configuration

Customizing brew button functions and selecting the correct brewer model.

Global Recipes

Non-Brew Programming Options

Temperature and Energy Save Settings

Adjusting brew temperature and configuring energy saving features.

Brew Counts and Quality Timer

Monitoring brew cycles and setting the quality timer for freshness.

System Settings and Maintenance

Brew Button Programming

Brew Volume and Time Customization

Setting specific volumes and times for different brew sizes.

Pre-Infusion and Pulse Brew Features

Configuring advanced brewing techniques for flavor enhancement.

By-Pass and Model Selection

Adjusting by-pass flow and selecting the correct brewer model.

Cleaning the GEM3 IF Satellite

GEMTIF Electrical Schematic

Schematic Legend and Symbols

Key to symbols and legends used in the GEMTIF electrical diagram.

SSR Pin Assignments

Detailed pinout for the Solid State Relay (SSR) used in the GEMTIF.

Electrical Rating Table

Table outlining the electrical ratings for GEMTIF components.

GEMSIF Electrical Schematic

Schematic Legend and Symbols

Key to symbols and legends used in the GEMSIF electrical diagram.

SSR Pin Assignments

Detailed pinout for the Solid State Relay (SSR) used in the GEMSIF.

Electrical Rating Table

Table outlining the electrical ratings for GEMSIF components.

GEM3 IF Electrical Schematic

Hybrid Pin Assignments

Pin configuration for the hybrid temperature controller on the GEM3IF.

Electrical Rating Table

Table outlining the electrical ratings for the GEM3IF unit.

Rough-In Drawings and Dimensions

GEMTIF Installation Dimensions

Physical dimensions and space requirements for installing the GEMTIF brewer.

GEMSIF Installation Dimensions

Physical dimensions and space requirements for installing the GEMSIF brewer.

GEM3 IF Installation Dimensions

Physical dimensions and space requirements for installing the GEM3IF brewer.

Product Warranty Information

Warranty Coverage and Periods

Details on parts, labor, and grinder burr warranties and their durations.

Warranty Conditions and Exceptions

Factors that void the warranty, including improper operation and maintenance.

Return Merchandise Authorization (RMA)

Process for obtaining RMA and returning equipment for warranty service.

Related product manuals