ENGLISH
29
ENGLISH
28
Default “Exposure Setting” is 100% for all 3 color channels.
Increase the exposure of the scanning light source if images are too
dark. Decrease exposure if images are too bright.
Menu Commands - Window (overview)
Settings for the CyberView window and Exposure adjustment for the scanner.
Menu Commands - Scan
a. Prescan
Prescan the existing lm.
b. Scan
1. Scan Selected to File… > Scan the selected lm to a speci ed path.
c. Revert
Discards all modi cations and restores the image back to the original
state.
Preference - See Scan Setting (See Page 13)
Exit
Closes the CyberView X5 user interface.
There is a message pop-up “Quit the application prompts to save docu-
ments?“ click “Yes“ to save , “No“ to discard the current
settings or “Cancel“ to return to Cyber View X.
1. Un/Lock scanning area.
2. Zoom In: Magnify image.
3. Zoom Out: Reduce image.
4. Rotate 90 Left: Turn the image 90° counter clockwise.
5. Rotate 90 Right: Turn the image 90° clockwise.
6. Flip Horizontal: Flip the image horizontally.
7. Flip Vertical: Flip the image vertically.
8. Revert: Discard all modi cations and restore the image.
Toolbar Diagram
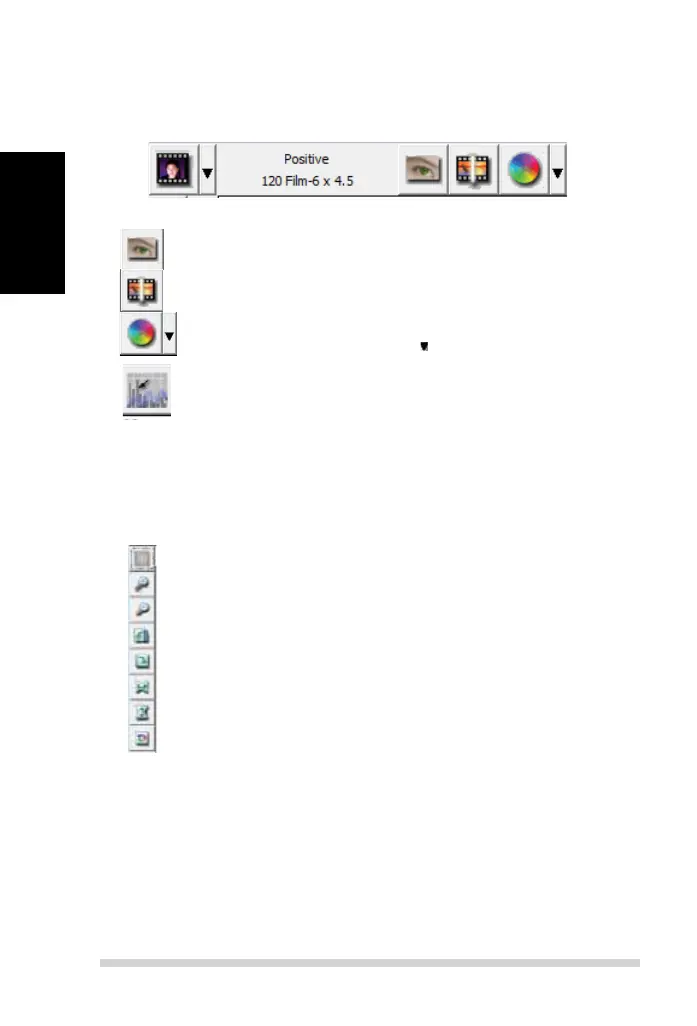
II. Function Bar Diagram
In order to optimize scanned image quality, please select your lm type and
brand from the toolbar:
Prescan:
Pre-scan the current lm.
Scan: Scan lm.
Image Adjustment: Press drop down button for more options.
Auto Calibrate: Calibrates the Scanner
28
Default “Exposure Setting” is 100% for all 3 color channels.
Increase the exposure of the scanning light source if images are too
dark. Decrease exposure if images are too bright.
Menu Commands - Window (overview)
Settings for the CyberView window and Exposure adjustment for the scanner.
Menu Commands - Scan
a. Prescan
Prescan the existing lm.
b. Scan
1. Scan Selected to File… > Scan the selected lm to a speci ed path.
c. Revert
Discards all modi cations and restores the image back to the original
state.
Preference - See Scan Setting (See Page 13)
Exit
Closes the CyberView X5 user interface.
There is a message pop-up “Quit the application prompts to save docu-
ments?“ click “Yes“ to save , “No“ to discard the current
settings or “Cancel“ to return to Cyber View X.
1. Un/Lock scanning area.
2. Zoom In: Magnify image.
3. Zoom Out: Reduce image.
4. Rotate 90 Left: Turn the image 90° counter clockwise.
5. Rotate 90 Right: Turn the image 90° clockwise.
6. Flip Horizontal: Flip the image horizontally.
7. Flip Vertical: Flip the image vertically.
8. Revert: Discard all modi cations and restore the image.
Toolbar Diagram
II. Function Bar Diagram
In order to optimize scanned image quality, please select your lm type and
brand from the toolbar:
Prescan:
Pre-scan the current lm.
Scan: Scan lm.
Image Adjustment: Press drop down button for more options.
Auto Calibrate: Calibrates the Scanner