16
Installation
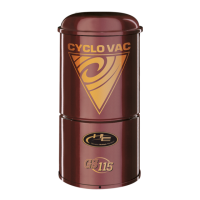
fi gure 12
fi gure 13
fi gure 14
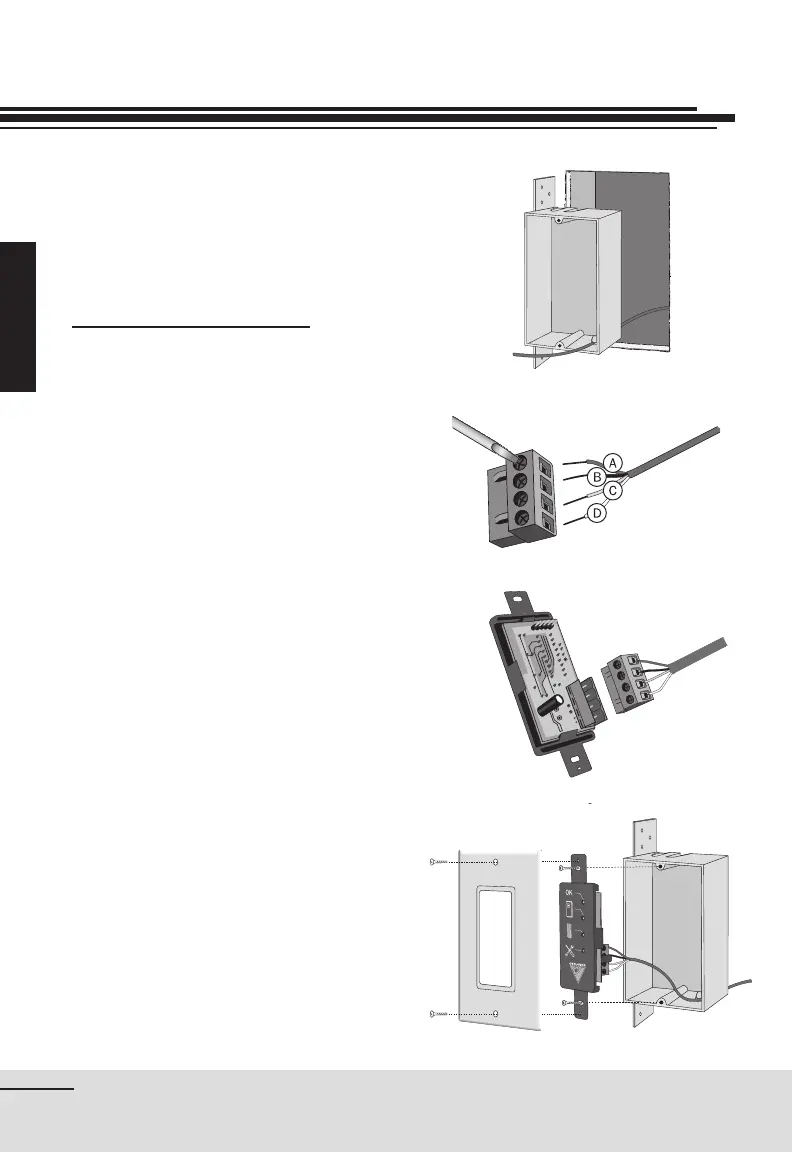
fi gure 11
A. Red
B. Black
C. Green
D. Yellow
Installing the Remote Monitor
Having determined the location of
both the central vacuum unit and
the Remote System Monitor, run low
voltage wiring to connect the Monitor
to the central vacuum power unit.
Installing the Remote Monitor
1. Insert the low voltage wire into the
mounting box through one of the
designated openings, and fasten
within the wall at the determined
location (fi gure 11).
2. Having stripped the exterior casing
of the four-stranded wire, strip 0,5
cm (¼") of each color wire.
3. Connect wires to the module
connector. Insert each of the 4
color wires in the corresponding
color-coded inlet on the connector.
To do so, loosen the screw on the
side of each inlet, insert the wire,
and tighten screw to ensure a tight
connection. Repeat for each of the
remaining 3 wires (fi gure 12).
4. Insert the connector to the
electronic module and ensure it
holds in place (fi gure 13).
5. Screw the electronic module to the
mounting box, with the two screws
provided (fi gure 14).
6. Complete with the “Decora”
nishing plate.
(Optional — DL300 only)