CY8CKIT-059 PSoC® 5LP Prototyping Kit Guide, Doc. #: 001-96498 Rev. *G 17
Kit Operation
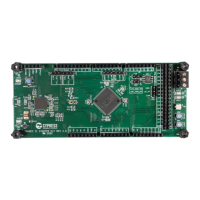
■ Push Button (SW): This kit has a push button, which can be used to provide input to the
PSoC 5LP.
Note: The switch connects the PSoC 5LP pin to ground when pressed. Therefore, you need to
configure the PSoC 5LP pin as resistive pull-up to detect the switch press.
■ Reset Button: This button is used for the following purposes:
❐ Reset the PSoC 5LP device: When pressed, it connects the XRES line of the PSoC 5LP to
ground and resets the PSoC 5LP device.
❐ Bootload the KitProg: When pressed while connecting the kit’s PCB USB connector to the
USB port of the PC, this button puts the KitProg into the bootloader mode. For more details on
the KitProg functionality, refer to the KitProg User Guide.
Note: When the two boards are separated, you can mount the SW2 button on the target board to
reset the PSoC 5LP device using a switch.
3.2 KitProg
The KitProg is a multi-functional system, which includes a programmer, debugger, USB-I2C bridge,
and a USB-UART bridge. The Cypress PSoC 5LP device is used to implement KitProg functionality.
The KitProg is integrated in most PSoC development kits. For more details on the KitProg
functionality, refer to the KitProg User Guide in the kit installation directory:
<Install_Directory>\CY8CKIT-059\<version>\Documentation\
KitProg_User_Guide.pdf.
3.3 Programming and Debugging the PSoC 5LP Target Device
The target PSoC 5LP device can be programmed and debugged using the KitProg. Before
programming the device, ensure that PSoC Creator and PSoC Programmer software are installed
on the PC. See Install Software on page 13 for more information.
3.3.1 Programming using PSoC Creator
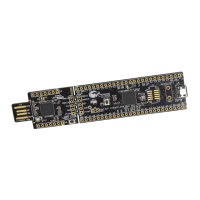
1. Connect the kit to the computer through the PCB USB connector, J10, as shown in Figure 3-2.
The kit will enumerate as a composite device, if you are plugging in the PSoC 5LP Prototyping Kit
to your PC for the first time.
Figure 3-2. Connecting the PSoC 5LP Prototyping Kit to a Computer