CY8CKIT-059 PSoC® 5LP Prototyping Kit Guide, Doc. #: 001-96498 Rev. *G 19
Kit Operation
3.3.2 Debugging using PSoC Creator
To debug the project using PSoC Creator, follow steps 1 to 3 from Programming using PSoC Creator
on page 17 followed by:
1. Click the Debug icon or press [F5]. Alternatively, you can use the option Debug > Debug.
2. When the PSoC Creator opens in Debug mode, use the buttons on the toolbar to debug your
application.
For more details on using the debug features, refer to section 3.2 of the KitProg User Guide.
3.3.3 Programming using PSoC Programmer
PSoC Programmer (3.27.1 or later) can be used to program existing .hex files into the PSoC 5LP
Prototyping Kit. Refer to section 3.3 of the KitProg User Guide for a detailed explanation on how to
program using PSoC Programmer.
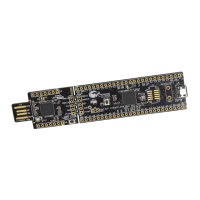
3.4 USB-UART Bridge
The KitProg on the PSoC 5LP Pioneer Kit can act as a USB-UART bridge. The UART lines between
the KitProg and the target are hardwired on the board, through the snappable area, with UART_RX
assigned to P12_6 and UART_TX assigned to P12_7 on PSoC 5LP (target). For more details on the
KitProg USB-UART functionality, refer to the KitProg User Guide.
3.5 USB-I2C Bridge
The KitProg can function as a USB-I2C bridge and communicate with the Bridge Control Panel
(BCP) software utility. The I2C lines on the PSoC 5LP (target) device are P12_1 (SDA) and P12_0
(SCL), which are hardwired on the board to the I2C lines of the KitProg. The USB-I2C supports I2C
speeds of 50 kHz, 100 kHz, 400 kHz, and 1 MHz. For more details on the KitProg USB-I2C
functionality, refer to the KitProg User Guide.
3.6 Updating KitProg Firmware
The KitProg firmware normally does not require any update. You can use the PSoC Programmer
software to update the firmware. Refer to the KitProg Use Guide for a detailed explanation on how to
update the KitProg firmware.