3
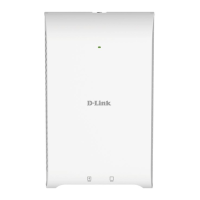
# Connector Description
1 Reset Button
Press and hold for 10
seconds to factory
reset the device.
2 PoE LAN Port
Gigabit RJ-45
port for data.
3
Power
Receptor
To connect the
supplied power
adaptor.
Table 2: Interface Description
Powering the Access Point
Using Power over Ethernet (PoE)
Use a standard Ethernet cable to connect the
LAN port on the DAP-2662 to a PoE power source
device such as a PoE switch or PoE injector.
(Optional) Using the power adapter
1. Connect the power connector of the
adapter to the power input on the
DAP-2662 and plug the adapter into a
nearby power outlet.
Conguring the Access Point
Note: D-Link recommends conguring the
device before mounting it.
Using D-Link Nuclias Connect
The DAP-2662 is designed to be managed
through D-Link Nuclias Connect. Refer to the
D-Link Nuclias Connect Manual for detailed
conguration instructions.
Figure 4: Connecting through D-Link Nuclias
1. Download the free Nuclias Connect
app from the App Store or Google Play
by searching for Nuclias Connect or by
scanning the QR code below.
2. Open the Nuclias Connect app and follow
the onscreen instructions to discover and
set up your device.
Manual Conguration
If you are not using Nuclias Connect, you may
manually congure the DAP-2662 using its web
user interface (UI). Refer to the DAP-2662 User
Manual for detailed conguration instructions.
Use the following methods to access the web
user interface:
Note: The management computer must be in
the same subnet as the DAP-2662.
1. Use an Ethernet cable to connect the
management computer to the PoE switch
or to the PoE Injector the DAP-2662 is
connected to.
2. Open a web browser on the management
computer and type in dap.2662.local in
the address eld and press Enter.
3. When prompted, enter the default login
credentials:
User name: admin
Password: admin
PoE Switch or Router
 Loading...