Do you have a question about the D-Link DP-300 and is the answer not in the manual?
Details D-Link's hardware warranty terms, including repair or replacement.
Outlines D-Link's warranty for software products and magnetic media.
Covers warranty limitations, liability clauses, trademarks, and copyright statements.
Instructions for checking package contents and inspecting the print server.
Step-by-step guide for connecting and setting up the DP-300 on a network.
Covers network standards, data transfer rates, and connector types for networking.
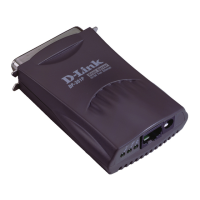
The D-Link DP-300 Multiprotocol Ethernet/Fast Ethernet Print Server is a compact and efficient device designed to integrate printers into a network environment, managing print jobs from various workstations and file servers. It offers a robust solution for network printing, offloading the print management workload from file servers and enabling high-performance printers to operate at their full capacity. Its portability and cost-effectiveness make it a flexible alternative to PC-based print servers, allowing printers to be strategically placed for user convenience.
The print server supports a wide array of network operating systems and protocols, including IPX/SPX (for Novell NetWare 3.x, 4.x with bindery emulation or native NDS), TCP/IP (for UNIX lpr/lpd systems like HP-UX, SunOS, Solaris, SCO, UnixWare, IBM AIX, and Windows NT), NetBEUI (for Windows NT, Windows 95, Windows for Workgroups, Microsoft LAN Manager, and IBM LAN Server), and AppleTalk (for MacOS EtherTalk). This broad compatibility ensures seamless integration into diverse network infrastructures.
For setup and administration, the DP-300 comes with Windows-based software called PS Admin, which simplifies configuration and management tasks. Additionally, for networks without Windows-compatible machines, the print server can be configured and managed via the telnet protocol, offering versatility in its deployment.
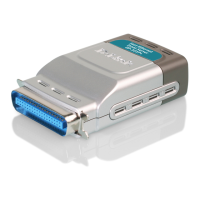
The device features three printer ports located on its rear panel: two identical parallel ports labeled LPT1 and LPT2, and a single serial port labeled COM. These ports are independently configurable using either the PS Admin program or the print server's telnet interface. The parallel ports are IEEE 1284 compliant, supporting high-speed bidirectional communication, which is particularly beneficial for high-speed laser printers that can leverage the Hewlett-Packard PJL (Printer Job Language) for faster data transfer than a standard PC parallel port.
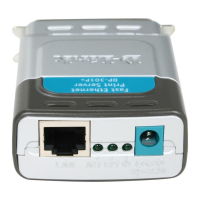
On its right side panel, the DP-300 includes an RJ-45 connector for network connection. This connector is compatible with both 10Base-T Ethernet and 100Base-TX Fast Ethernet cabling, ideally using Category 5 twisted-pair cable. The port incorporates the NWay protocol, allowing the print server to automatically detect and negotiate the optimal transmission speed of the network, ensuring efficient data flow. The DC power input connector, labeled DC 12V, is also located on this side panel.
The front panel of the DP-300 is equipped with five LED indicators that provide visual feedback on the device's status. The "Power/Tx" LED indicates whether the print server is powered on (steady or flashing green) and blinks off briefly during network transmission. The "Link/Rx" LED confirms a good network connection (steady or flashing green) and blinks off briefly when receiving data from the network. The "LPT1," "LPT2," and "COM" LEDs light up to show that print data is being transferred through their respective parallel or serial ports. These three port indicators also play a crucial role in signaling hardware failures during the power-on self-test (POST).
Installation of the DP-300 involves a straightforward procedure to ensure proper operation and avoid configuration issues. Before powering up the device, it is recommended to confirm the proper operation of each printer intended for connection, ideally by printing test files directly from a PC using the same port type (serial or parallel) that will be used with the print server. Once printer functionality is verified, the printers should be switched off. It is also important to ensure that the network is operating normally.
The DP-300 is then connected to the network via its RJ-45 connector. With the printers still powered off, their respective ports are connected to the corresponding printer ports on the DP-300. For high-performance printers, parallel-port connections are preferred. After connecting the printers, they should be switched on. Finally, the DC power adapter is plugged into the DP-300's DC 12V socket and then into an electric service outlet. The print server does not have an external power switch; it powers on automatically when connected to an outlet. Upon power-up, the "Power/Tx" LED should light steady green, and the device will initiate its self-test.
The power-on self-test (POST) is an important diagnostic feature. When the DP-300 is powered on, it automatically performs a self-test of its major components. The results of this test are indicated by the state of the LPT1, LPT2, and COM LED indicators. Initially, all five LEDs (Power/Tx, Link/Rx, LPT1, LPT2, COM) should show steady green for a few seconds, followed by the LPT1, LPT2, and COM LEDs flashing simultaneously three times. Any irregularity in these initial LED tests may suggest a problem with the LEDs themselves, requiring contact with the dealer.
Following the initial LED tests, the actual component tests commence. A normal, fault-free result is indicated by three cycles of sequential flashing of the three port LEDs, after which all three LEDs will remain dark. If the self-test detects any component error, it will halt after the LED tests, and the LEDs will continuously signal the specific error according to a predefined pattern. In such cases, contacting the dealer for unit correction is advised.
For further operational testing, the PS Admin software includes a Print Test function. This function allows users to confirm printer cable connections and overall printer functionality after the PS Admin software has been installed and the DP-300 and its ports have been configured.
The DP-300 is also designed for flexible placement, featuring wall-mount sockets on its bottom case. Screws and nylon anchors are provided to facilitate mounting the device to a wall or partition adjacent to the printers. To mount the DP-300 with the front panel facing up (and printer port connectors facing down), two mounting screws should be set at specific lower-left and upper-right corners of a rectangle, leaving about 3 mm (1/8 inch) between the screw head and the wall surface. The DP-300's mounting sockets then fit over these screws, and the case is gently pressed towards the wall and slid at a 45-degree angle downward and leftward to engage the screwheads securely in the slots. This mounting option helps optimize space and cable management in the printer area.
| Device Type | Print Server |
|---|---|
| Model | DP-300 |
| Print Server Type | External |
| Power Supply | External power adapter |
| Protocols | TCP/IP, AppleTalk |
| Supported Operating Systems | Windows, Mac OS, Unix, Linux |
| Management | Web-based management, SNMP |
| Ports | Parallel (IEEE 1284) |