Maintenance Section
-161-
3. Remove the floor mat and floor plate.
4. Make sure the parking brake lever is released.
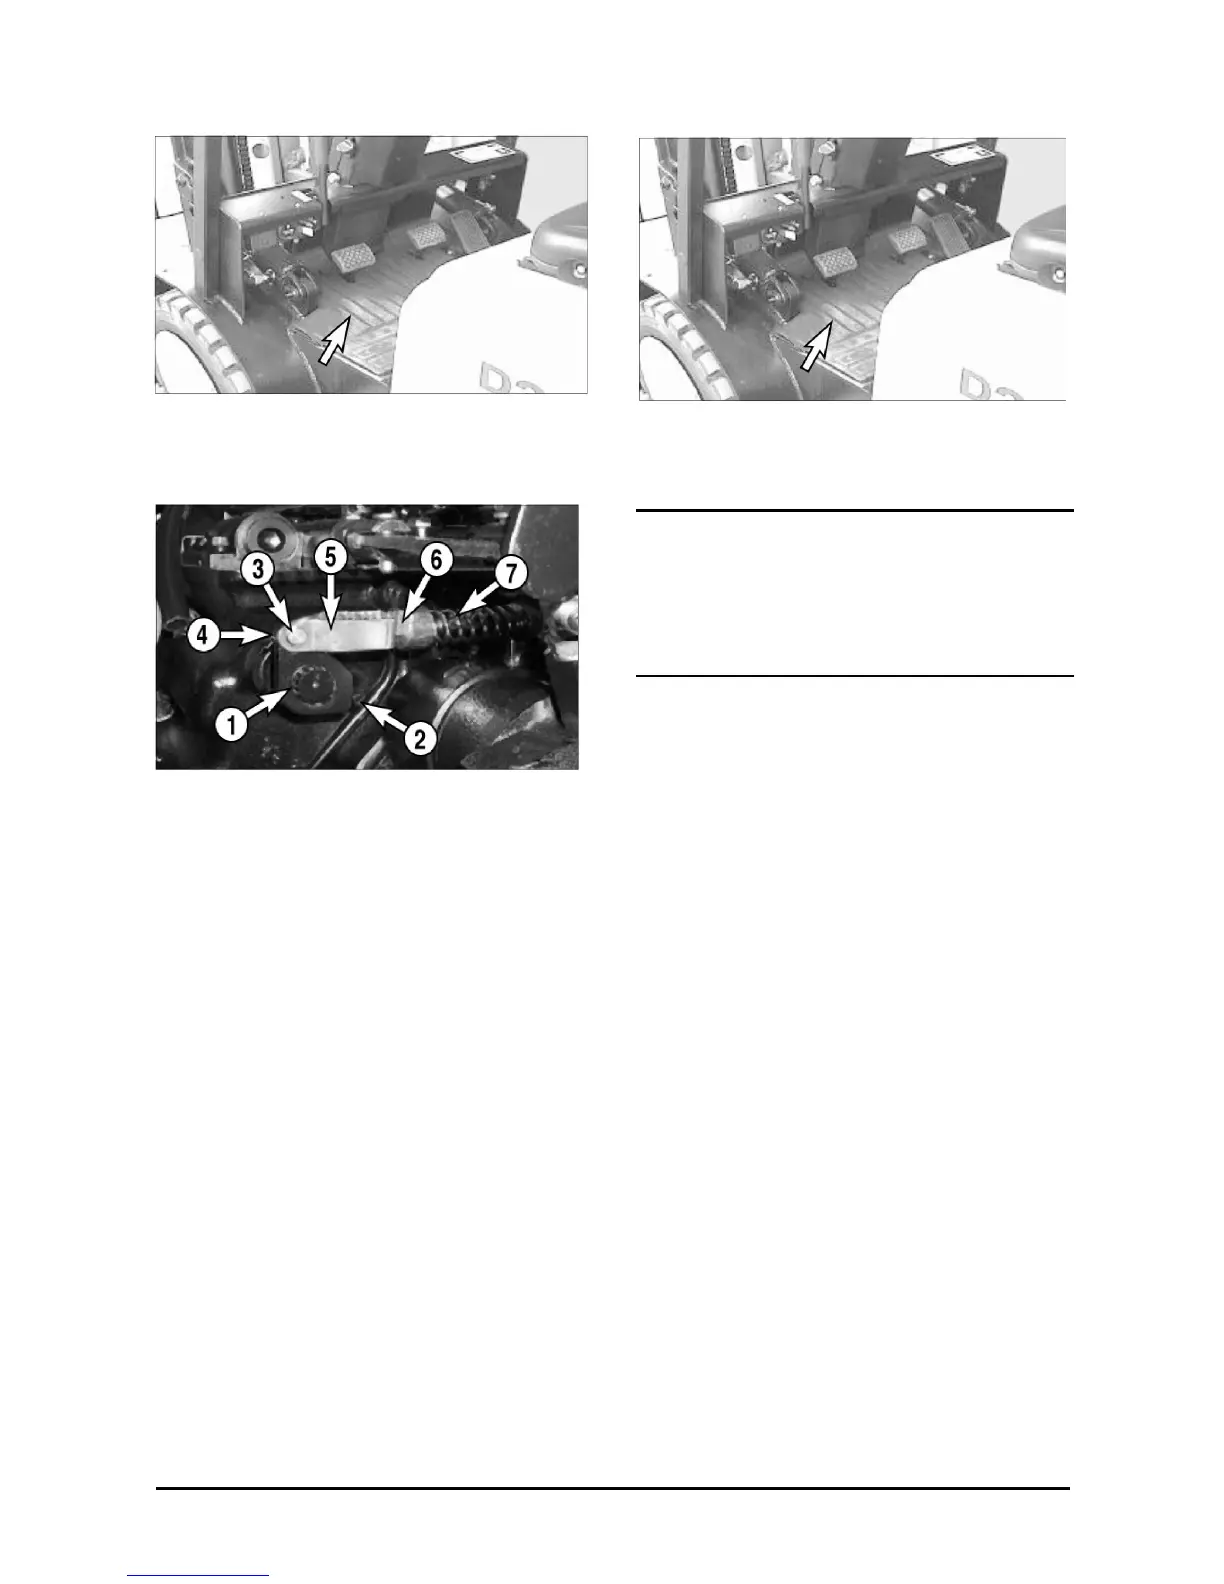
5. Make sure the brake lever (1) is held against
stop pin (2). If the brake lever (1) is held against
the stop pin (2), go to step 7. If the brake lever
(1) is NOT held against the stop pin (2), go to
step 6.
6. Remove the pin (3) and the cotter pin (4).
Tighten the nut (6) to compress the spring (7)
further and pull downward and turn the clevis
(5) until the pin (3) fits into the brake lever when
the lever (1) is held against the stop pin (2).
Then install the pin (3) and the cotter pin (4)
and return the nut (6) to the clevis (5).
7. Loosen lock nut (5). Tighten screw (6) to 6 to 7
N•m (50 to 60 lb•in). Loosen the screw (6) 1 1/6
turns and tighten the lock nut (5).
NOTICE
Turn the adjustment screw (6) clockwise to
tighten. Turning the screw (6) too far
counterclockwise could allow parts to fall into
the bottom of the transmission.
The transmission would than require
disassembly to remove the parts.
8. Reinstall the floor plate and floor mat.
9. Engage the parking brake, remove the tire
chocks and test the parking brake. Refer to
‘Parking Brake Testing’ in the preceding
section.
 Loading...