Page 4
QUICK START GUIDE | TiOC Solution
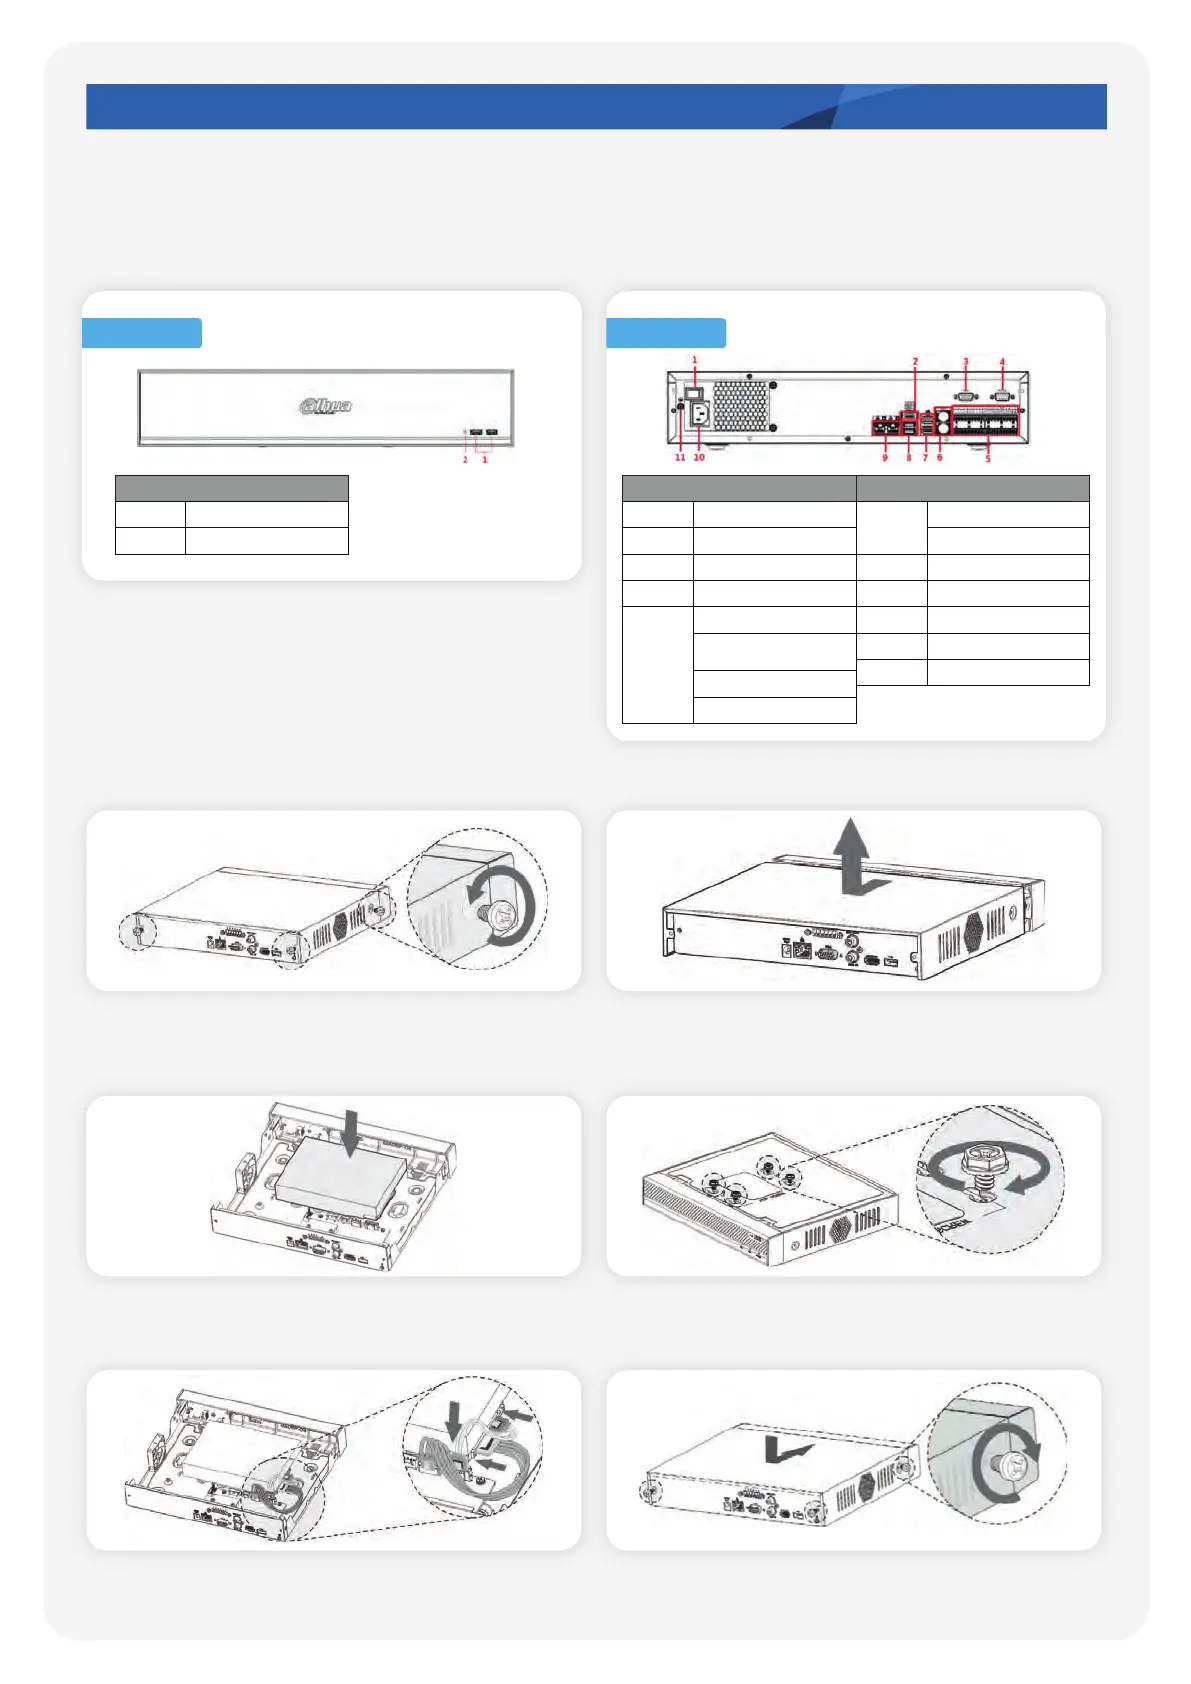
2.2 Installation of the recorder
2.2.1 Ports on the recorder
Port NameNo.
Power Button
eSATA Port
VGA Port
RS232 Port
Alarm Input Port (1-16)
Alarm Output Port
(NO1-NO5, C1-C5, NC5)
RS485 Port (A, B)
CTRL
1
2
3
4
5
Port NameNo.
MIC IN
MIC OUT
HDMI Port
USB Port
6
7
8
Network Port
9
Power Input Port
10
11
Front Panel Rear Panel
Port NameNo.
USB Ports
IR Indicator
1
2
2.2.2 How to install the recorder
Step 2: Remove the case cover in the direction shown
by the arrow above.
Step 1: Remove the fixing screws on the case cover
(including the two screws on the rear panel and the
two screws on the left and right panels).
Step 3: Match the four holes on the baseboard to
position the HDD.
Step 4: Turn the device upside down, match the
screws with the holes on the HDD and then fasten
them. The HDD is fixed to the baseboard.
Step 5: Connect the HDD data and power cable to
the device.
Step 6: Place the cover back and fasten the screws on the
rear panel and side panels to complete the installation.
 Loading...