English 8
2.
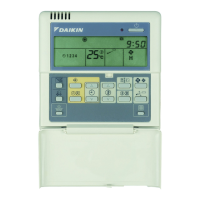
Select the Zone Number to be regis-
tered using the “ZONE NUMBER” button.
Keeping the button pressed down will move it
rapidly.
3.
“”
to the group you wish to reg-
ister using the arrow keys.
Keeping the button pressed down will move it
rapidly.
4.
Press the “SELECT” button to register
that group to the zone.
The “” display lights up on all the selected
units.
Pressing the “RESET” button removes
the group from that zone, and “” goes
off.
Repeat steps 3 and 4 until all the units you wish to
register to the zone have been added.
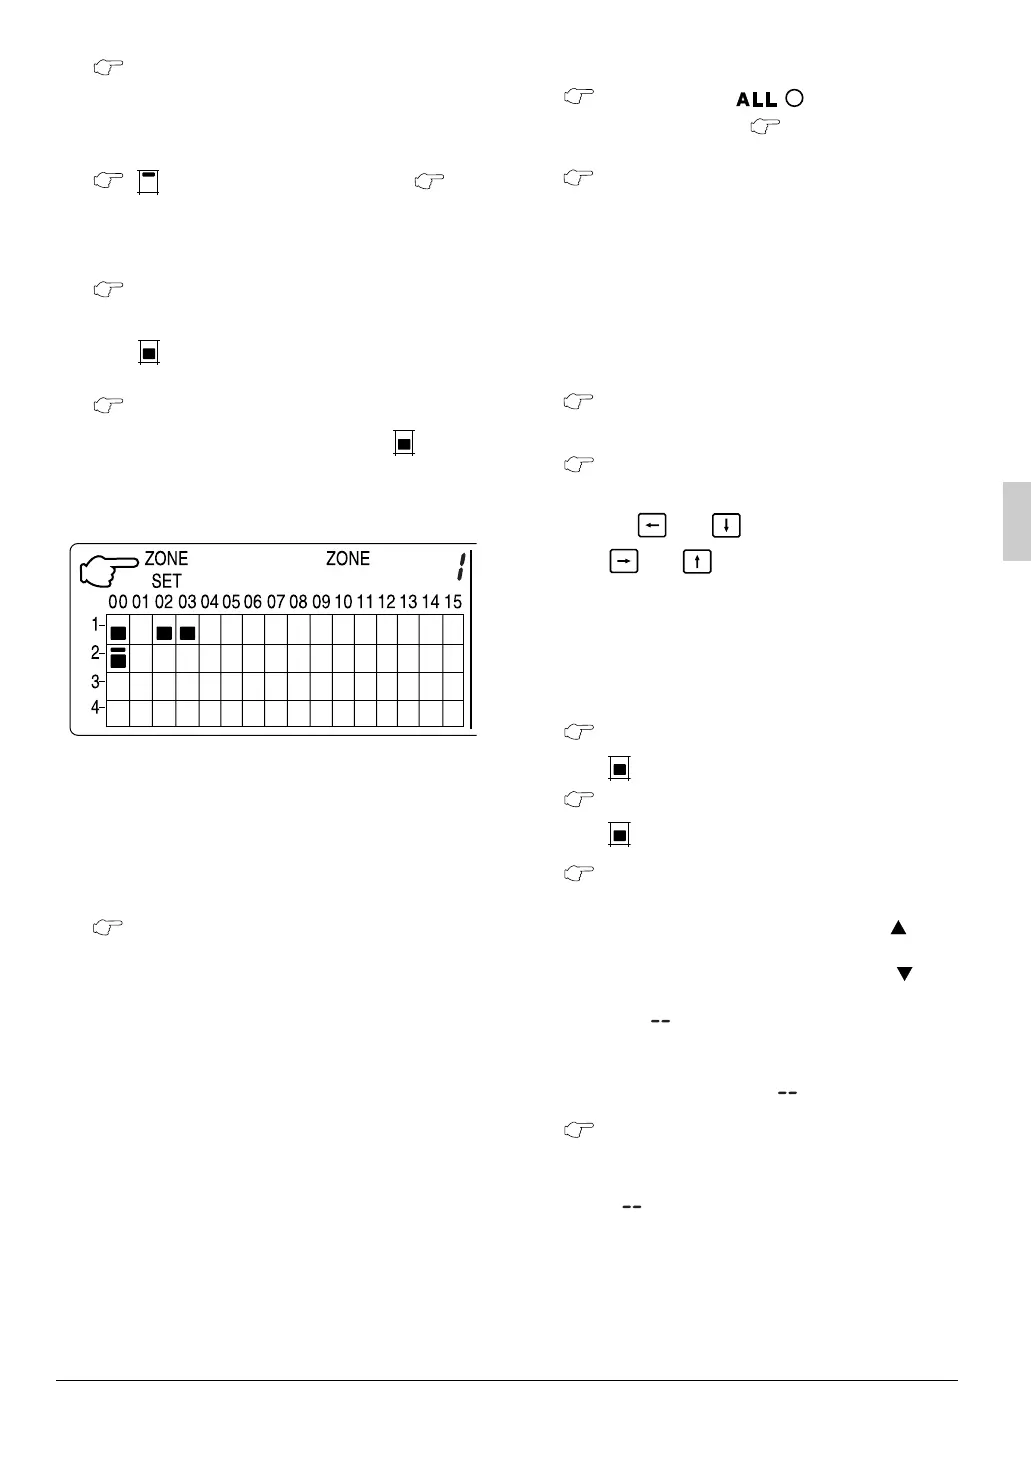
In this example, a screen is shown with
units 1-00, 1-02, 1-03, and 2-00 registered
to Zone Number 1.
5.
Repeat steps 2 to 4 to register to the next
zone.
6.
Once zone registration is complete,
press the “ALL/INDIVIDUAL” button to
turn off “ZONE SET” display and return to
the individual screen.
The display returns to the normal screen if nothing
is done for one minute when in zone registration
mode.
(NOTE)
• It is impossible to register one group to several
different zones.
If this is done, the last zone registered to will be
valid.
[Batch deletion of zone registration]
1.
Pressing the “” for at least
four seconds while pressing the “FIL-
TER SIGN RESET” button when
“ZONE SET” is displayed will delete all
zone registrations.
The zone registrations for all units will be lost.
䡲
䡲䡲
䡲 Zone operation and stop method
(Fig. 7)
This is for operating or stopping connected units in
zones.
[Zone operation]
1.
Press the “ALL/INDIVIDUAL button” to
enter the zone screen.
2.
Using the arrow keys, select the zone
number to operate or stop.
Pressing and reduces the zone number
while and raise the number.
Keeping the button pressed down will move it
rapidly.
• If the zone number is displayed as “---,” this
indicates that no units are registered in a
zone. Please perform zone registration
before using a zone. (See page 7)
3.
Press the “SELECT” button.
The “” display lights up in the group.
Press the “RESET” button.
The “” display goes off in the group.
4.
Press the “TEMPERATURE ADJUST-
MENT” button.
The temperature rises 1° every time the ( ) but-
ton is pressed.
The temperature drops 1° every time the ( ) but-
ton is pressed.
Set to “” when you do not wish to use zone
setting for the temperature setting.
Setting to 1° above or below the temperature
setting range displays “”.
5.
Call up the desired mode by pressing
the “OPERATION MODE SELECTOR” but-
ton.
Set to “” when you do not wish to use zone set-
ting for the operation mode.
3
5
4
6
7
2
1
9
8
2
1
3
4
5
6
7
3P124623-2A_EN.fm Page 8 Tuesday, December 16, 2003 4:32 PM