installation Considerations
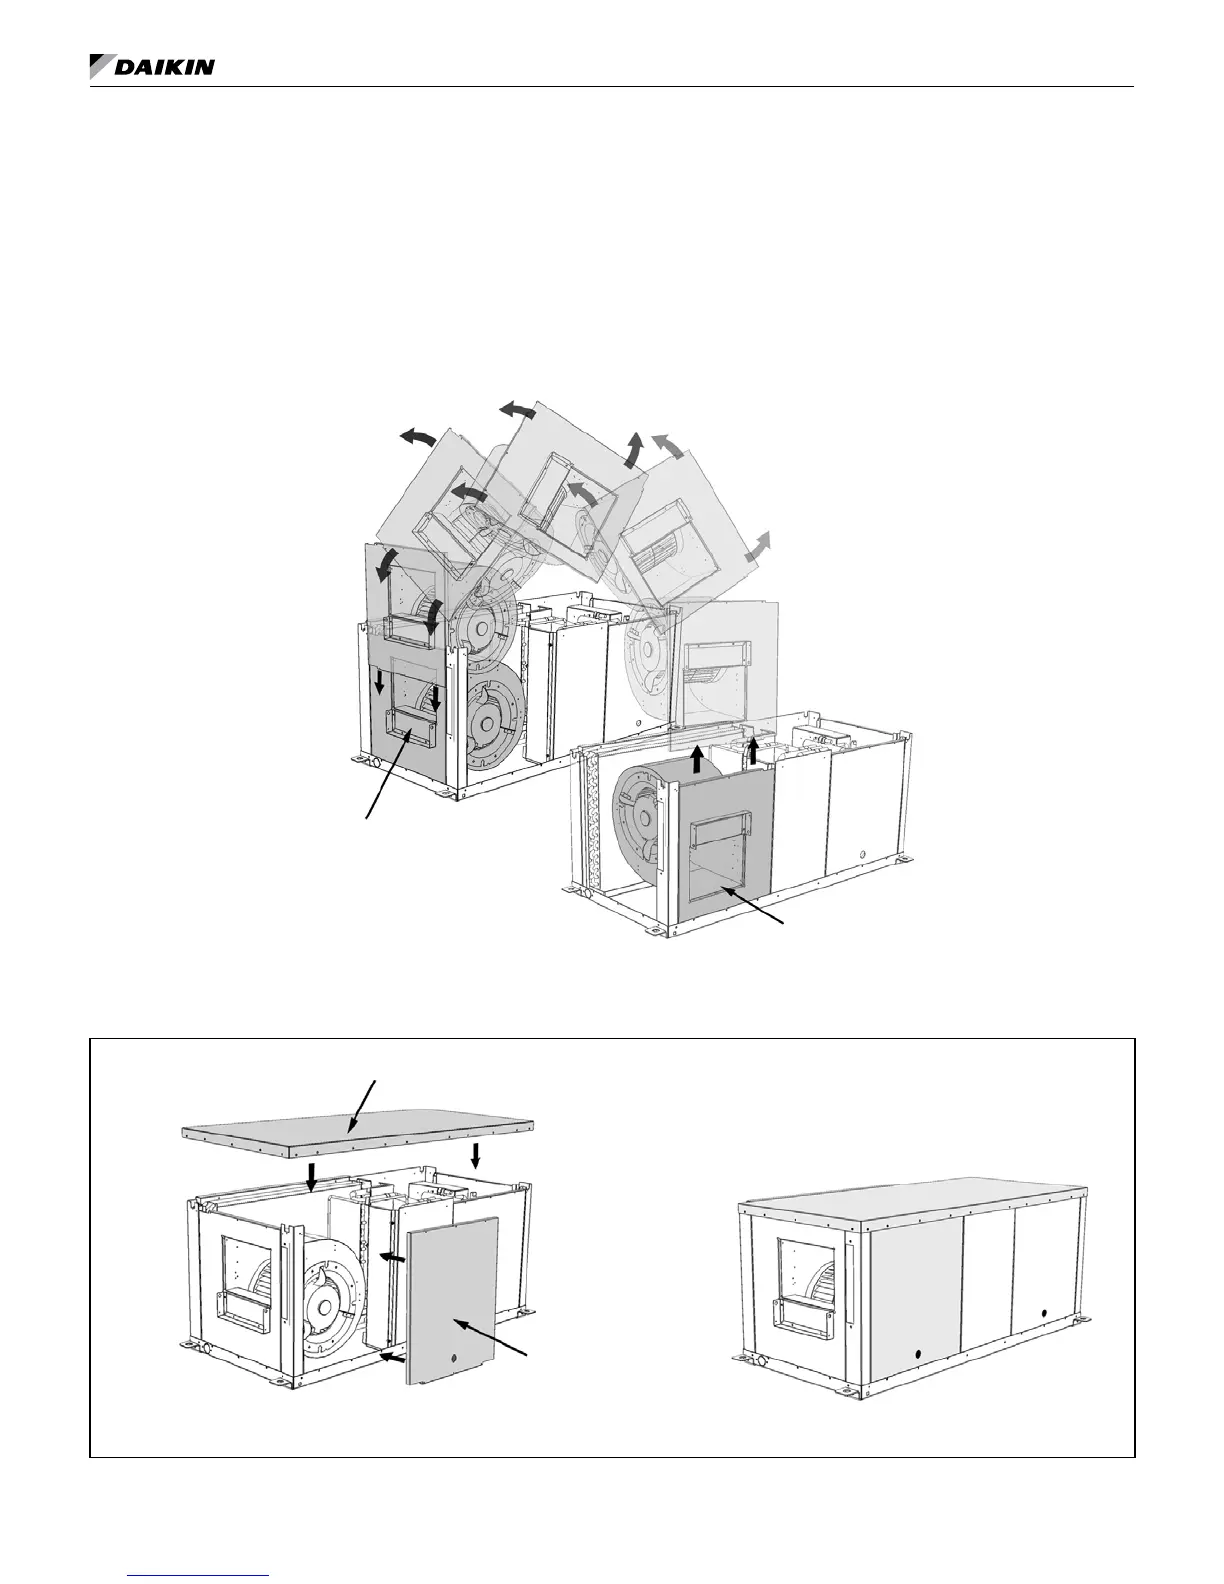
Figure 5: Lift out the fan assembly, turn 90 degrees and rotate 180 degrees
Remove screws securing the fan assembly
to the cabinet. Note bottom-horizontal
orientation of fan assembly
Position the fan assembly in the end
opening with the fan in the “top-horizontal”
orientation
Rotate the Fan Assembly 180 degrees
Straight Discharge Arrangement
(Bottom-Horizontal) Orientation
End Discharge Arrangement
(Top-Horizontal) Orientation
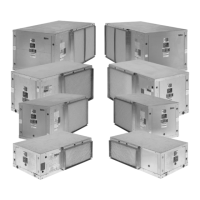
Figure 6: Reinstall the top and access panel
Reinstall Access
Panel to Fan Motor
Reinstall Top
Completed End Discharge Assembly
IM 1049-9 8 www.DaikinApplied.com
6. Lift the fan assembly out rotating it 180 degrees and
position it within the opening at the end of the unit
(Figure 5). With the fan motor in the end discharge
position the fan and housing orientation is top-
horizontal. A straight air discharge arrangement, the
housing is in the bottom-horizontal orientation.
7. Secure the fan assembly to the unit frame with the
screws removed previously.
8. Reinstall the access panel in the fan motor access
opening (Figure 6).
9. Reinstall the top panel and secure with screws
removed previously.
Note: If installed correctly the fan motor should be
accessible when the fan motor access panel is
removed.